3. Install the rear of the rail into the rear of the rack.
a. Line up the three pins on the rear of the slide rail with the three holes in the selected U on the
rear of the rack.
b. Push the rails so that the pins go into the holes, as shown by 1 in Figure 53.
c. Drop the slide rail down 2 until it latches into place.
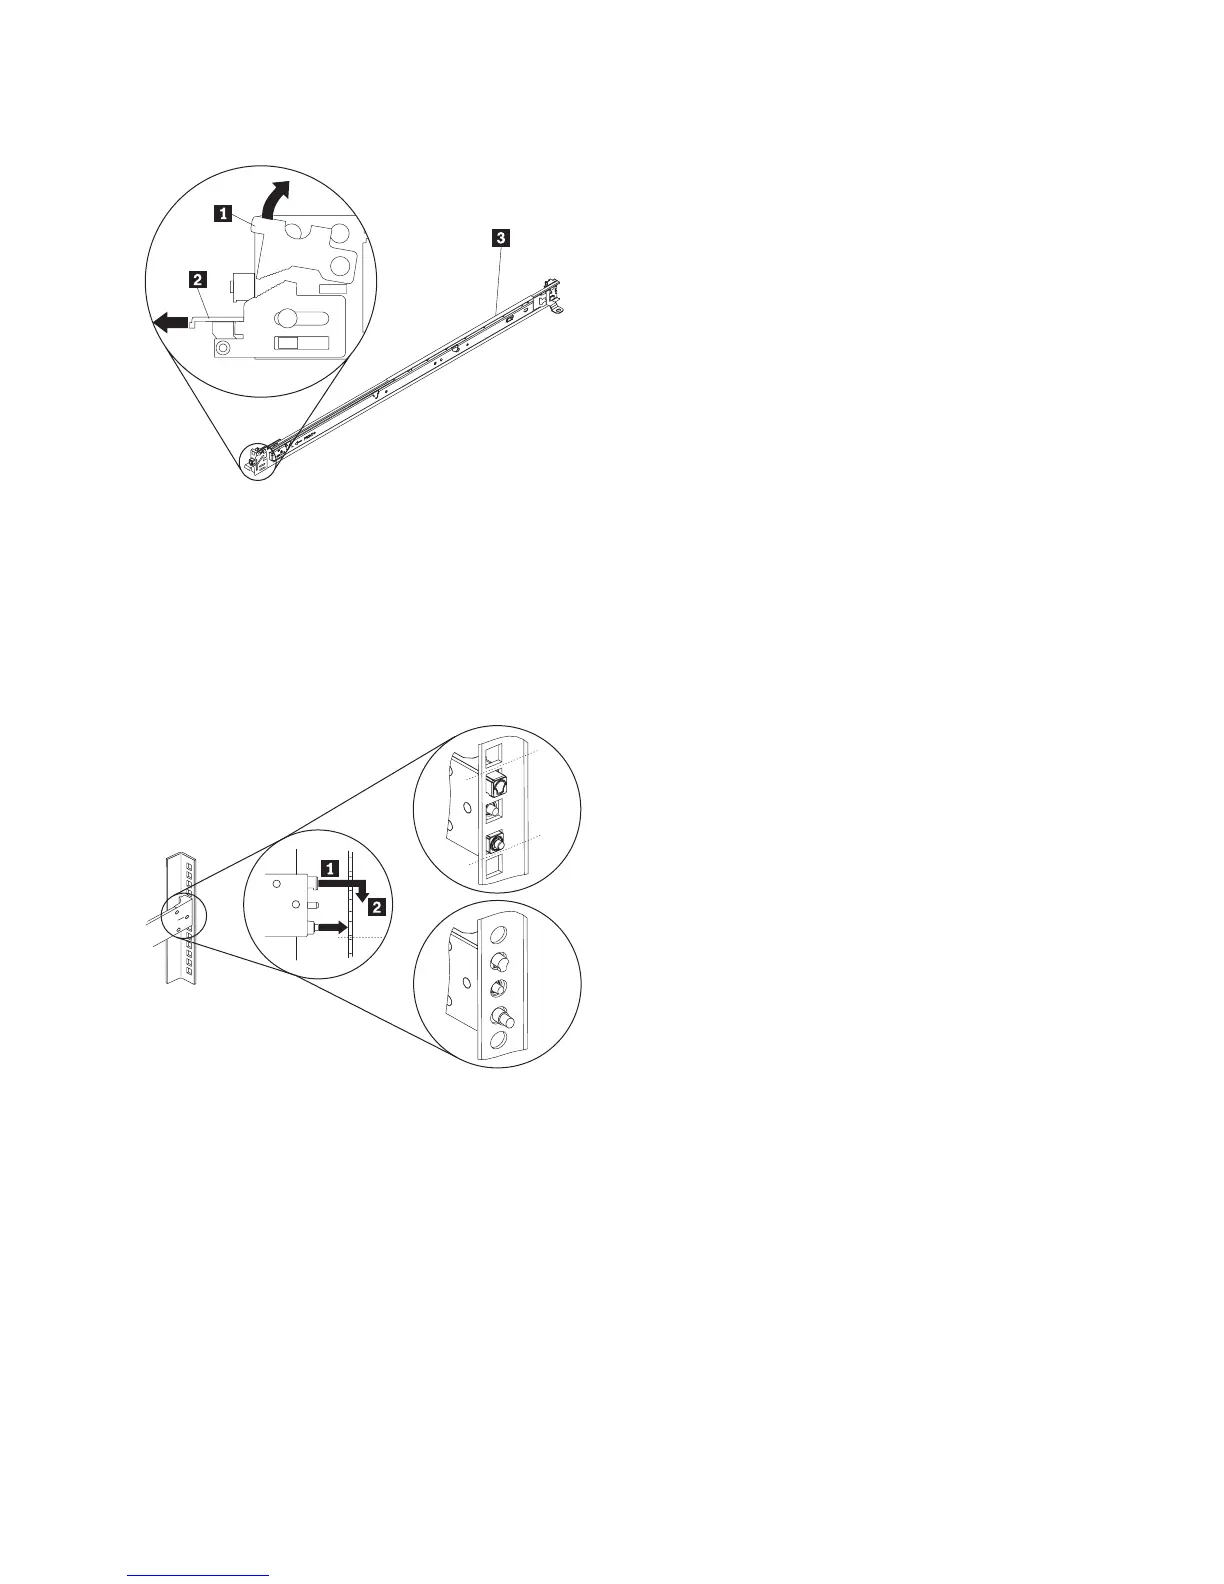
4. Install the front of the rail into the front of the rack.
a. Pull the slide rail forward and insert the metal of the rack between the front latch and the pins, as
shown by 1 in Figure 54 on page 60.
Insert the two pins into the two lower holes in the U on the front of the rack.
b. Drop the rail into place until it clicks.
c. Push the front latch 2 in all the way.
svc_bb1ka005
Figure 52. Installing the SAN Volume Controller 2145-CF8 slide rails on the rack
svc_bb1ka010b
U
U
U
Figure 53. Installing the rear of a SAN Volume Controller 2145-CF8 slide rail in the rear of the rack
Chapter 2. Removing and replacing parts 59