4. When the node is completely turned off, remove the cable-retention brackets and disconnect the
power cables, as described in “Removing the cable-retention bracket” on page 29.
5. To make sure that you can replace all cables in the same ports from which they were removed, label
the port position of each fibre-channel and Ethernet cable; then remove all cables from the back of
the node.
6. Optional: Remove the node from the rack and place it on a flat, static-protective surface. See
“Removing the SAN Volume Controller from a rack” on page 40.
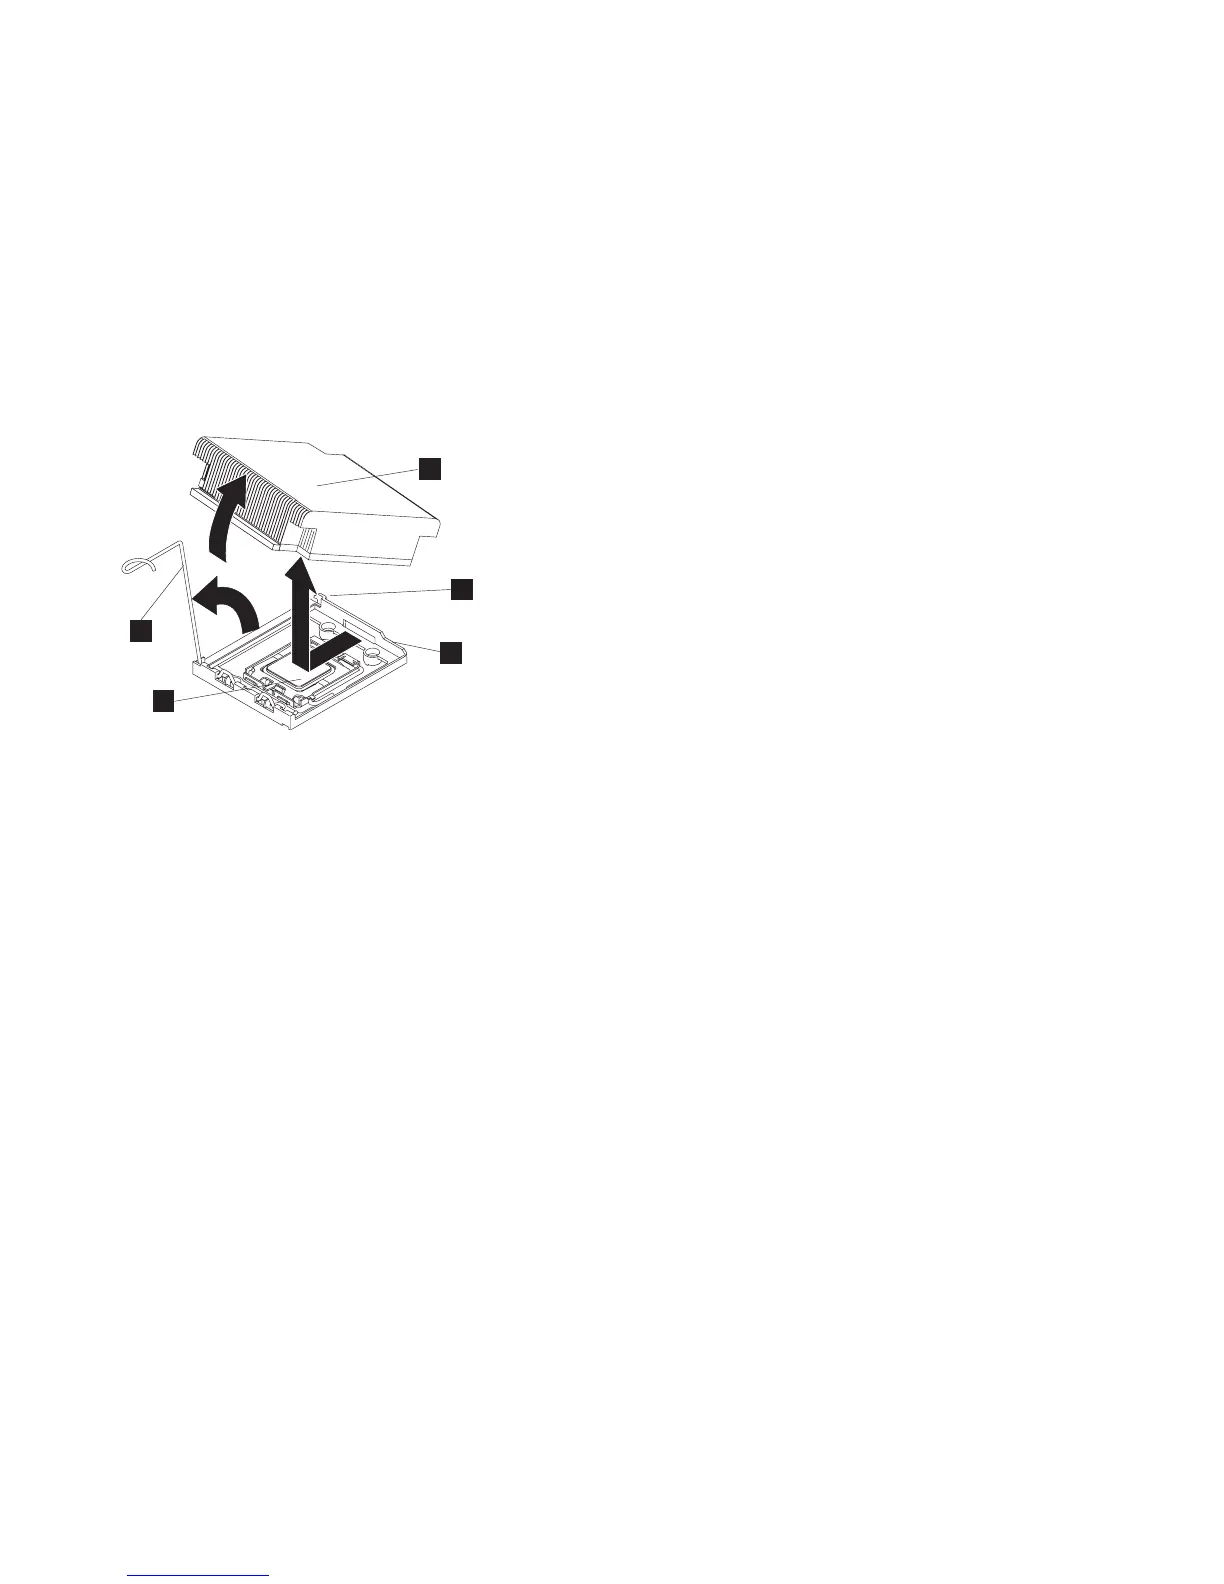
7.
8. Disconnect any cables that impede access to the heat sink (3 in Figure 244) and the microprocessor
(1).
1 Microprocessor
2 Heat-sink release lever
3 Heat sink
4 Lock tab
5 Retainer bracket
9. Push the heat-sink release lever (1) down and away from the processor, then lift the lever until it
is perpendicular to the system board.
10. Lift the heat sink from the side nearest the lever, in its upright position and remove. After removal,
place the heat sink on its side on a clean, flat surface.
11. Release the microprocessor-release lever (2 in Figure 245 on page 223), by pressing down on the
curved end of the lever, moving that end away from the middle of the processor, and releasing the
lever up to the open position.
1
2
3
4
5
Figure 244. Removing the heat sink from the SAN Volume Controller 2145-CF8 microprocessor
222 IBM SAN Volume Controller Hardware Maintenance Guide