2 0.02 mL of thermal grease
Note: If properly applied, approximately half of the grease remains in the syringe when you are
done.
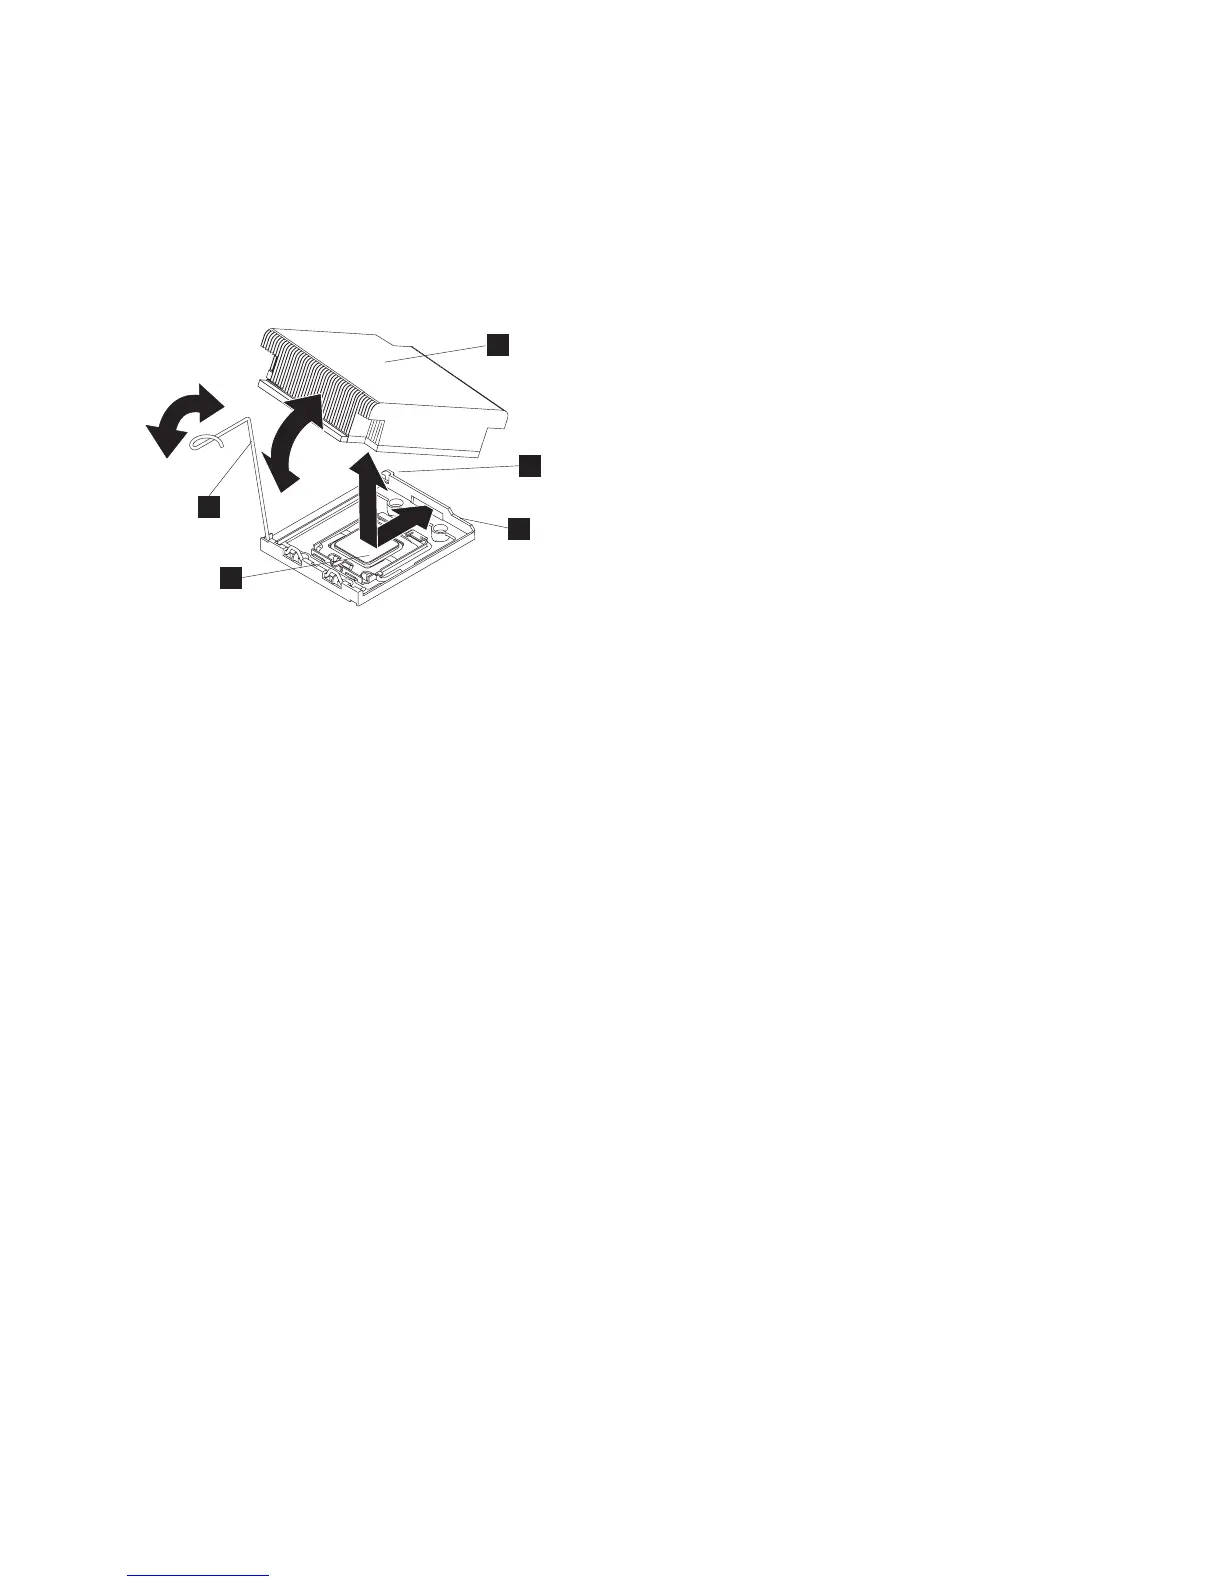
8. Align the heat sink on top of the microprocessor, as shown in Figure 254.
1 Microprocessor
2 Heat-sink release lever
3 Heat sink
4 Lock tab
5 Retainer bracket
9. Lower the rear flange of the heat sink into the opening in the retainer bracket (5) and press down
firmly on the front of the heat sink until it is seated securely.
10. Rotate the heat-sink release lever (2) to the closed position and hook the lever underneath the lock
tab (4).
11. If you removed the air baffle for the other microprocessor, install it at this time.
12. Make sure that all cables, adapters, and other components are installed and seated correctly and that
you have not left loose tools or parts inside the node. Make sure that all internal cables are correctly
routed. If you disconnected the fibre-channel and Ethernet cables, make sure that each cable is
reconnected to the same port from which it was removed.
13. Replace the top cover. See “Replacing the top cover” on page 72.
14. If you removed the node from the rack, replace the node in the rack, as described in “Replacing the
SAN Volume Controller in a rack” on page 48.
15. If you removed any fibre-channel or Ethernet cables, use the labels you placed on each cable to
replace all fibre-channel and Ethernet cables in the same ports from which they were removed.
16. If you removed the power cords, replace the power cords and the cable-retention brackets, as
described in “Replacing the cable-retention bracket” on page 34.
17. Lift the locking levers (1 in Figure 255 on page 232) on the slide rails and push the server 2 all
the way into the rack until it clicks into place.
1
2
3
4
5
Figure 254. Installing the heat sink on the SAN Volume Controller 2145-CF8 microprocessor
Chapter 2. Removing and replacing parts 231