4535 612 10261 HD11 Service Manual Page 193
CSIP Level 1 Disassembly and Reassembly: Disassembly Procedures
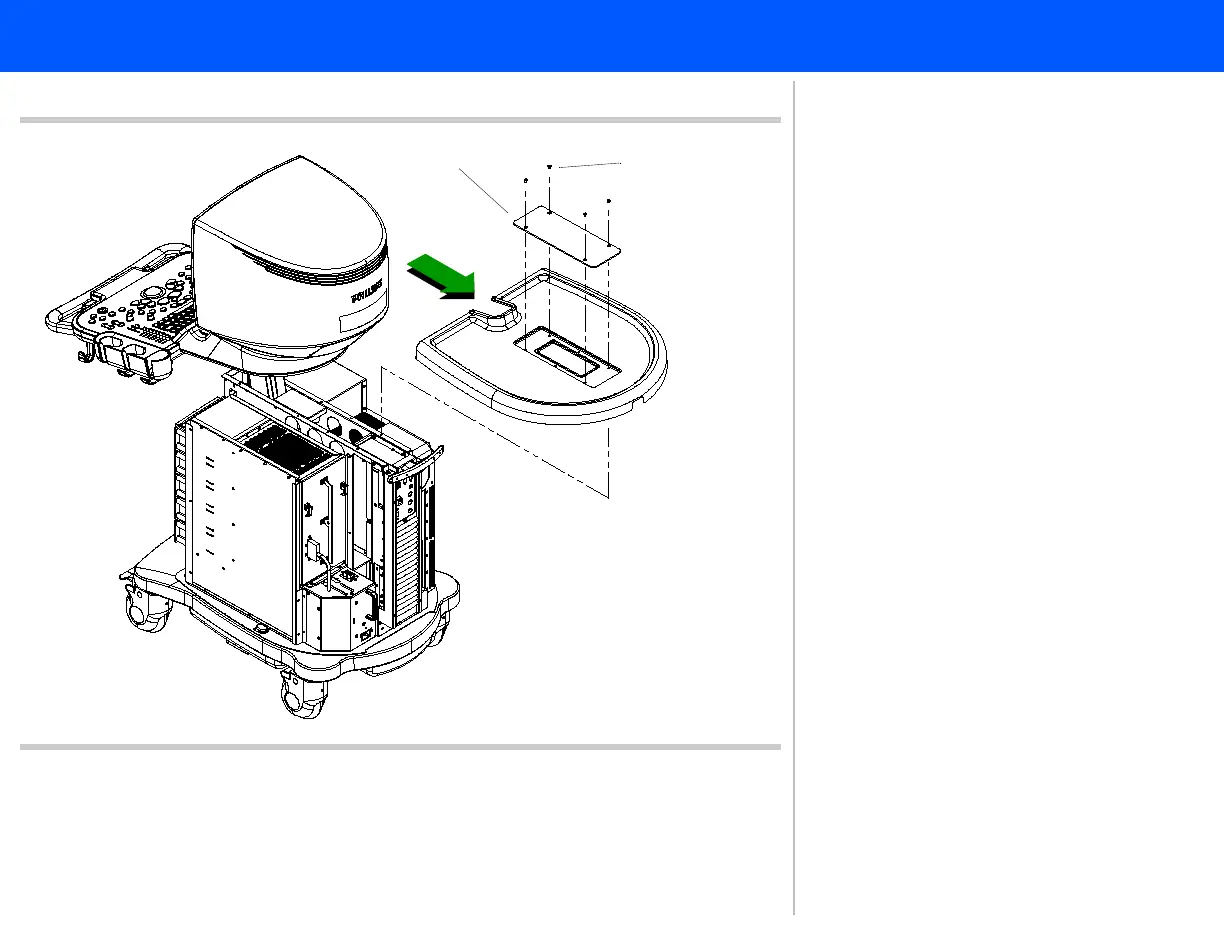
Figure 10-6 Removing the Top Cover with a Top Hatch
Flathead
screws
(4 plcs)
8
9
Top hatch
If your system has a peripheral mounting
plate installed, refer to Figure 10-21 for
peripheral mounting plate disassembly.
See Figure 10-22 for top cover removal
with a peripheral mounting plate bracket
installed.
8. Remove the four flathead screws
securing the top hatch. Remove the
top hatch.
9. These four flathead screws also
secure the top cover. Lift and slide
the top cover toward the rear of the
system. Proceed to step 10.