2.Replacement and Adjustment
11
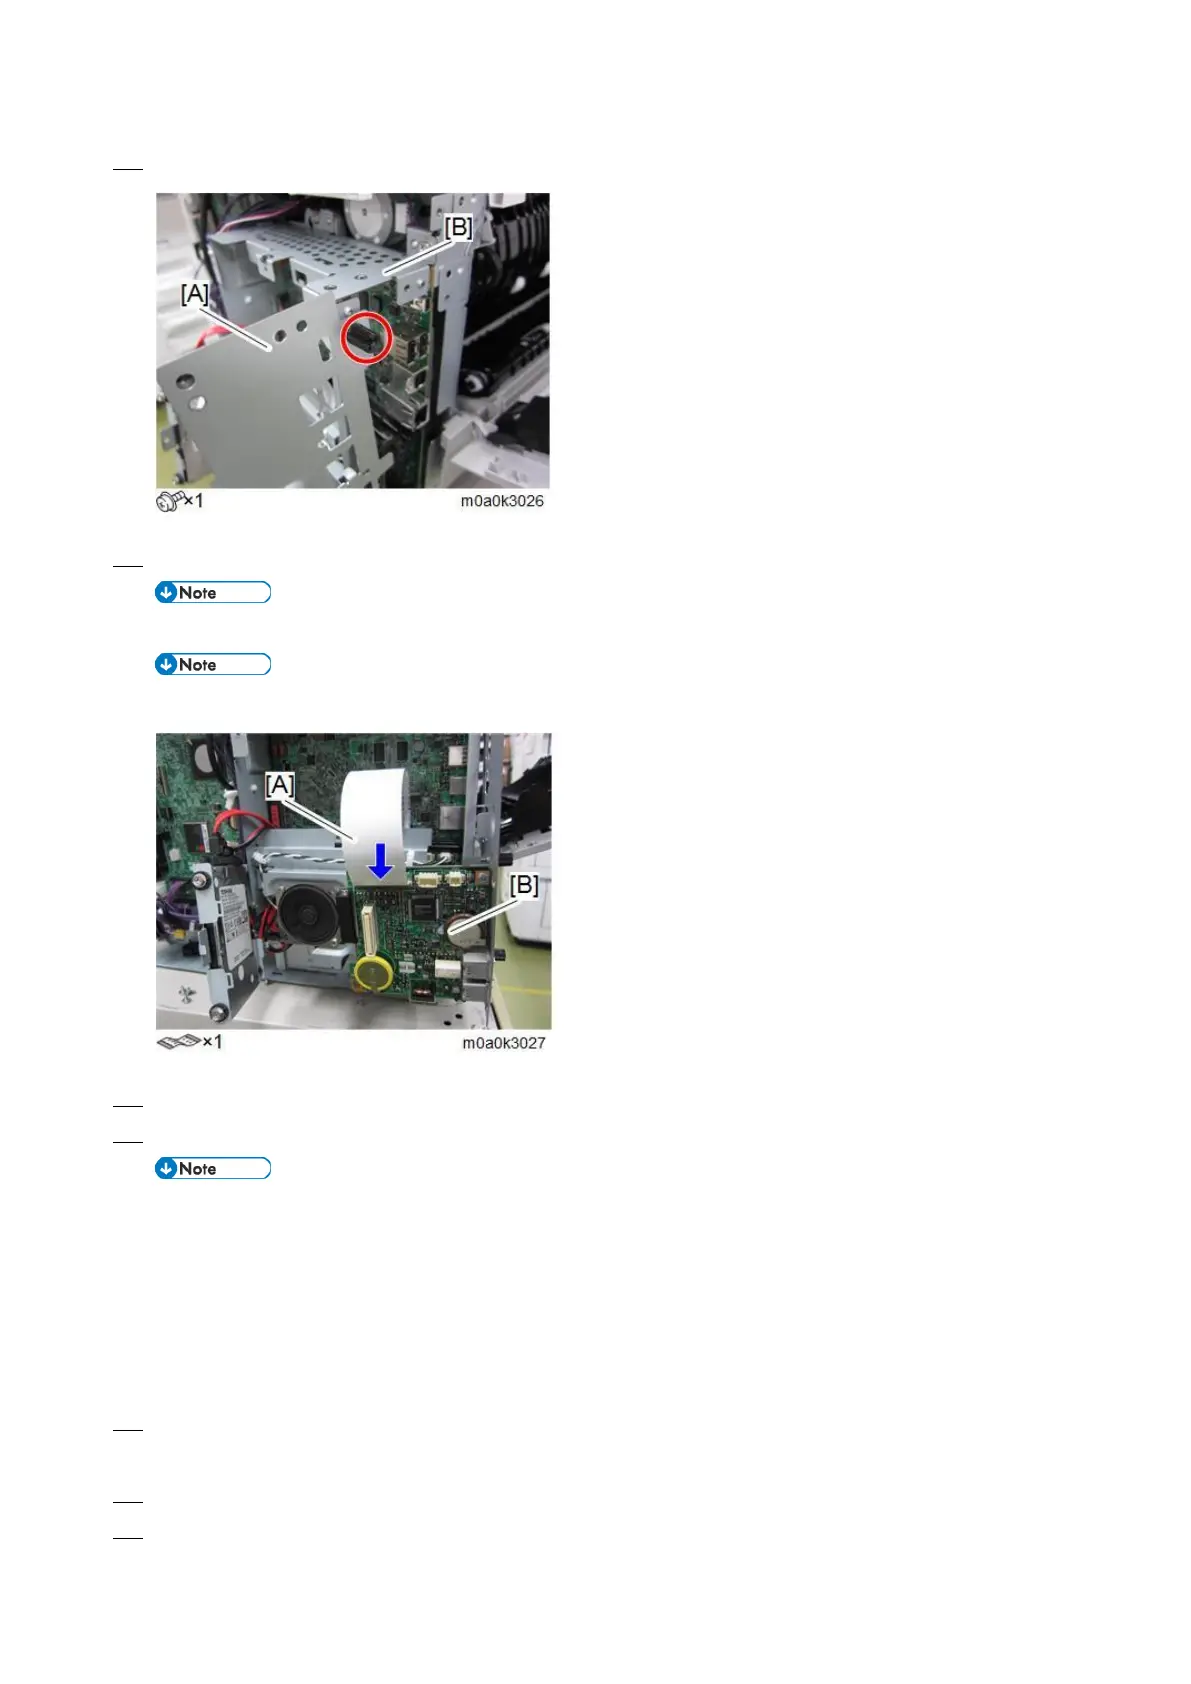
12. Mount the old FCU board with bracket [A] to the controller box temporarily.
13. Insert the other end of the flat cable [A] into the CN603 connector on the old FCU board [B].
To prevent a short circuit, make sure the old FCU board does not come into contact with anything metal.
Make sure that the blue tape of the flat cable faces outward.
14. Turn the main power switch ON.
15. The SRAM data transfer begins. Transfer is complete when a beep sounds.
The volume of the beep is set to the same level as the speaker volume.
If the speaker volume is set to off, the volume of the beep is set to its initial factory-set level.
If the machine does not beep, switch the main power off and then back on and try the data transfer
again. Try several times if necessary.
Be sure to check the transfer result after executing data transfer. If the transfer has failed, you need to
specify settings manually in the SP mode.
16. When "Ready" appears on the control panel, switch the power OFF, and then remove the AC power plug from the
receptacle.
17. Disconnect the flat cable from both FCU boards.
18. Remove the old FCU board with bracket from the controller box.