2.Replacement and Adjustment
12
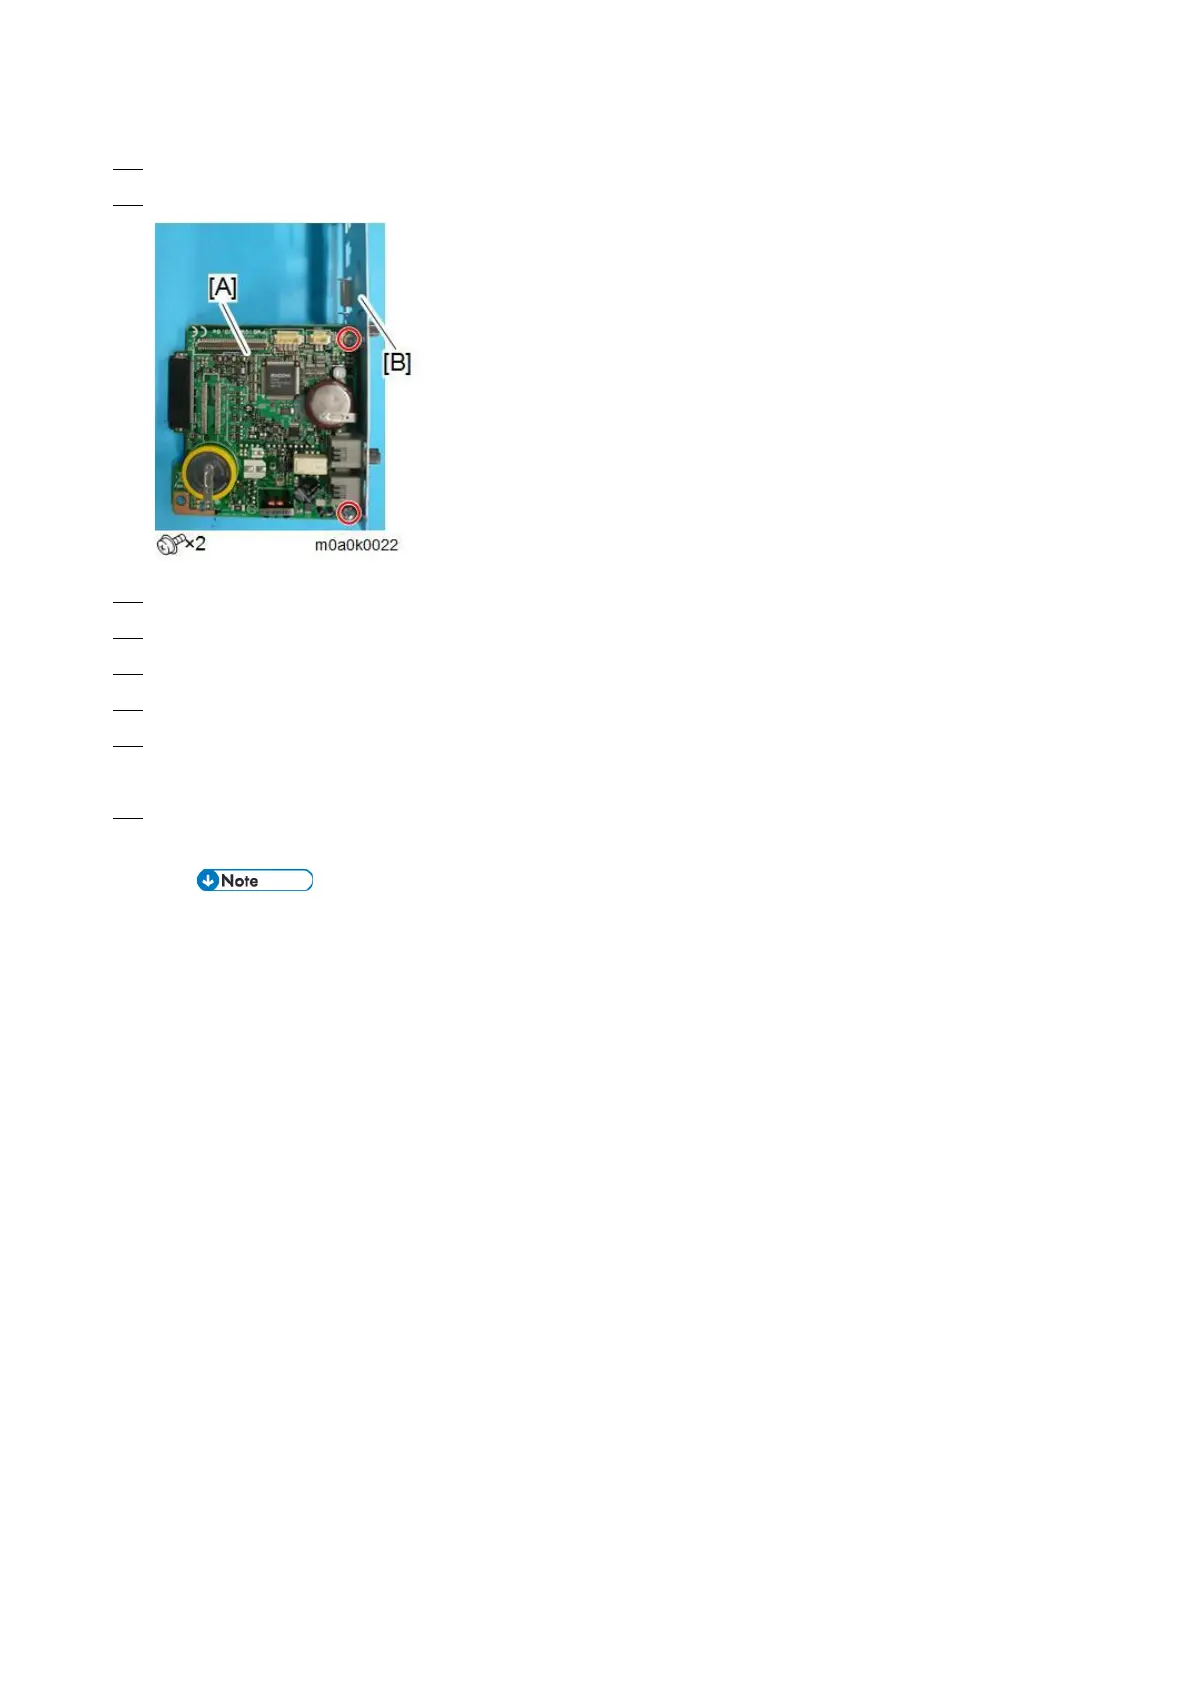
19. Disconnect the speaker connector and remove the new FCU board [A] from the machine.
20. Remove the bracket [B] from the old FCU board [A] and attach the bracket to the new FCU board.
21. Mount the new FCU board in the machine and connect the speaker connector to the new FCU board.
22. Reattach the controller box cover.
23. Reattach the cover.
24. Turn the main power switch on.
25. Enter the SP mode, print the system parameter list from SP6-101 in the Fax SP menu, and then check the list to see
whether the SRAM data has been transferred correctly.
26. Set the correct date and time from the [User Tools].
User Tools > Machine Features > System Settings > Timer Setting > Set Date/Time
If any of the SRAM data was not transferred, input those settings manually.