Configuration with the Control Panel
98-137654-A Chapter 6: Configuration 6-39
6666
Configuration
• Arrow icon (lower left corner) for back function and to collapse
the on-screen keyboard when you don’t need it any more.
To get started with the Control Panel, do as follows:
1. Make sure that it is connected to the LAN port 4 at the rear of the
ACU, possibly through a switched network.
2. Press the on/off button. A couple of start-up screens
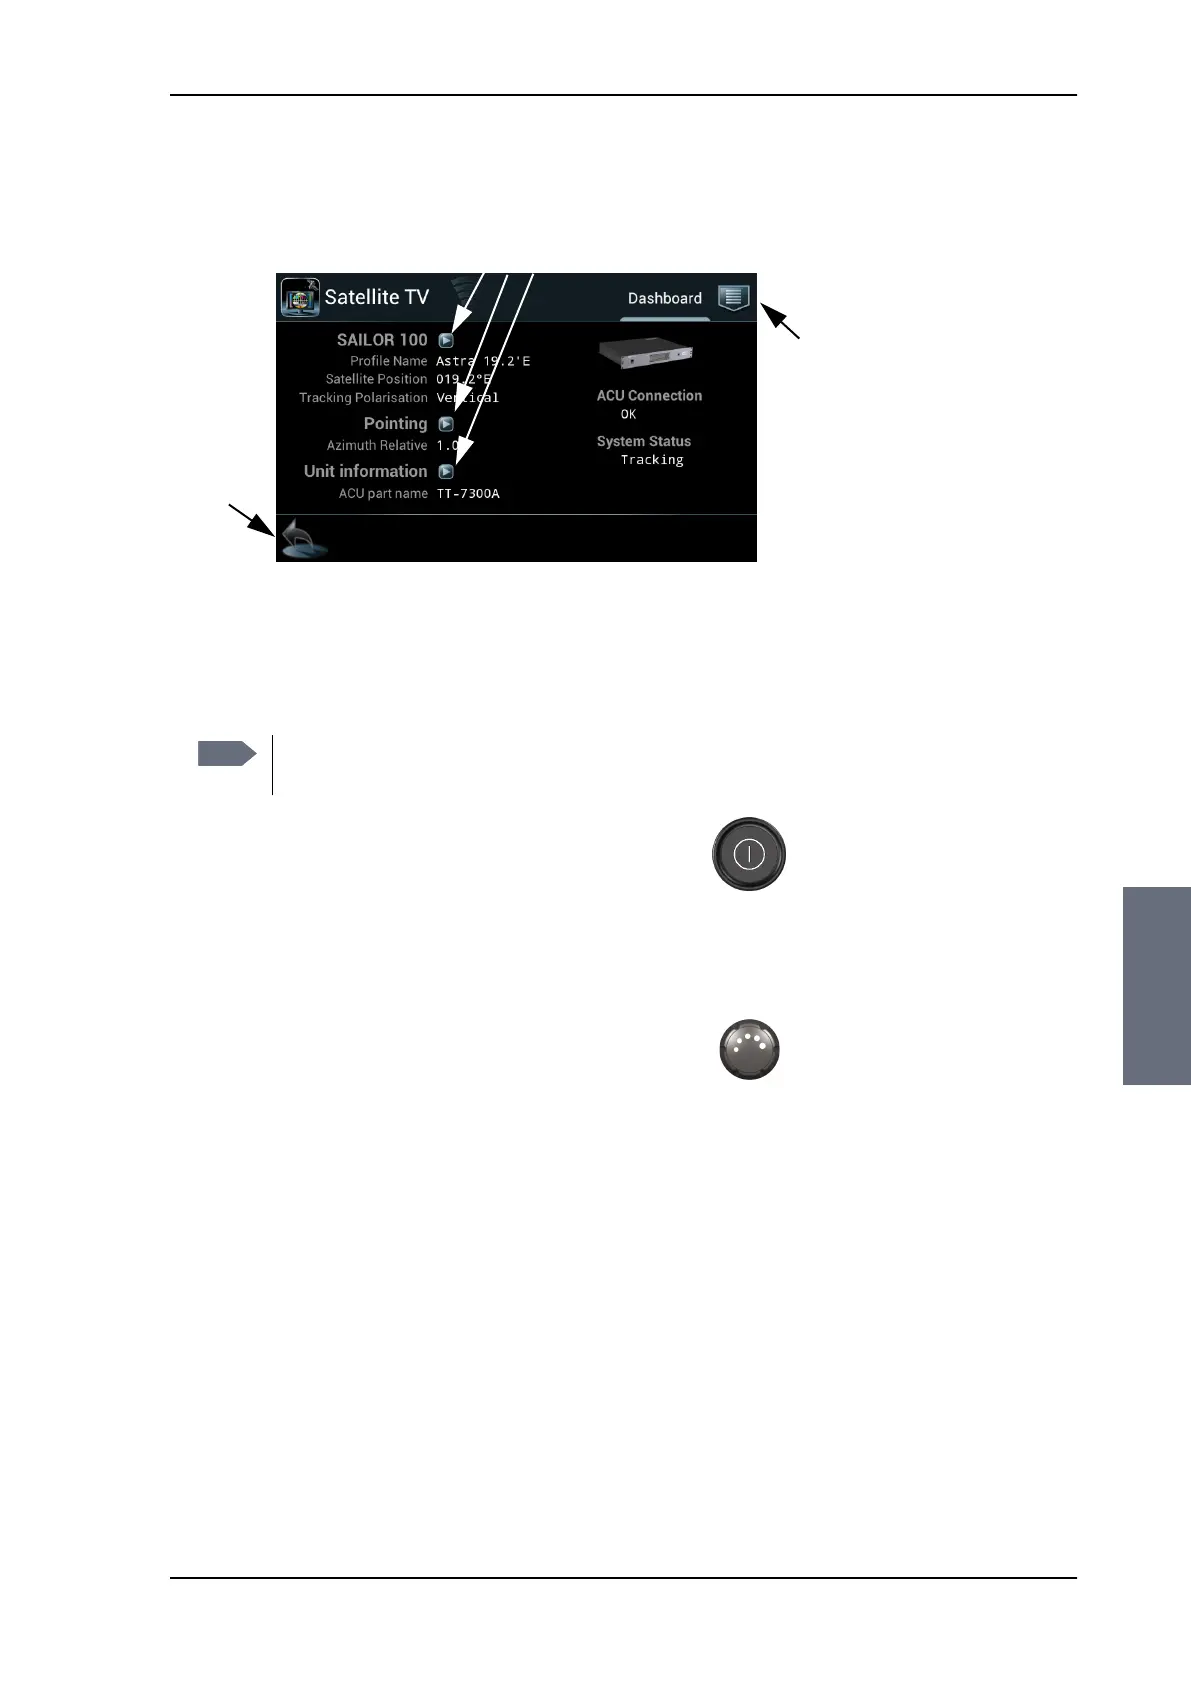
are displayed. Wait until the Dashboard is displayed:
• ACU connection: OK
• System: status information, e.g. TRACKING. When a yellow
triangle is displayed in the section ACU Connection the ACU is
not ready for operation.
3. Use the Dim button to dim the light in the Control
Panel. Turn right or left to dim the display more/less.
4. Now you can create satellite profiles.
For details on ACU network configuration and DHCP server see
Configuring the LAN network on page 6-26.
Figure 6-31: Control Panel — Dashboard
Show further information
Menu
Back,
collapse
keyboard
Note
If connected directly to the ACU, make sure that the
DHCP server has been enabled on that port.
SAILOR100TM.book Page 39 Tuesday, January 29, 2013 2:44 PM
 Loading...