Installation of the ADU
3-20 Chapter 3: Installation 98-137654-A
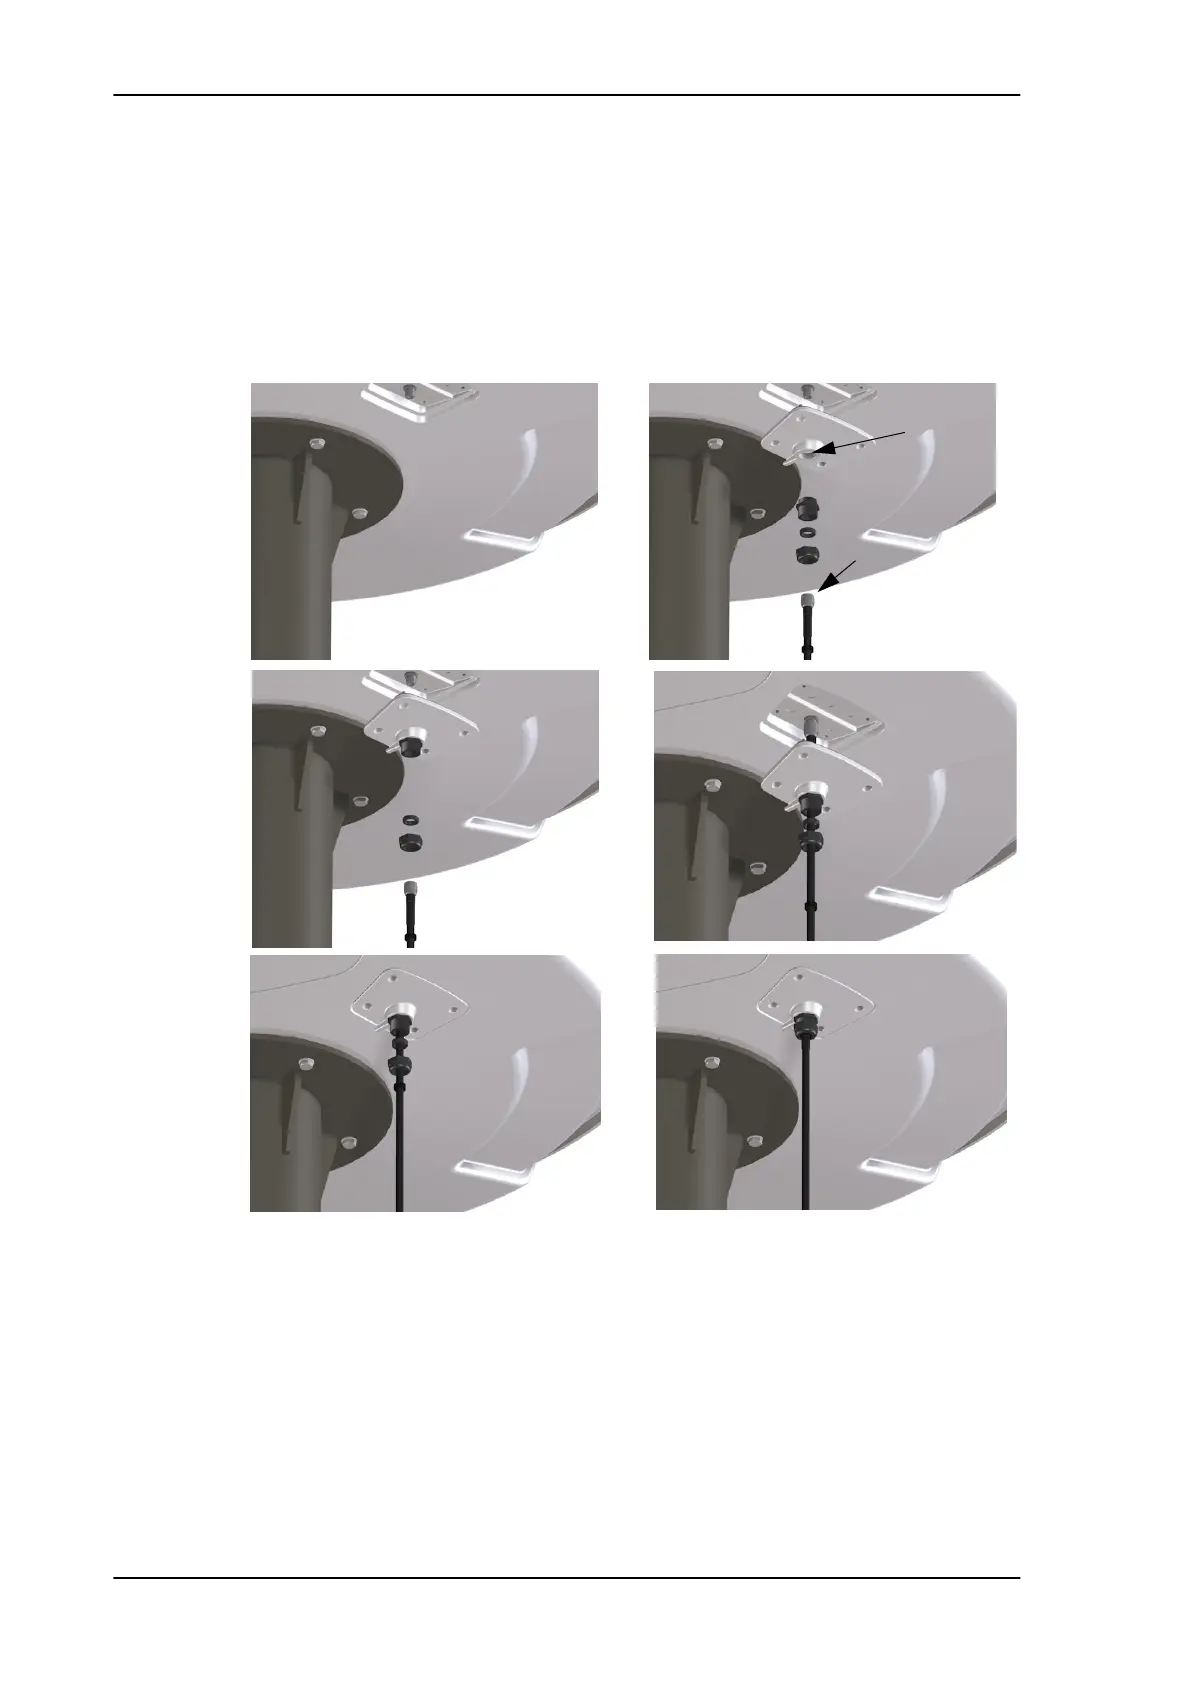
8. Put the coaxial ADU cable through the protection plate as shown
in the following figure, and connect the N connector of the ADU
cable to the ADU.
Select a suitable size for the cable gland: 16—20 mm diameter or
19—23 mm diameter. See also N-connector interface on the ADU
on page A-7 for a more detailed drawing how to connect the N-
connector on the ADU.
Ensure that the connector assembly is properly protected against
seawater and corrosion. As a minimum, wrap it with self-
amalgamating rubber.
9. Put the protection plate in place and fasten the 4 bolts (picture 5).
10. Fasten the nut (picture 6).
Where the cables are exposed to mechanical wear — on deck,
through bulkheads, etc. — protect the cables with steel pipes.
Figure 3-17: Connecting the ADU cable
Protection plate
N connector
1
2
3
4
5
6
SAILOR100TM.book Page 20 Tuesday, January 29, 2013 2:44 PM