212 Service WAGO-I/O-SYSTEM 750
758-874/000-131 WAGO-I/O-IPC-C6
Manual
Version 1.0.0
Pos: 54.6 /Serie 758 ( Funk, IPC und PFC)/Ser vice/Service Wartung 758-87 x 2 @ 10\mod_1312538266466_21. doc @ 76027 @ @ 1
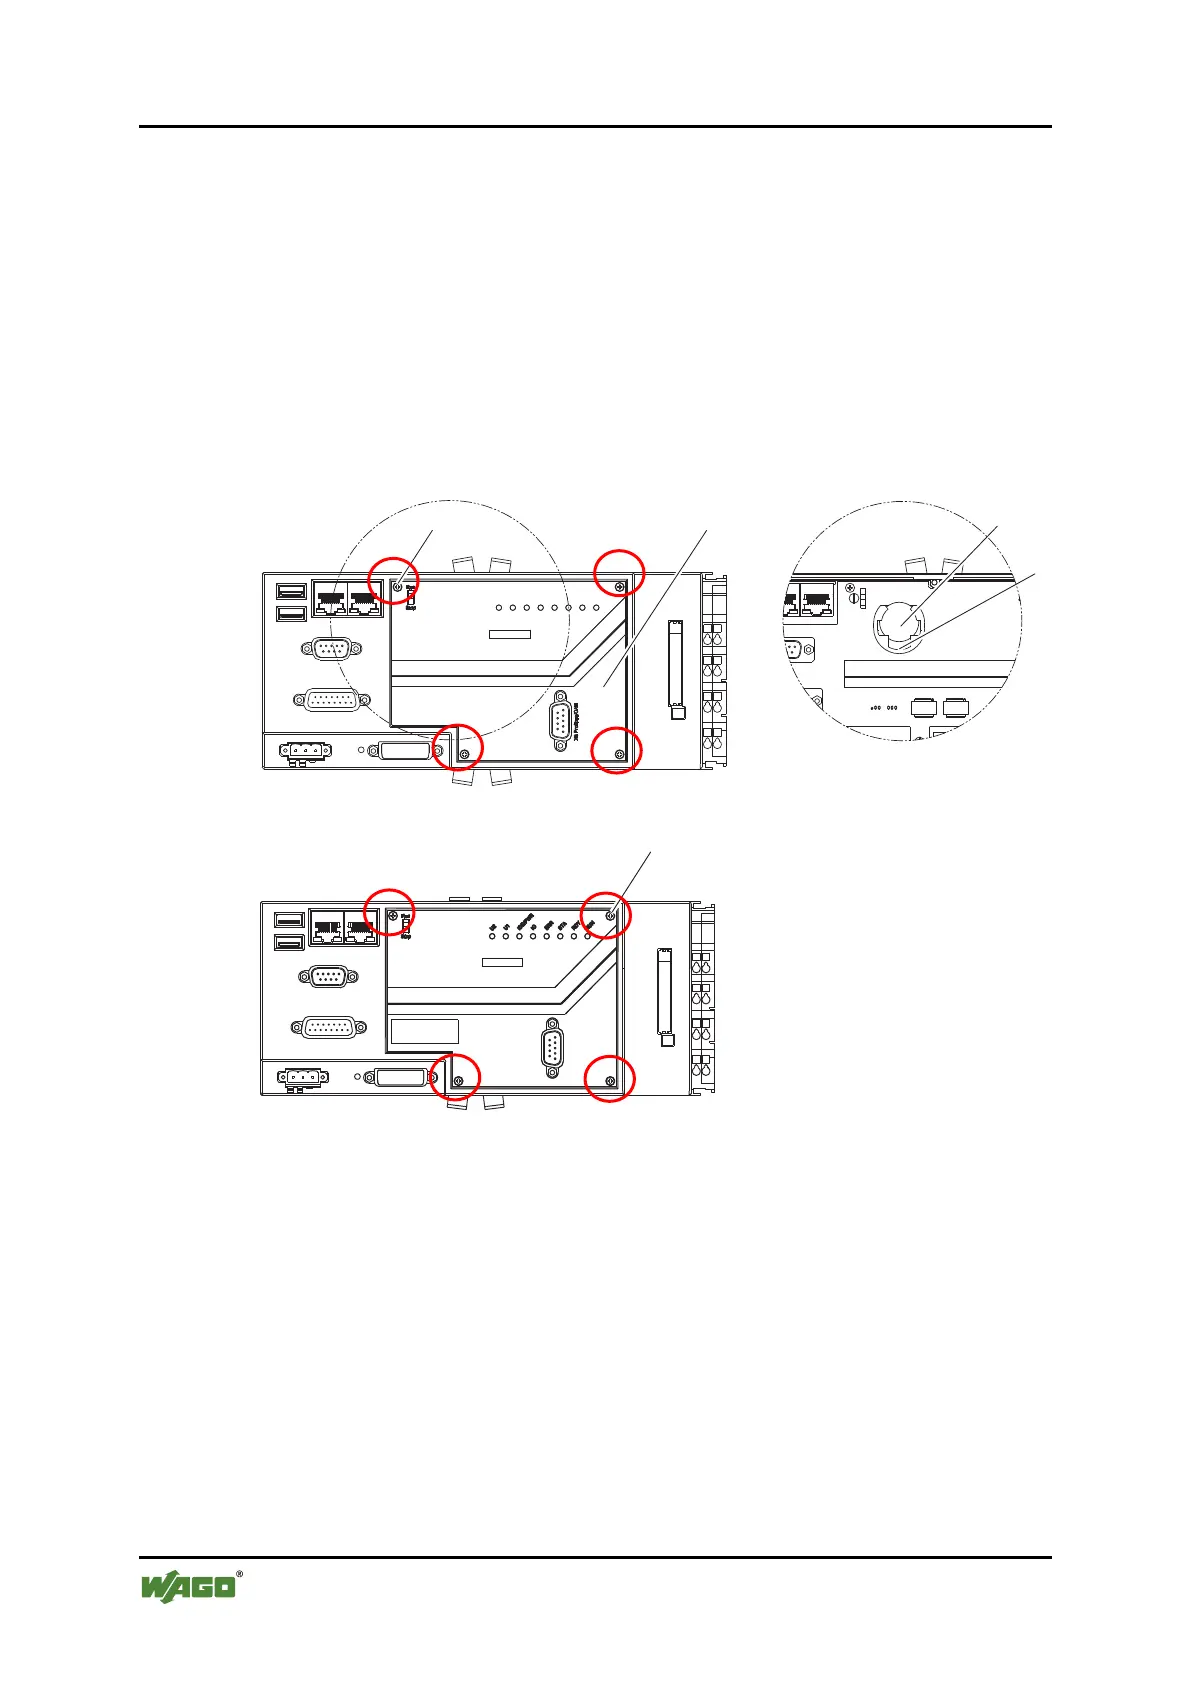
To replace the battery, proceed as follows:
1. Remove the fieldbus cable from connection X3 (this step is not nessesary
for versions without fieldbus connection).
2. Remove the cover (51) by removing the four screws (53) with an
appropriate Torx® screwdriver.
In the case of a wall mount, hold the cover secure before loosening the last
screw so that the cover does not fall.
3. Remove the old battery (52) by pressing it downwards against the contact
(54) with your finger and then pulling it out towards you.
Pos: 54.7 /Serie 758 ( Funk, IPC und PFC)/Ser vice/Service Wartung 758-87 x FB - Bild 1 @ 10\mod_13125383821 08_21.doc @ 76040 @ @ 1
U1
IDE/PWR
IO
ERR
STA
RDY
RUN
U2
Figure 110: Changing the battery for the emergency power supply 1
Pos: 54.8 /Serie 758 ( Funk, IPC und PFC)/Ser vice/Service Wartung 758-87 x FB - Bild 2 @ 10\mod_13125385026 87_21.doc @ 76046 @ @ 1
Figure 111: Changing the battery for the emergency power supply 2
Pos: 54.9 /Serie 758 ( Funk, IPC und PFC)/Ser vice/Service Wartung 758-87 x 3 @ 10\mod_1312538439780_21. doc @ 76043 @ @ 1
4. Insert the new battery, type CR2025, with the positive pole upwards into the
holder so that the edge of the battery is lying on the lower contact (54), and
press the battery in until you feel it catch.
5. Secure the front plate with the four screws (53). Make sure that the
threading is not tightened too tightly. For a vertical mounting of the I/O-
IPC, hold the front plate secure until the first screw is fastened so that it
does not fall down.
6. If necessary, fasten the fieldbus cable to connection X3 (this step is not
nessesary for versions without fieldbus connection).
.
53
52
51
54
 Loading...