as much as possible. At cooking level 1, the
pressure indicator rises to the 1st cooking ring.
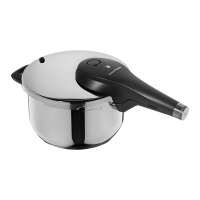
1| Check that the pressure cooker is closed
correctly.
2| Place the pressure cooker on the stove.
3| Set the stove to a high energy level.
The pressure cooker will heat up.
a) Air will escape through the safety valve
7
,
which is also the automatic cooking sys-
tem, until the valve closes and pressure
builds up.
b) First the pin and then the entire pressure
indicator
16
will start to rise. The increase
can be regulated by adjusting the energy
supply accordingly.
c) The rise of the pin in the middle of the
pressure indicator signals that the pot can
no longer be opened.
4| The cooking time begins as soon as the pres-
sure indicator
16
clearly displays the 1st
cooking ring.
5| Ensure that the ring position on the pressure
indicator
16
remains constant.
6| If the pressure indicator
16
drops below the
1st cooking ring, increase the energy supply.
This increases the cooking time slightly.
7| If the pressure indicator
16
rises above the
1st cooking ring, the result is an excess
build-up of steam pressure, which must
be regulated via adjustment of the energy
supply.
a) Remove the pressure cooker from the hob.
b) Wait until the pressure indicator has low-
ered to the 1st cooking ring.
c) Once the energy supply has been reduced,
put the pressure cooker back on the stove.
8| After the cooking time is over, remove the
pressure cooker from the hob and reduce the
pressure (see Section 9).
9| Once the pressure has been reduced, shake
the pressure cooker and open carefully.
8.2| COOKING LEVEL 2
Quick cooking level for all other foods
A lot of time and energy is saved at this cooking
level. At cooking level 2, the pressure indicator
rises to the 2nd cooking ring. If the pressure is
too high, it is regulated automatically.
1| Check that the pressure cooker is closed
correctly.
2| Place the pressure cooker on the stove.
3| Set the stove to the highest heat setting.
The pressure cooker will heat up.
a) Air will escape through the safety valve
7
,
which is also the automatic cooking sys-
tem, until the valve closes audibly and
pressure builds up.
b) The pressure indicator
16
begins to rise.
The increase can be regulated by adjusting
the energy supply accordingly.
c) The rise of the pin in the middle of the
pressure indicator signals that the pot can
no longer be opened.
The cooking time begins as soon as the
pressure indicator
16
clearly displays the
2nd cooking ring.
4| Ensure that the ring position on the pressure
indicator
16
remains constant.
5| If the pressure indicator
16
drops below the
2nd cooking ring, turn up the energy supply
on the stove.
This increases the cooking time slightly.
6| If the pressure indicator
16
rises above the 2nd
cooking ring, the result is an excess build-up
of steam pressure, which escapes audibly
through the pressure control device
15
.
a) Remove the pressure cooker from the hob.
b) Wait until the pressure indicator has low-
ered to the 2nd cooking ring.
c) Once the energy supply has been reduced,
put the pressure cooker back on the stove.
7| After the cooking time is over, remove the
pressure cooker from the hob and reduce the
pressure as described in Section 9.
35
ZHtw TR TH SV SL SK RU RO PT PL NO NL KO ID HU HR FI EL DA CS BG ZHcn IT ES FR EN DE
 Loading...