Mechanical Installation
2
2.6 Remove and Reattach the Keypad
YASKAWA SIEPC71061705H GA700 Series Technical Manual 43
2.6 Remove and Reattach the Keypad
NOTICE: You must remove the keypad before you remove or reattach the front cover. Before you reattach the keypad, make
sure that you attach the front cover into position. If you keep the keypad connected to the drive when you remove the front
cover, it can cause an unsatisfactory connection and incorrect operation.
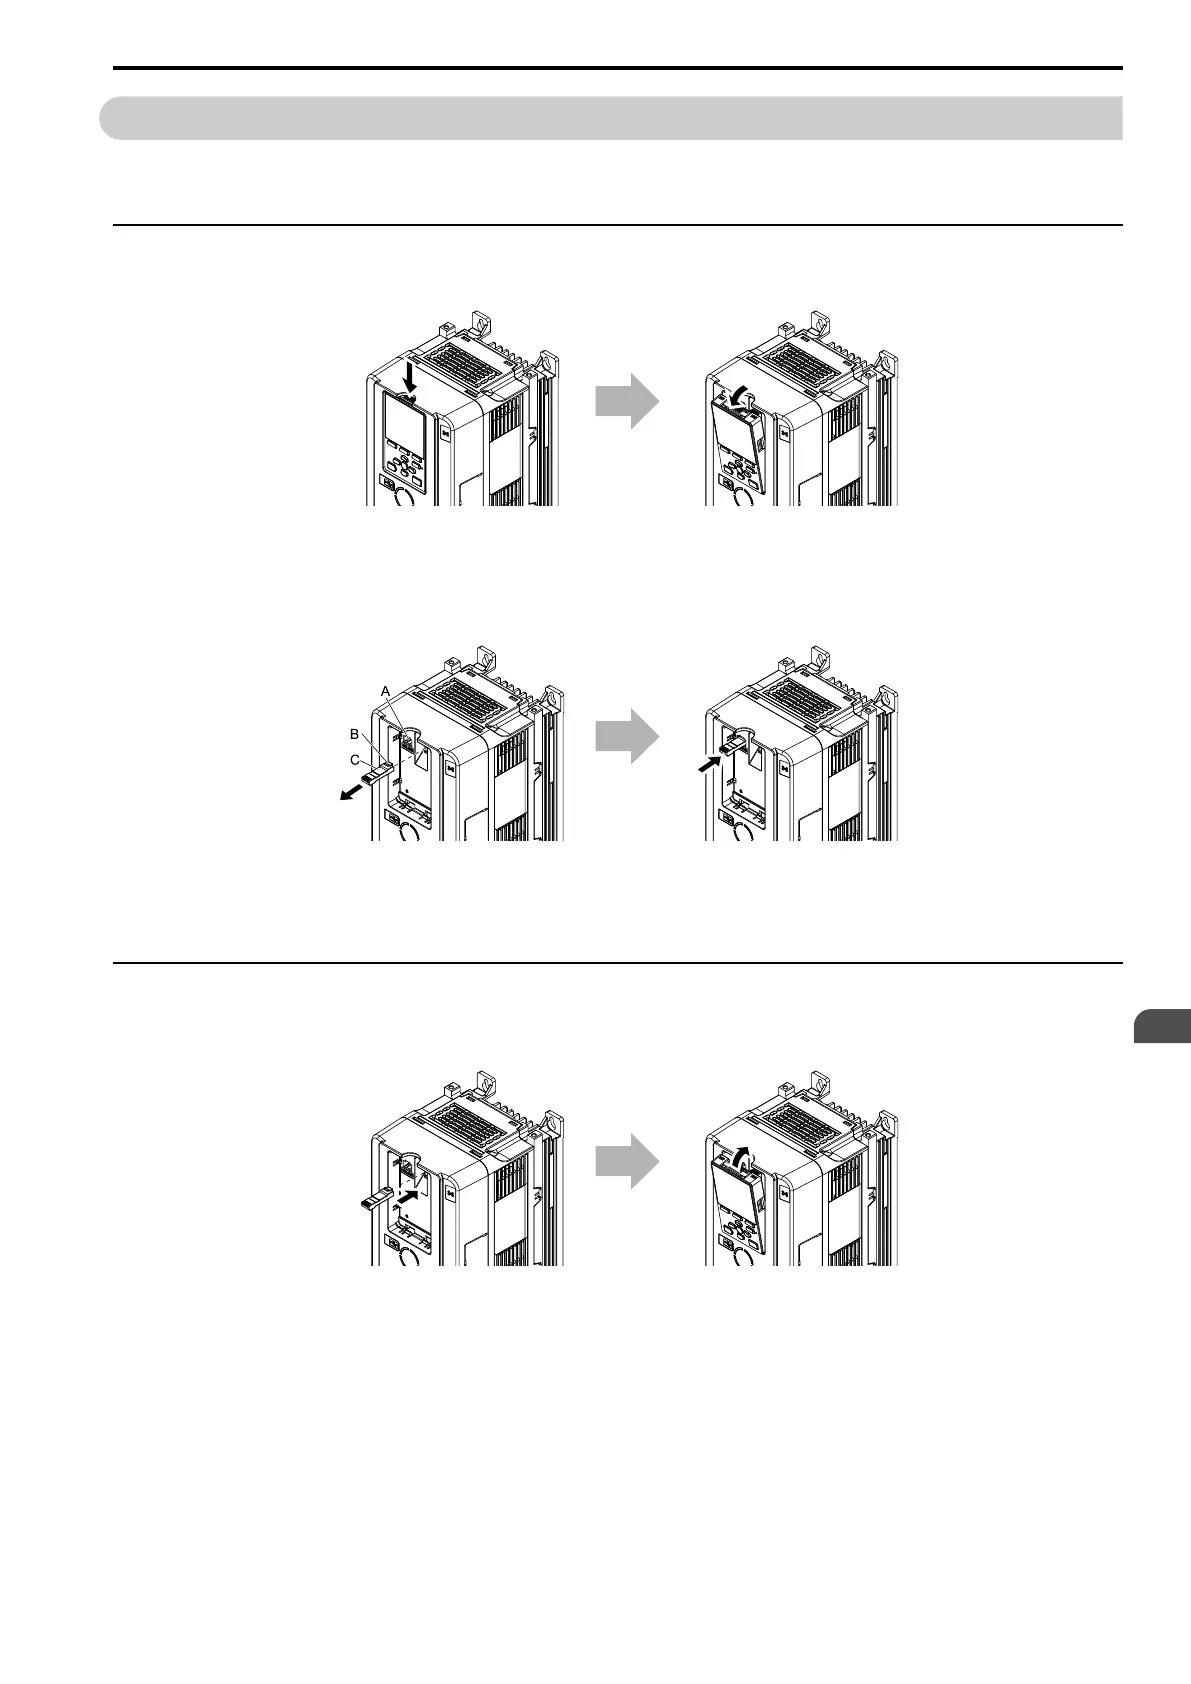
◆ Remove the Keypad
1.
Push down the tab on the top of the keypad, then pull the keypad forward and remove it from the drive.
Figure 2.7 Remove the Keypad
2. Pull the keypad connector out from the drive horizontally, then put it in the holder.
Note:
Insert the end of the keypad connector that has the tab.
A - Holder
B - Hook
C - Keypad connector
Figure 2.8 Move the Keypad Connector to the Holder
◆ Reattach the Keypad
Insert the keypad connector to its initial position. Put the bottom of the keypad into position first, then carefully
push on the top of the keypad until the hook clicks into place.
Figure 2.9 Reattach the Keypad
 Loading...