CAPINTEC, INC. CAPTUS
®
3000
Figure 16-9
9. In the Comment text box, enter a comment if desired.
10. Click the
button or press ALT+D to save the data. Click the
button or press ALT+C to discard the data and return to Figure 16-1 Main Custom
Protocols Screen.
Editing Patient Information
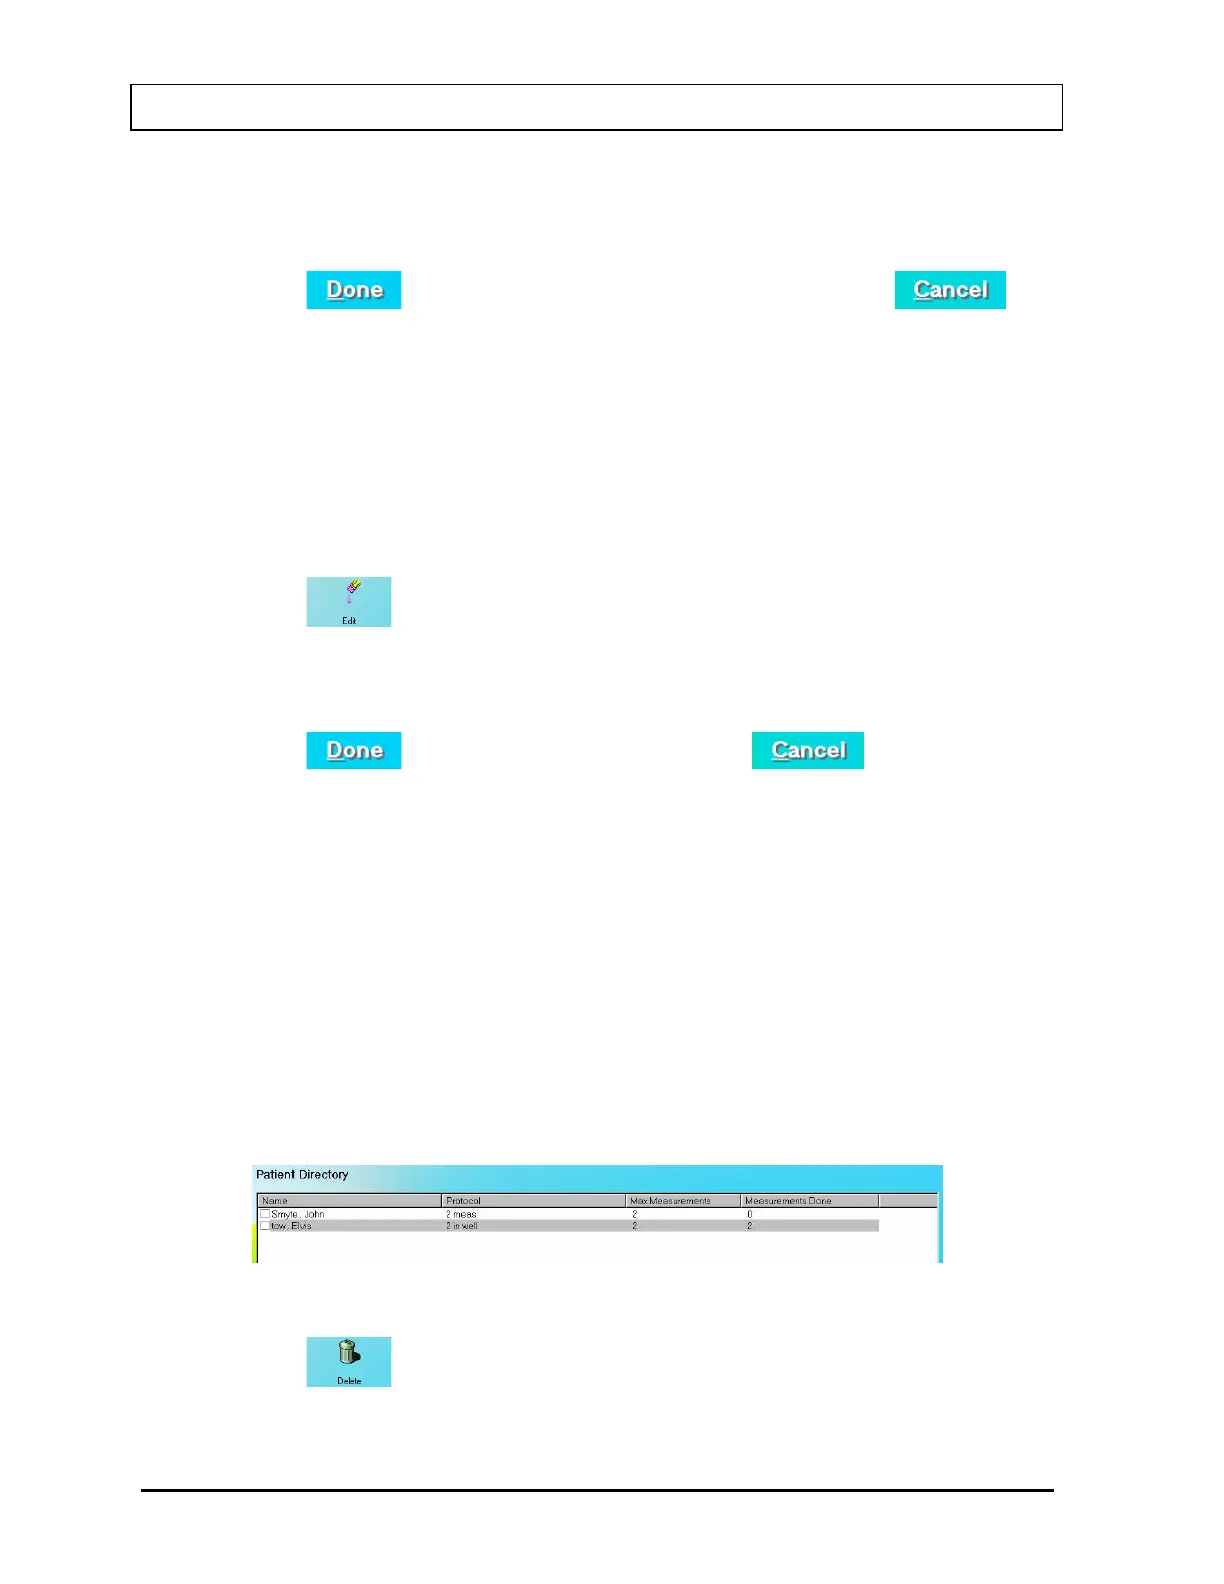
1. To select a patient to be edited, use the keys or Page Up and Page Down keys to
move up or down in the patient list in the Patient Directory list box. If the list is long,
the scroll bar is also available. To reach a particular patient, press the first letter of the
patient name. Press the key if necessary, to go further down (Figure 16-10).
2. Click the
icon. The Patient Data Screen (Figure 16-8) will appear.
3. Click in the text box to be edited or use Tab keys to move around. Type over the
existing information wherever needed.
4. Click the
button to save changes or click the button to discard
the changes and return to Figure 16-1 Main Custom Protocols Screen.
Deleting Patient Information
1. To select one or more patients for deletion, click in the check box on the left end of the
patient in the Patient Directory list box on the main Custom Protocols screen (16-10). A
check should appear in the check box to indicate it has been selected. The patient can
also be selected by first highlighting the desired patient by clicking and then double-
clicking anywhere in the grid to place a check in the box. To deselect a patient, click in its
check box again or double-click anywhere in the grid while the desired patient is
highlighted and the check will be removed from the check box.
Note: The status of a check box can be toggled by quickly double-clicking the desired
item.
Figure 16-10
1. Click the
icon. Figure 16-11 will appear.
16-10 CUSTOM PROTOCOLS November 13