CAPINTEC, INC. CAPTUS
®
3000
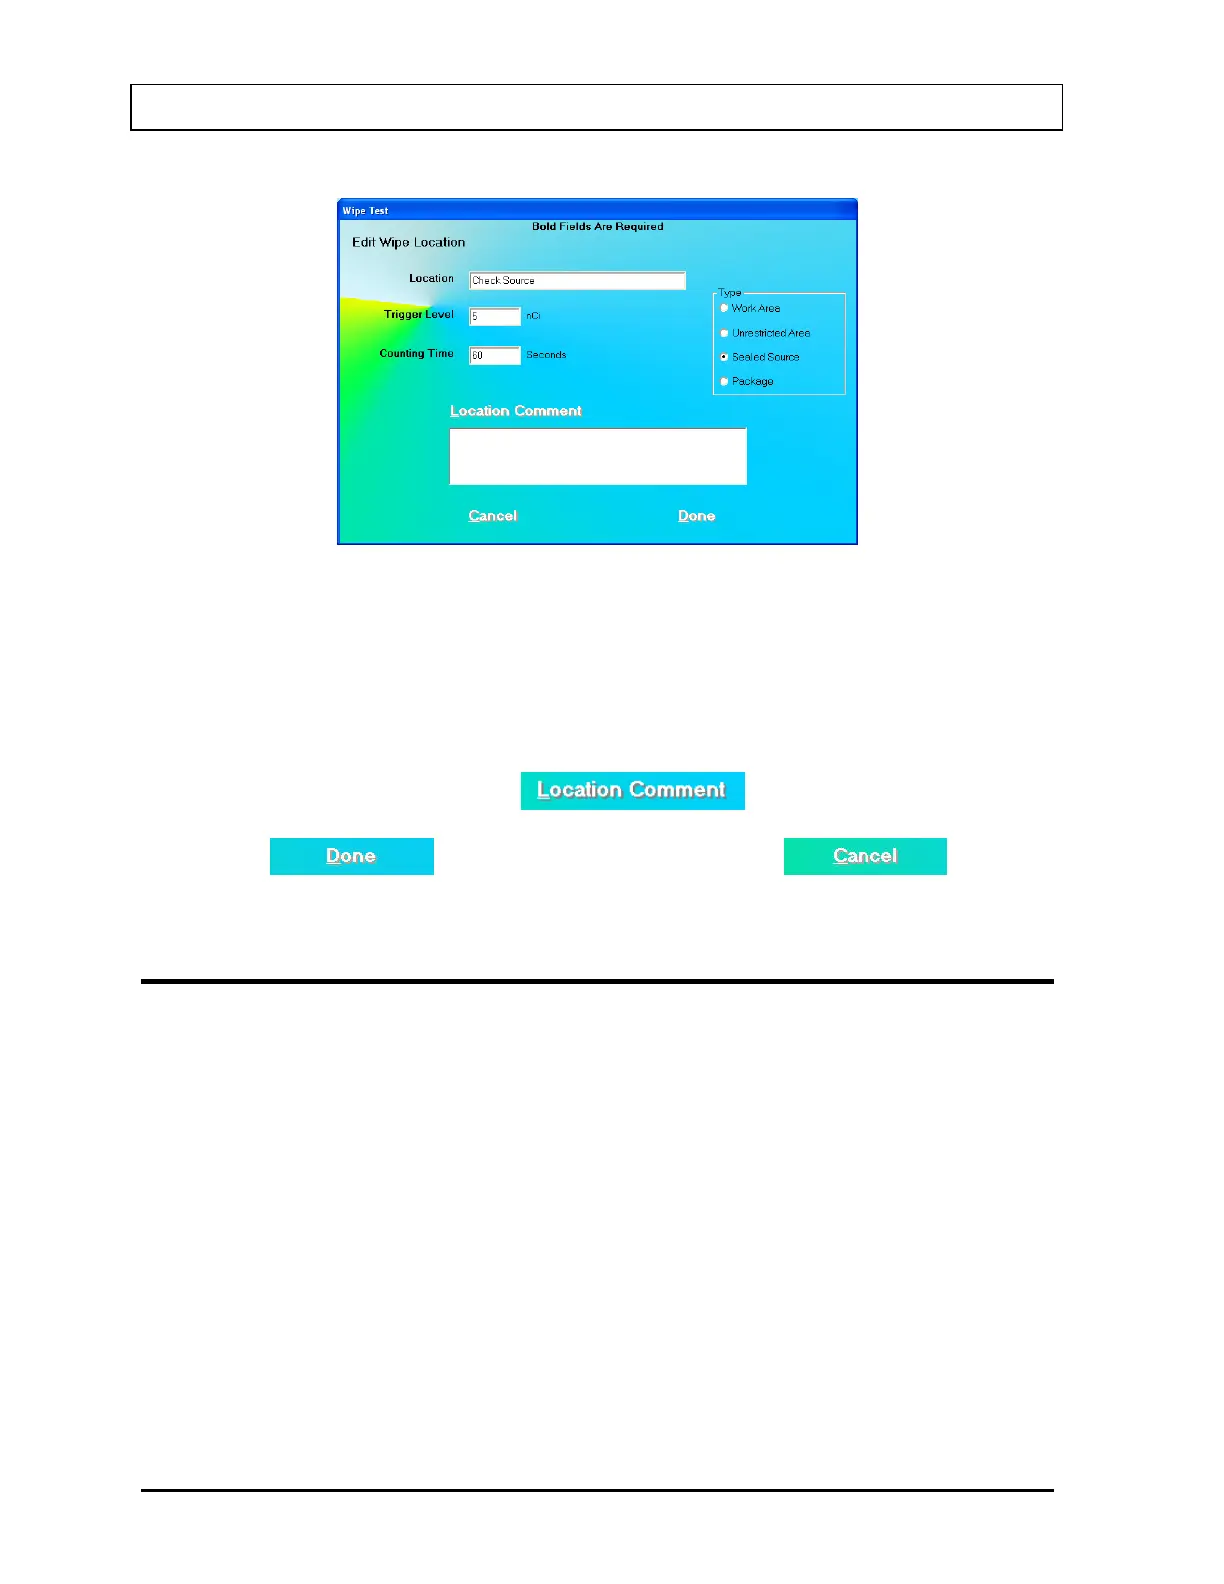
Figure 8-9 Edit Wipe Location Screen
5. Click in the appropriate text box or Type frame radio button. Type over the existing
information.
Note: To move between data fields use the Tab key. To select Type of wipe location
use
or
keys.
6. To edit or add comments, click the
button.
7. Click the
button to save changes or click the button to
cancel the changes and return to Figure 8-2 Main Wipe Test Screen.
DELETING WIPE TEST LOCATION
Note: If you wish to save Wipe Location information before deleting, refer to CHAPTER 14:
ARCHIVE.
1. Select a group in the Preset Groups or User Defined Groups frame by clicking in its
radio button to view only those wipe locations that belong to that group.
2. Click inside the Wipe Locations box to make it active.
3. To select a wipe location for deletion, use the keys or Page Up and Page Down keys
to move up or down in the wipe location list. If the list is long, the scroll bar is also
available. To reach a particular location, press the first letter of the location name. Press
the key if necessary, to go further down.
4. To select one or more wipe locations for deletion, click in the check box to the left of the
wipe location name in the Wipe Locations box on the Main Wipe Test Screen as shown
in Figure 8-10. A check should appear in the check box to indicate it has been selected.
8-10 WIPE TESTS November 13