CAPINTEC, INC. CAPTUS
®
3000
7. Click the button or press Alt+D to save changes or click the
button or press Alt+C to cancel the changes and return to Figure 8-2
Main Wipe Test Screen.
• To move between data fields use the Tab key, and to select Type of wipe
location use or keys.
• To better organize your wipe test routine, sort the added locations into groups
depending on their functionality. Refer to
ADDING WIPE LOCATIONS TO
PRESET GROUPS below for details.
ADDING WIPE LOCATIONS TO USER DEFINED GROUPS
To organize routine measurements, group the Preset Group wipe locations according to your
needs. You may then perform various functions on any set of wipe locations or group as
defined by you.
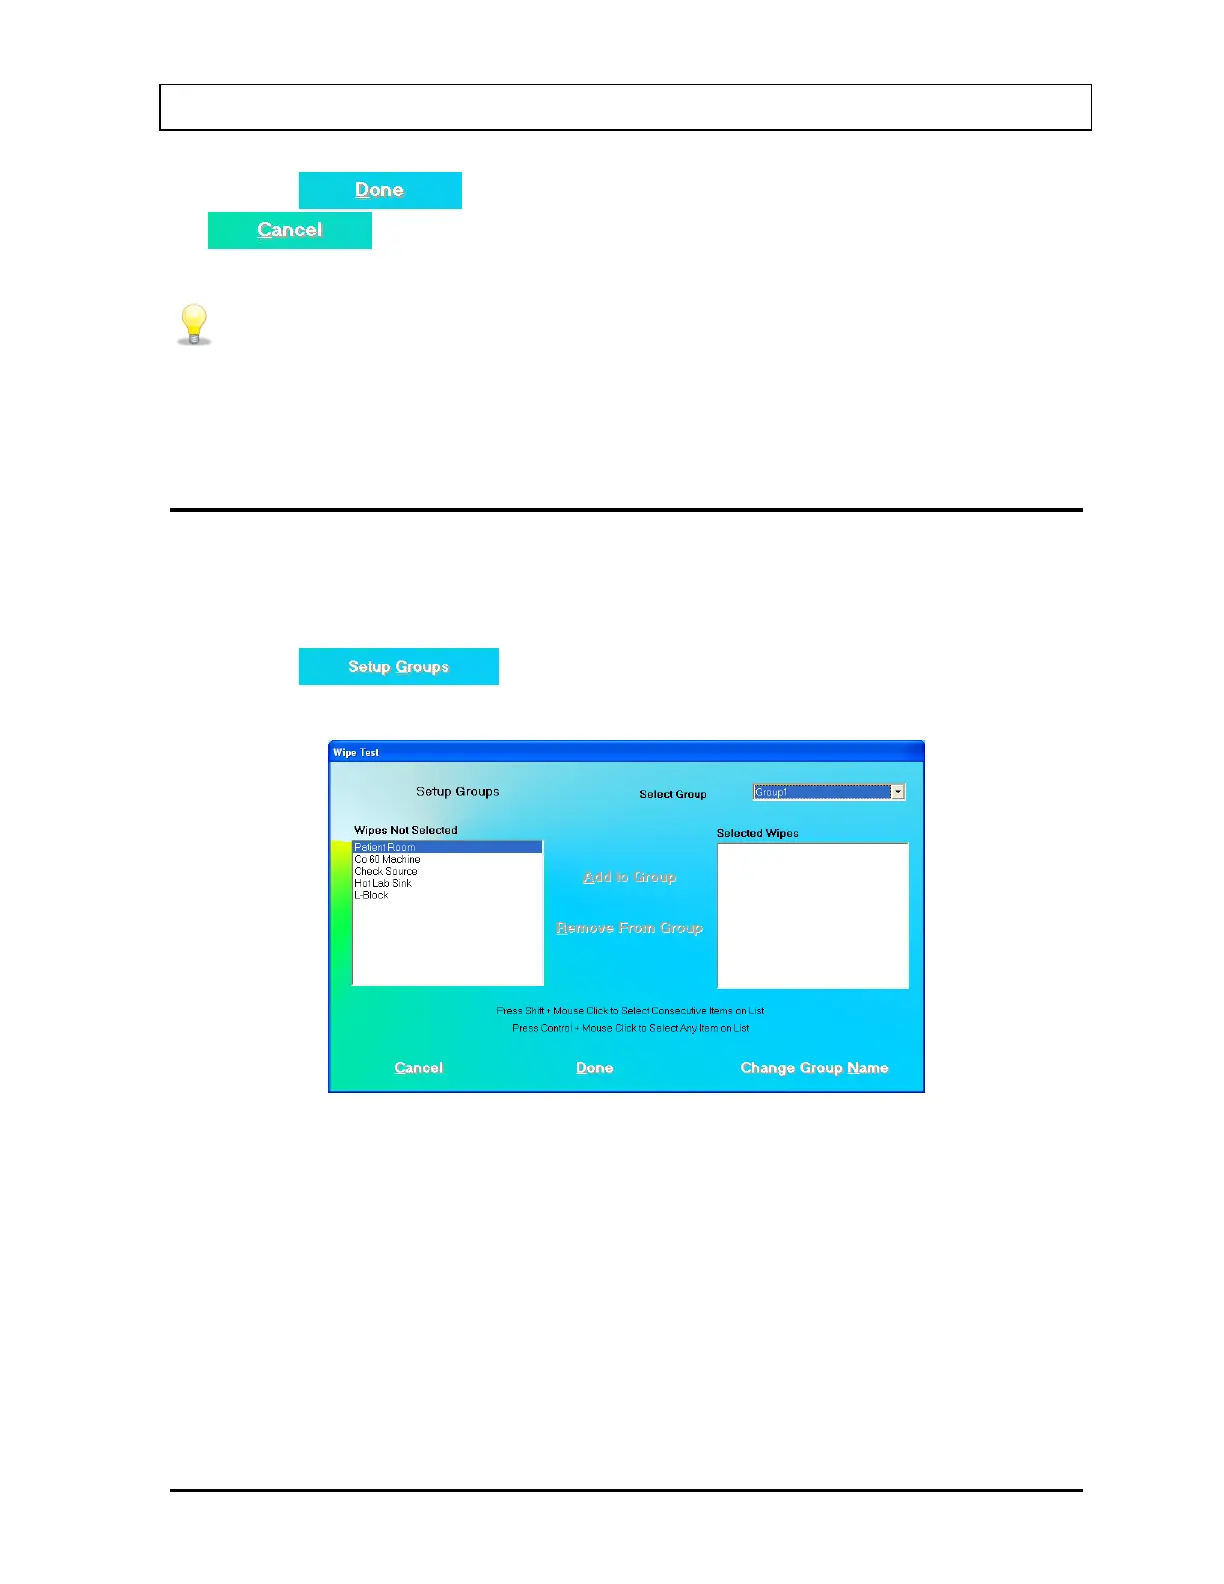
1. Click the
button or press Alt+G on Figure 8-2 Main Wipe Test
Screen. Figure 8-6 will appear.
Figure 8-6 Setup Groups Screen
2. Click in the Select Group drop-down box and click on a group to define or make
changes. The Selected Wipes box indicates any existing wipe locations that are included
in that group. You may define up to five different groups.
3. To add wipe locations to the selected group,
a. Click on the wipe location you want to add in the Wipes Not Selected box.
Note: To select a range of locations, click on the first location. Then, hold down the
Shift key while clicking on the last location. Or click and hold the mouse button
November 13 WIPE TESTS 8-7