CAPINTEC, INC. CAPTUS
®
3000
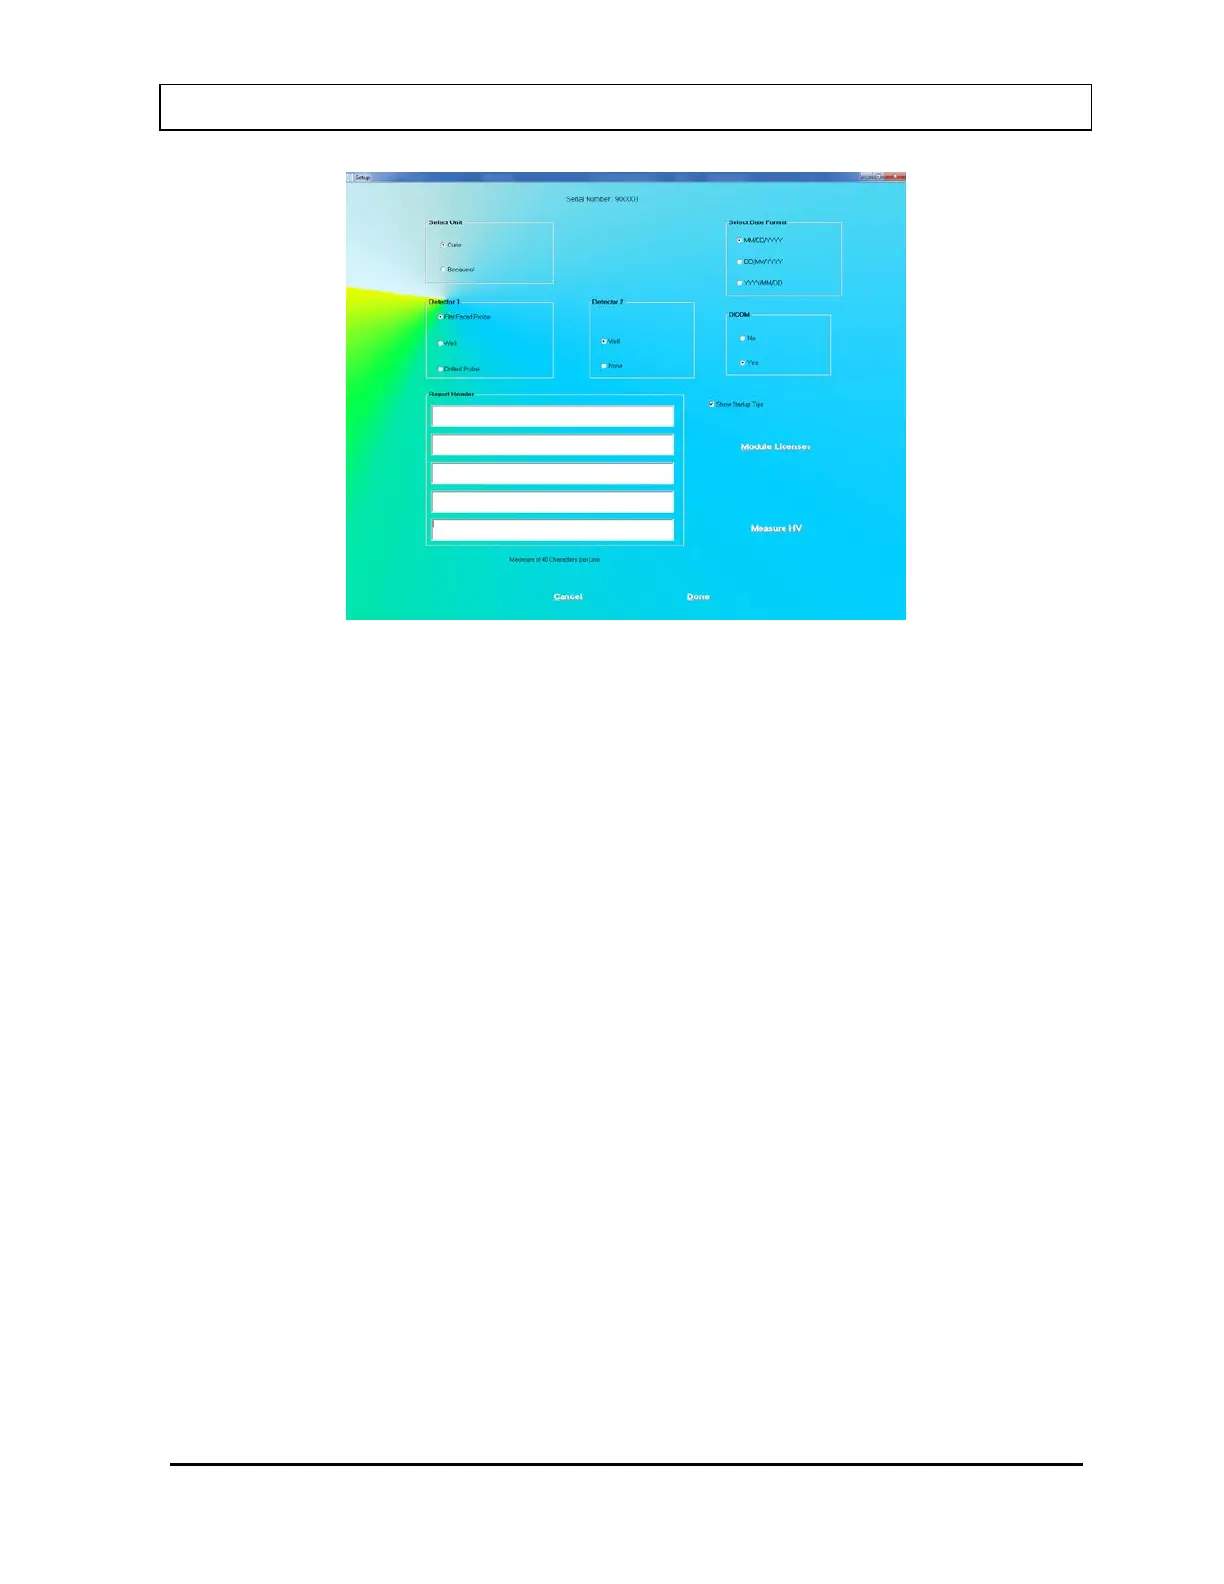
Figure 4-10 Setup Module Screen
Except for the report header, all other parameters are predefined with default settings.
The Serial Number at the top of the screen is specific to your system and is set at the
factory.
2. To change the default settings for unit of activity, mode of printing or format of the date,
click in the appropriate radio button. You can safely change any of these at any time
during the use of your system.
Note: If the date format is changed, the conversion will apply to stored data also. If the
unit for counts is changed, the new unit will apply to the new measurements only.
3. To select another detector type, click on one of the radio buttons in the Detector 1 box.
The Detector 2 box options, Well and None, are applicable, only when you select a Flat
Faced Probe as Detector 1.
Note: Your detector setting has been selected for the specific hardware shipped with
your system. Therefore, detector default should not be changed without
consulting with the technical service staff at Capintec.
4. If Cap-DICOM Software is installed on you system, select the Yes radio button in the
DICOM Frame. Otherwise, select the No radio button.
5. To enter a heading for each printed report, click in the first blank box under Report
Header. Enter the first line of the header. The length of each line is limited to 40
characters per line. To enter another line, click in the blank box below or press the Tab
key. An example of report header is as given below in Figure 4-11 Report Header
Frame. This header will appear centered at the top of each report printout.
November 13 GENERAL SETUP 4-13