Recording Images
15-28 LOGIQ 7 Basic User Manual
Direction 2392206-100 Rev. 1
Sony UP-D895
Follow these steps to set up the Sony UP-D895 printer.
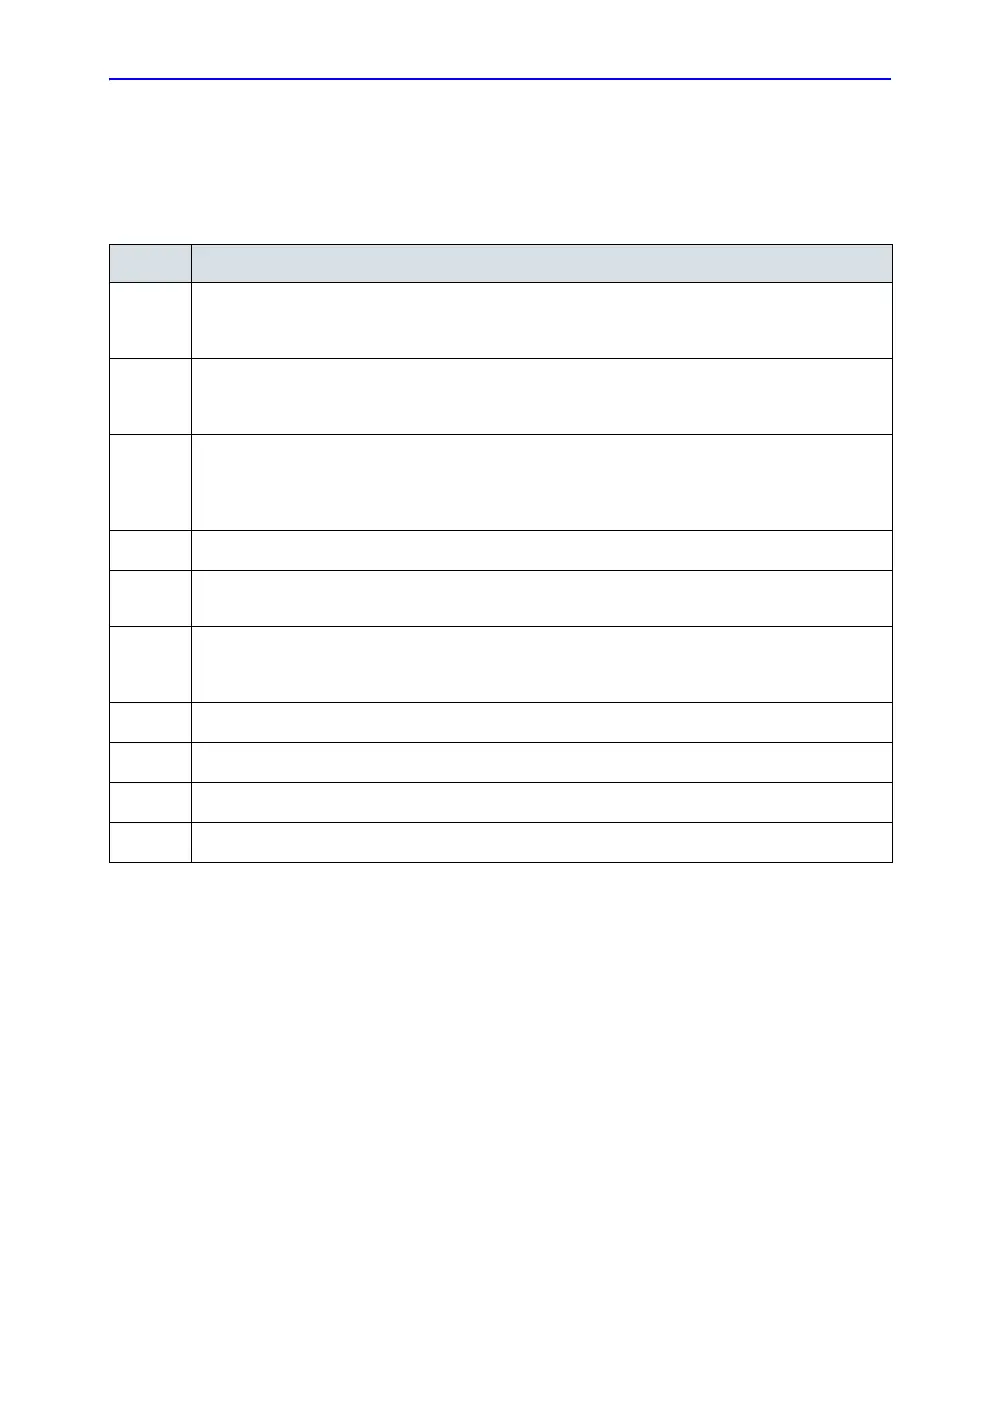
Table 15-4: Sony UP-D895 Instructions
Step Instructions
1.
Press Utility-->System-->Peripherals. Select Printers. Select the UP-D895 printer, then right
click (usually with the left Set key) and select Properties. Select Printing Preferences at the
bottom of the page.
2.
Select the Layout Tab and select Landscape.
Note: Landscape values set up in Utility-->Connectivity-->Stnadard Print take precedence over
this setting.
3.
Press the Advanced button at the borrom of the Layout page. Select 1920x1280 from the Paper
Size pull-down menu. Select Density Adjust. Select Properties. Set Gamma to SOFT (TONE3).
Set Dark to 0, set Light to 0, and set Sharpness to 0. Press Save. Save the file to the
recommended location. Press Save again. Press OK twice. Press Apply. Press OK.
4.
On the Properties page, select the Sharing Tab. Ensure that Not shared is selected.
5.
Select the Ports Tab. Select the USB Port for Sony UP-D895. Select Enable bidirectional
support.
6.
Select the Advanced Tab. Select: Always Available, Priority 1, Driver for Sony UP-D50, Spool
print documents so program finishes printing fastest, Start printing after last page is spooled,
Print spooled documents first, and Enable advanced printing features.
7.
Select the Color Management Tab. Select Automatic.
8.
Select the Security Tab. Specify permissions for each user group.
9.
Press OK.
10.
Press Save and Exit.

 Loading...


