GE HEALTHCARE
DIRECTION FC091194, REVISION 11 VIVID 7 SERVICE MANUAL
3 - 90 Section 3-10 - Connectivity Setup - Software v3.x
3-10-4 Select TCP/IP Set-up Screen - Software Version v3.x
1.) Press CONFIG (F2) and log on as adm, see 4-2-4 "Log On to the System as ‘ADM’" on page 4-12.
2.) If not already selected, select CONNECTIVITY
from the bottom row of “buttons” on the screen.
3.) Select the TCP/IP TAB (it is named Tcpip).
.
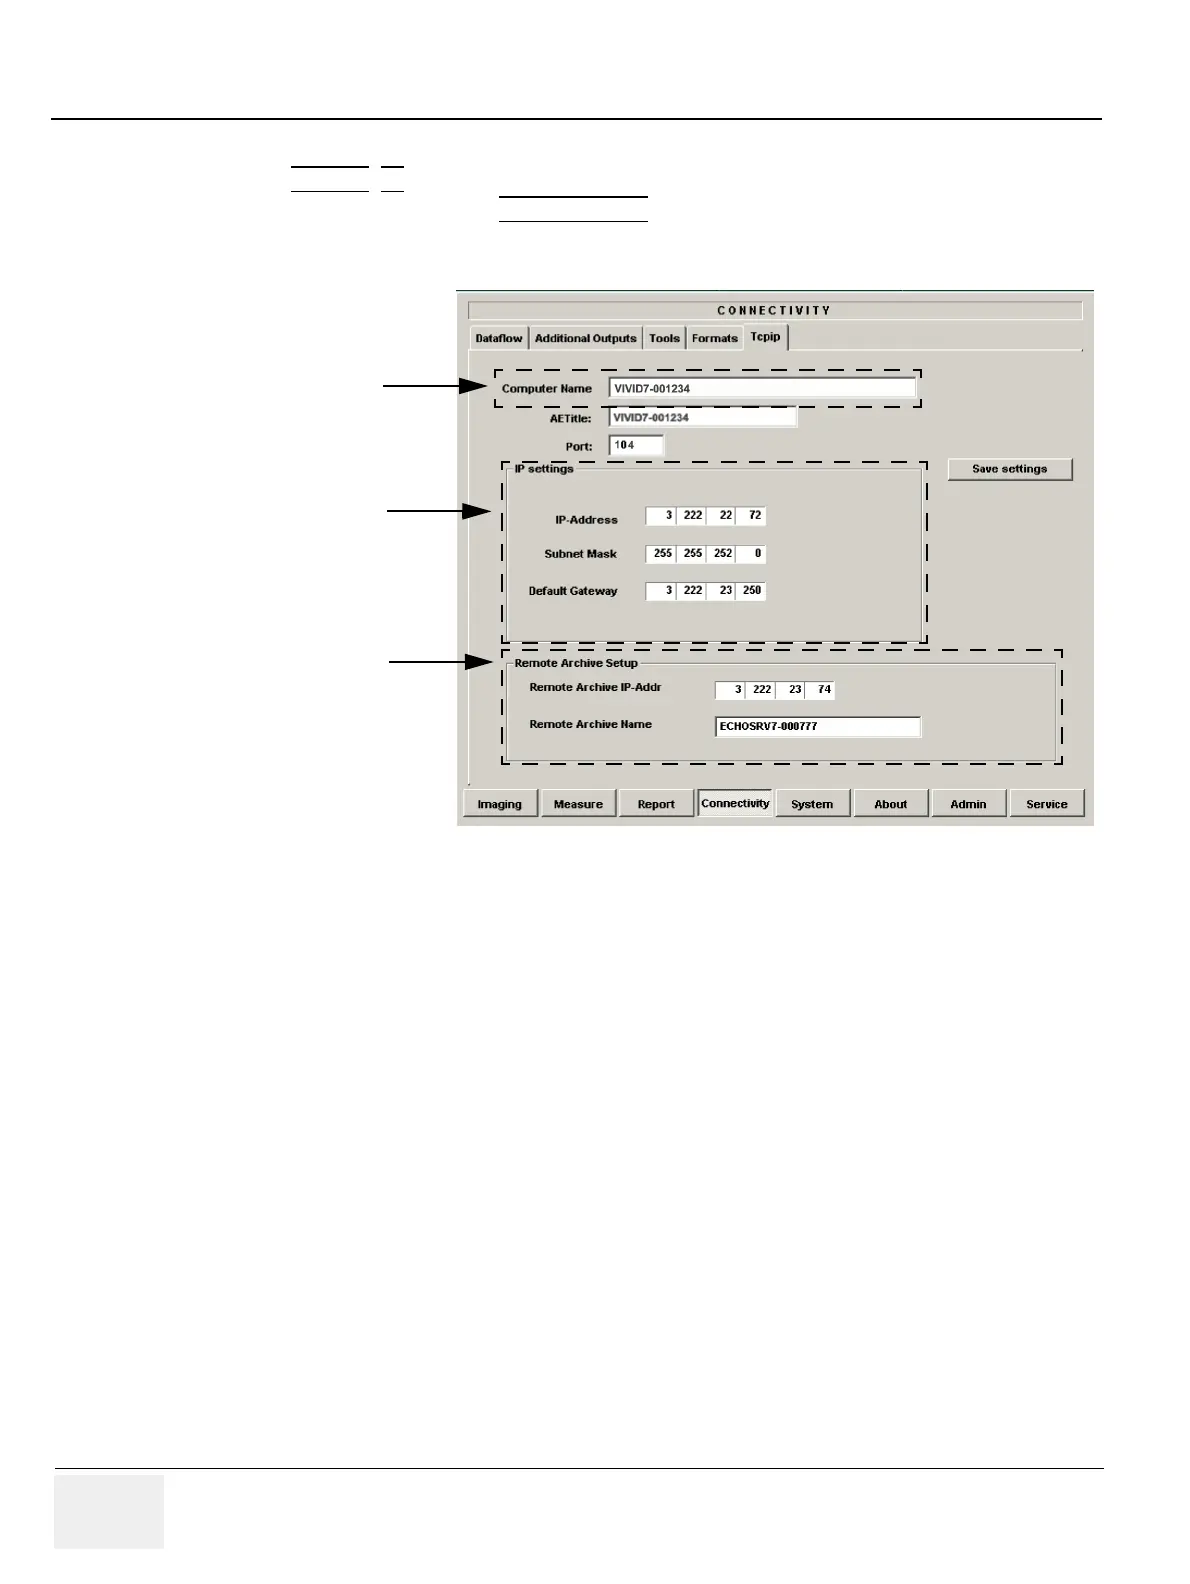
Figure 3-93 TCP/IP Set-up screen for Vivid 7, Overview (Example)
Computer Name:
For Vivid 7, this name is on the form: Vivid7-
00nnnn, where “00nnnn” is a number (nnnn is the
scanner’s serial number).
IP SETTINGS:
IP SETTINGS AREA FOR THE Vivid 7
SCANNER.
DEFAULT SETUP:
IP-ADDRESS: 10.0.0.3
SUBNET MASK: 255.255.255.255
GATEWAY: 0.0.0.0
Remote Archive Setup area:
IP settings area for a Remote Archive.
Example: EchoServer.
Default Setup:
Remote Archive IP-Addr: 10.0.0.4
Remote Archive Name: EchoPAC7-000001
The AETitles field and the Port field are only available on BT’03 software (and beyond).

 Loading...


