GE HEALTHCARE
DIRECTION FC091194, REVISION 11 VIVID 7 SERVICE MANUAL
8 - 10 Section 8-6 - Lower Rear Cover Replacements Procedure
Section 8-6
Lower Rear Cover Replacements Procedure
8-6-1 Manpower
One person, 30 minutes
8-6-2 Tools
Phillips screwdriver size 2
8-6-3 Preparations
Shut down the system, see 4-2-3 "Power Shut Down" on page 4-7.
8-6-4 Lower Rear Cover Removal Procedure
1.) Remove Filter Cover shown in "Upper Rear Cover Removal Procedure" on page 8-6.
2.) Remove both Side Covers, see "Side Covers Removal Procedure" on page 8-4.
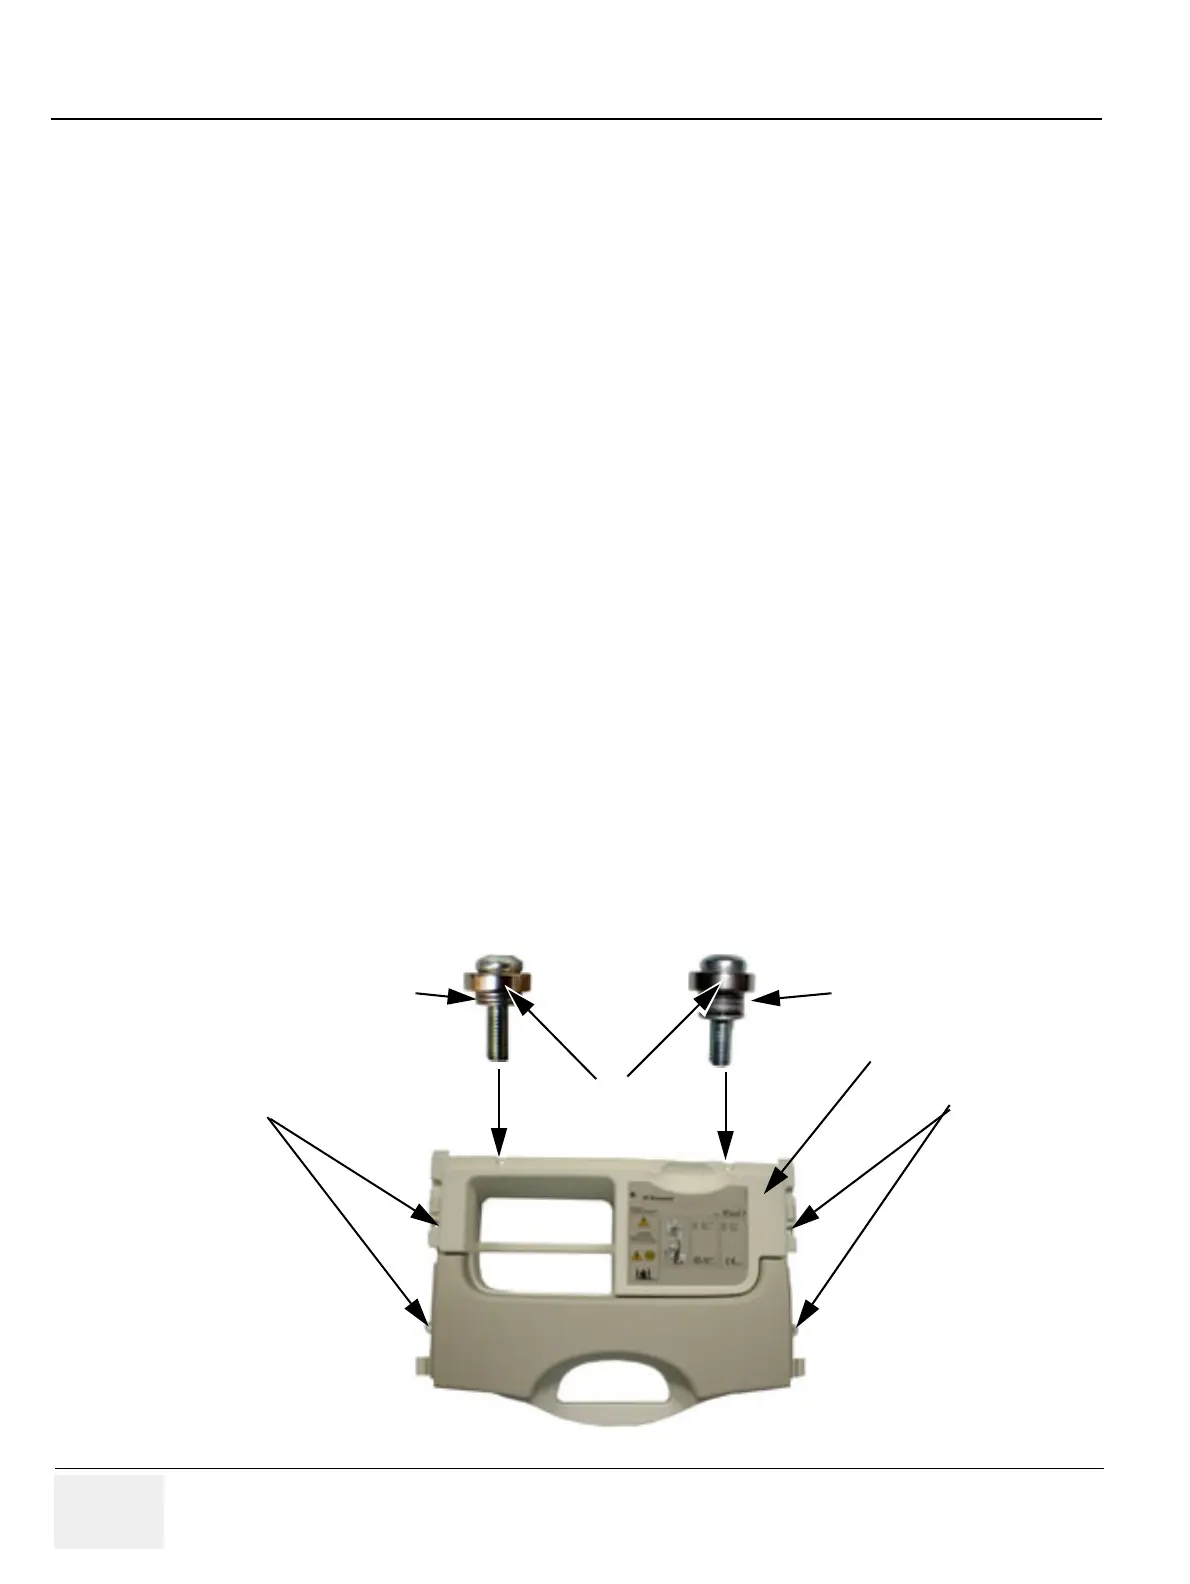
3.) Unscrew two (2) screws with magnetic lock (part number 080X1200) for Filter Cover. Left screw
contains also 3 or 4 washers (080C2053), right screw 5 or 6 washers, depending on thickness of
Lower Rear Cover.
4.) Unscrew four (4) remaining Phillips screws that fasten Lower Rear Cover to the chassis (See
Figure 8-5).
5.) Remove Lower Rear Cover.
8-6-5 Lower Rear Cover Installation Procedure
1.) Align Lower Rear Cover with the chassis and fasten it with eight (8) Phillips screws.
2.) Install Filter Cover, see "Upper Rear Cover Installation Procedure" on page 8-6 and Side Covers,
see "Side Covers Installation Procedure" on page 8-5.
3.) New Lower Rear Cover: Install correct label, see Section 1-5 "Labels Locations" on page 1-20.
Figure 8-8 Lower Rear Cover Fastening Locations.
Screws
Lower Rear Cover
Screws
Magnetic lock
5 - 6 washers
3 - 4 washers

 Loading...