There is no mounting hole in the center of the chassis that corresponds to the hole in
the center of the bracket.
6. Insert the two screws at the top of the bracket and tighten each partially.
Two screws are needed for mounting the bracket on the center of the chassis. You
do not need the third screw.
7. Tighten the two screws completely.
8. Repeat the procedure for the other bracket.
Related
Documentation
Mounting an EX9200 Switch on a Rack or Cabinet Using a Mechanical Lift on page 165•
• Mounting an EX9204 Switch on a Rack or Cabinet Without Using a Mechanical Lift
• Mounting an EX9208 Switch on a Rack or Cabinet Without Using a Mechanical Lift on
page 168
• Installing a Mounting Shelf in a Rack or Cabinet for an EX9204 Switch
• Installing a Mounting Shelf in a Rack or Cabinet for an EX9208 Switch on page 162
• Installing a Mounting Shelf in a Rack or Cabinet for an EX9214 Switch
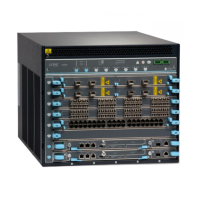
Mounting an EX9200 Switch on a Rack or Cabinet Using a Mechanical Lift
Because of the size and weight of the switch, we strongly recommend using a mechanical
lift to install the switch.
CAUTION: Do not install line cards in the chassis until after you mount the
chassis securely on a rack or cabinet.
CAUTION: Before front-mounting the switch on a rack or cabinet, have a
qualifiedtechnician verifythatthe rackor cabinetis strong enoughto support
the weight of the switch and is adequately supported at the installation site.
Before you install the switch:
•
Prepare the site for installation as described in Site Preparation Checklist for an EX9204
Switch, “Site Preparation Checklist for an EX9208 Switch” on page 79, or Site
Preparation Checklist for an EX9214 Switch.
•
Ensure the site has adequate clearance for both airflow and hardware maintenance
as described in Clearance Requirements for Airflow and Hardware Maintenance for an
EX9204 Switch, “Clearance Requirements for Airflow and Hardware Maintenance for
an EX9208 Switch” on page 88, or Clearance Requirements for Airflow and Hardware
Maintenance for an EX9214 Switch.
•
Ensure you understand how to prevent electrostatic discharge (ESD) damage. See
“Prevention of Electrostatic Discharge Damage” on page 351.
165Copyright © 2017, Juniper Networks, Inc.
Chapter 11: Installing the Switch

 Loading...