Table 67: Special Instructions to Follow Before Connecting Earth Ground to a Switch (continued)
Special InstructionsSwitch
NOTE: If you plan to mount your switch on four posts of a rack or cabinet, mount your switch in the rack
or cabinet before attaching the grounding lug to the switch. See Mounting an EX4500 Switch on Four Posts
in a Rack or Cabinet.
NOTE: The protective earthing terminal on an EX4500 switch mounted on four posts of a rack is accessible
through the slot on the left rear bracket only if the rack is 27.5 in. (69.85 cm) through 30.5 in. (77.47 cm)
deep for a switch mounted flush with the rack front and 29.5 in. (74.93 cm) through 32.5 in. (82.55 cm)
deep for a switch mounted 2 in. (5.08 cm) recessed from the rack front.
EX4500
NOTE: The protective earthing terminal on an EX4550 switch mounted on four posts of a rack is accessible
through the slot on the left rear bracket only if the rack is 27.5 in. (69.85 cm) through 30.5 in. (77.47 cm)
deep for a switch mounted flush with the rack front and 29.5 in. (74.93 cm) through 32.5 in. (82.55 cm)
deep for a switch mounted 2 in. (5.08 cm) recessed from the rack front.
EX4550
NOTE: Only one of the two protective earthing terminals needs to be permanently connected to earth
ground.
EX8216
Connecting Earth Ground to an EX Series Switch
To connect earth ground to a switch:
1. Connect one end of the grounding cable to a proper earth ground, such as the rack in
which the switch is mounted.
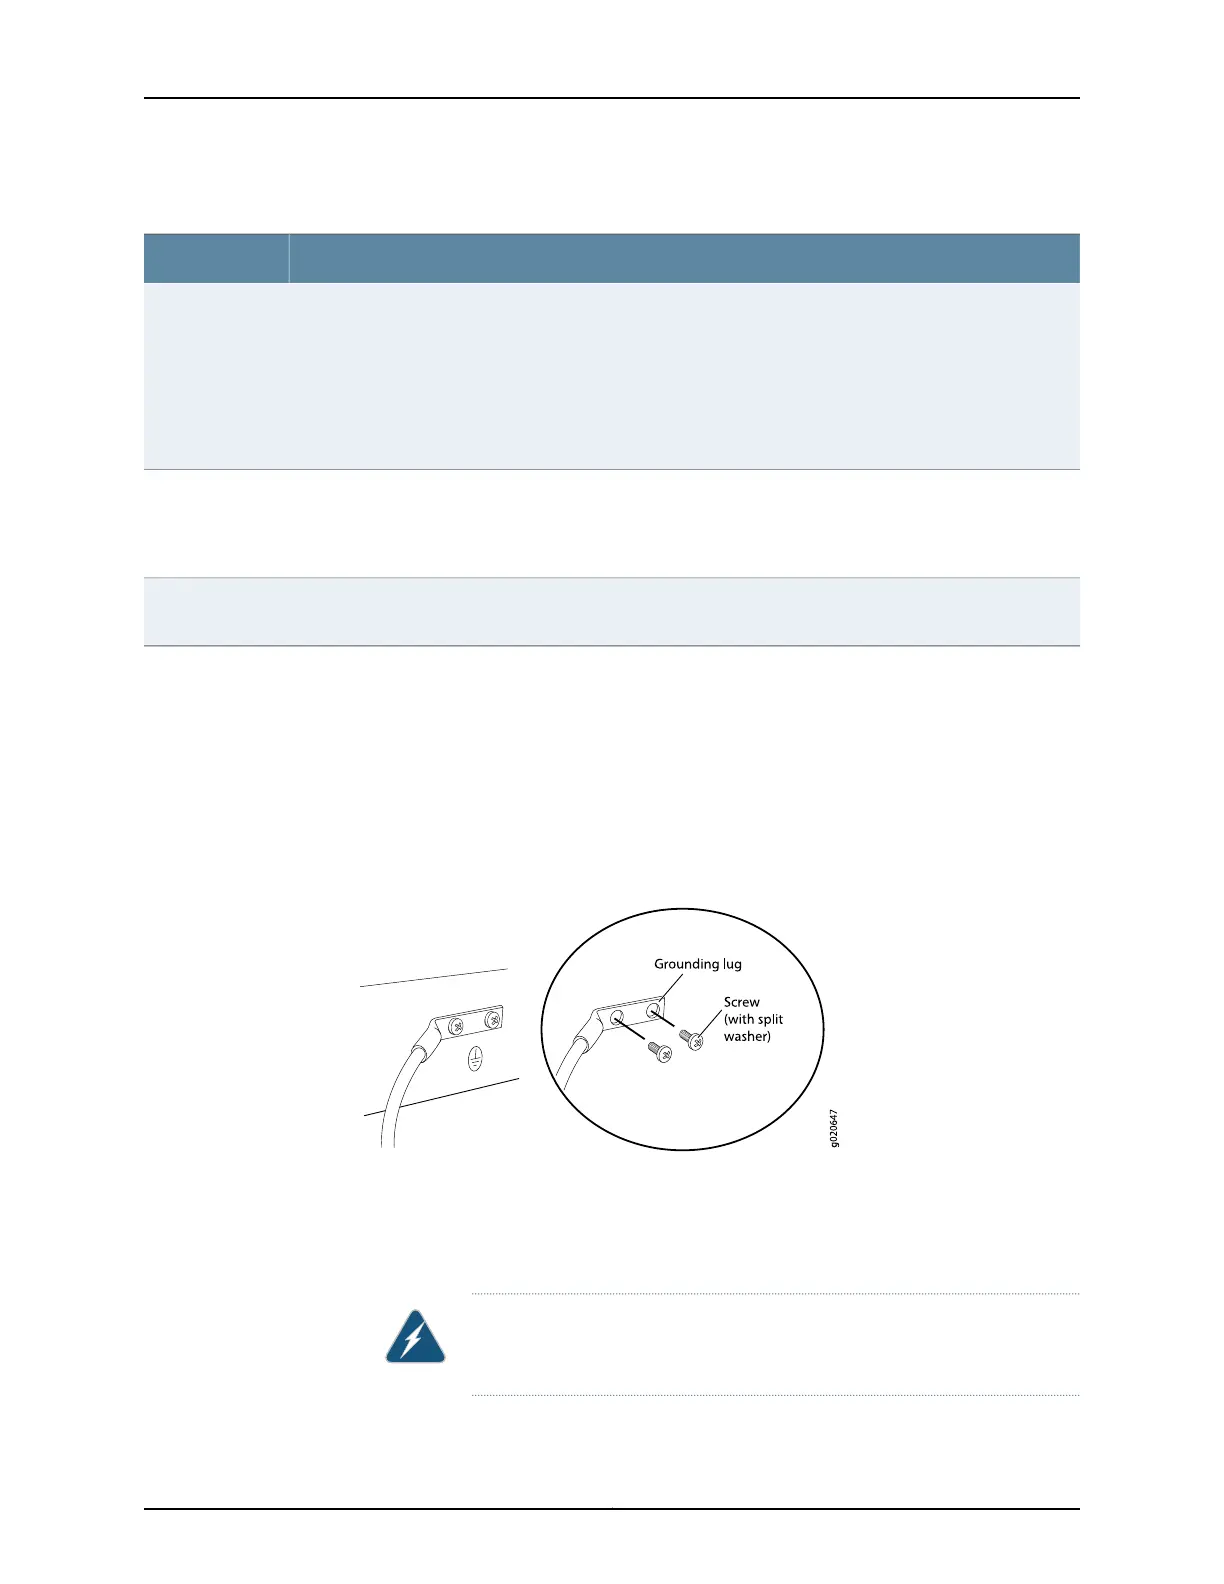
2. Place the grounding lug attached to the grounding cable over the protective earthing
terminal. See Figure 50 on page 178.
Figure 50: Connecting a Grounding Cable to an EX Series Switch
3. Secure the grounding lug to the protective earthing terminal with the washers and
screws.
4. Dress the grounding cable and ensure that it does not touch or block access to other
switch components.
WARNING: Ensure that the cable does not drape where people could trip
over it.
Copyright © 2017, Juniper Networks, Inc.178
EX9208 Switch Hardware Guide