Chapter 5: Changing the System Setup
MP65492–1 111 Linx 4900 Operating Manual
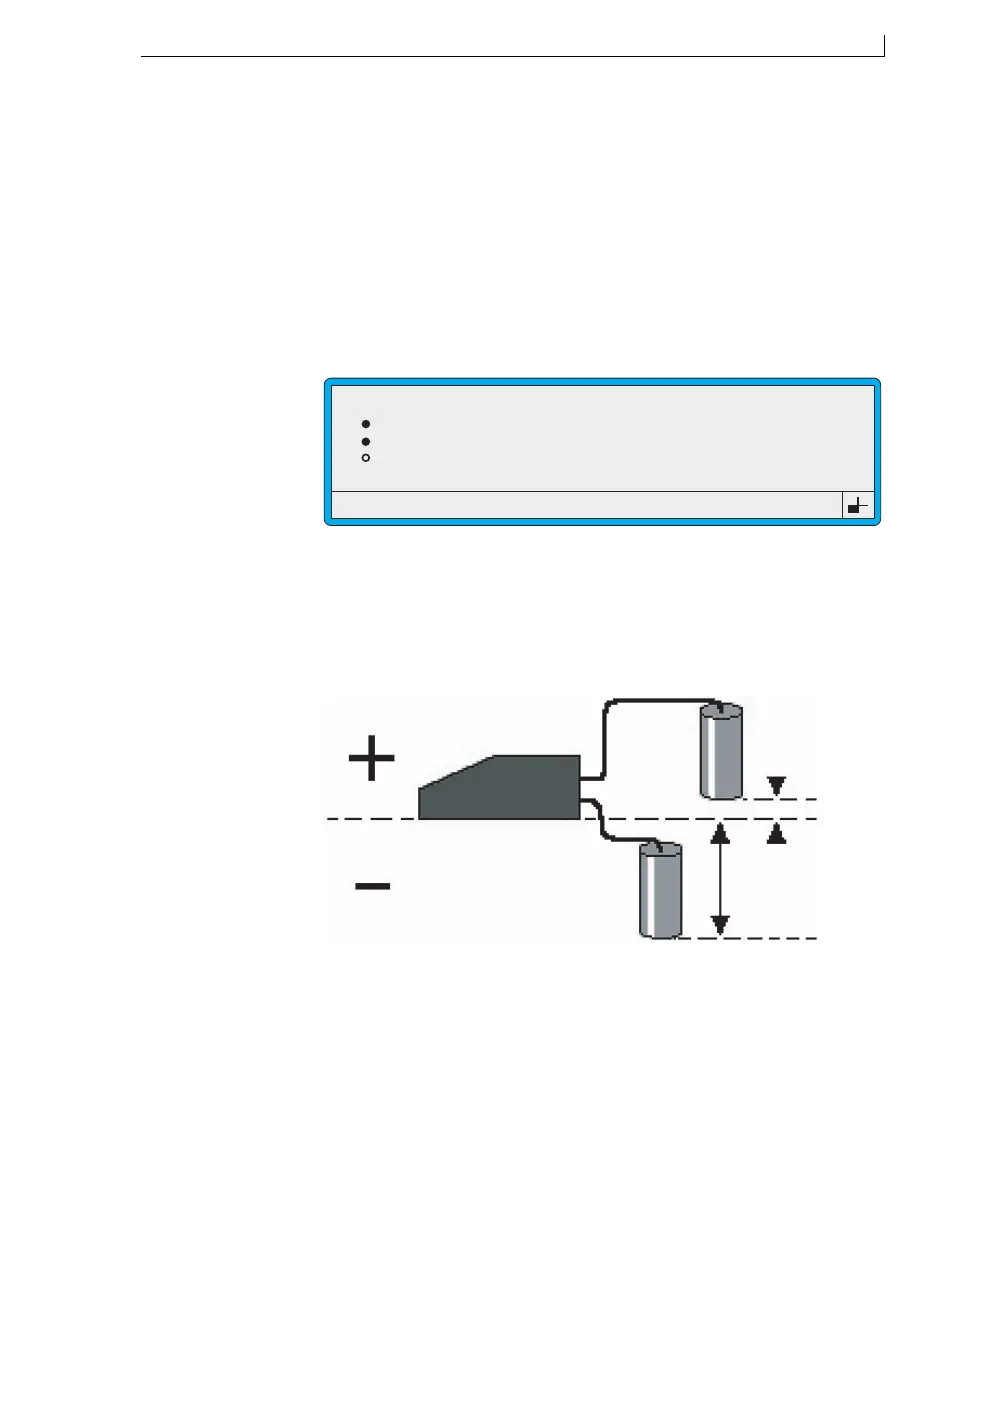
5.5.4 To Set the Head Height
The head height is the distance between the end of the printhead and the
base of the printer.
To set the head height, the jet must first be stopped, then do the following:
1. At the CURRENT MESSAGE screen, press the [F4] function key.
The SETUP menu is displayed.
2. Scroll through the menu options until the cursor rests at the Head
Height option, as shown below:
Figure 5-18 Setup Menu: Head Height Option
3. Press the [enter] key.
4. At the Head Height setting, enter the distance between the end of the
printhead and the base of the printer (as shown in Figure 5-19 below).
Figure 5-19 Head Height Example
Enter the value in units of whole or half metres, for example ‘0.5m’.
If the end of the printhead is lower than the base of the printer, you
must type a negative (–) value, for example, ‘–2.0m’.
Head Height is the distance
between the end of the printhead
and the base of the printer.
Shaft Encoder
Auto Power Down
Ink Type Selection
Head Height
49075
SETUP
: On
: 3XXX
: 0.5m
>
49277
4900 Op Manual.book Page 111 Tuesday, September 9, 2003 12:32 PM