215575 255 Revision B
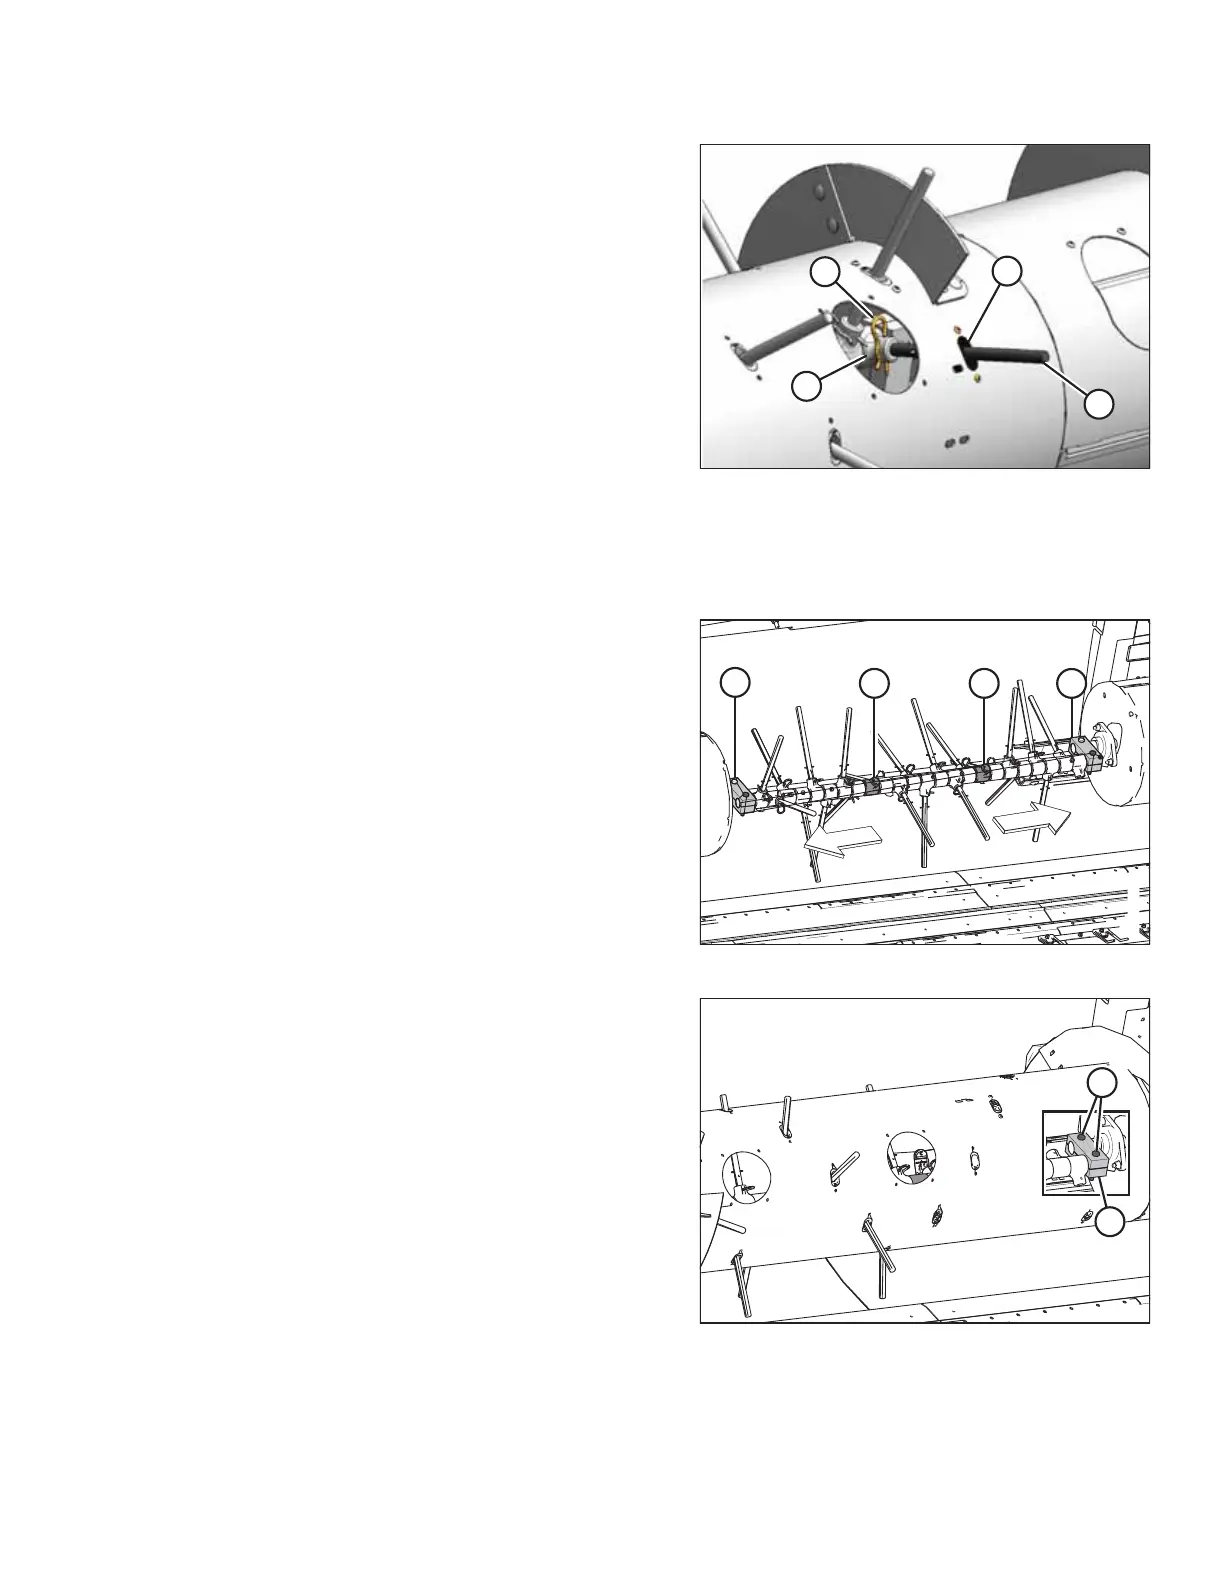
Figure 5.80: Auger Fingers
6. Reach inside the auger, remove hairpin (A) from auger
finger (B) requiring finger holder replacement, and pull the
auger finger out of finger holder (C).
7. Reach inside the auger, swivel auger finger (B) away from
finger holder (C), pull the finger from plastic guide (D), and
remove the finger from the auger.
NOTE:
Depending on the number of auger fingers (B) installed in
the auger, there may be spare holders (C) on the shaft. Look
inside the drum to see if there are any spare holders. If
there are spare holders already installed, completely
remove the damaged holder. To access the spare holder,
remove the auger fingers.
IMPORTANT:
There must always be 24 finger holders (C) on the shaft;
otherwise, the holders may slide over and cause auger
fingers (B) to fall into the drum during operation.
Figure 5.81: Auger Fingers
8. If the auger finger removed in Step 6, page 255 is on the
right side of the auger, reach inside, and remove all of the
fingers between damaged finger holder (A) and right finger
support clamp (B) as described in the following steps.
9. If the auger finger removed in Step 6, page 255 is on the
left side of the auger, remove all the fingers between
damaged finger holder (C) and left finger support clamp (D)
as described in the following steps.
NOTE:
The middle auger sheet has been removed from the
illustration for the sake of clarity.
Figure 5.82: Left Auger Finger Support Clamp —
Cutaway View Shown
10. Reach inside the auger, remove two M10 hex head bolts,
nuts, and washers (A), and remove finger support clamp (B)
from the shaft.
MAINTENANCE AND SERVICING