¾ 5-2 ¾
System Programming Procedure
Description
TX-Z 308/824/1232/2464 System user can change the System Data flexibly.
TX-Z
308/824/1232/2464 System Programming is available only from the display telephone that is
connected to physical port No. 1.
System Initialization
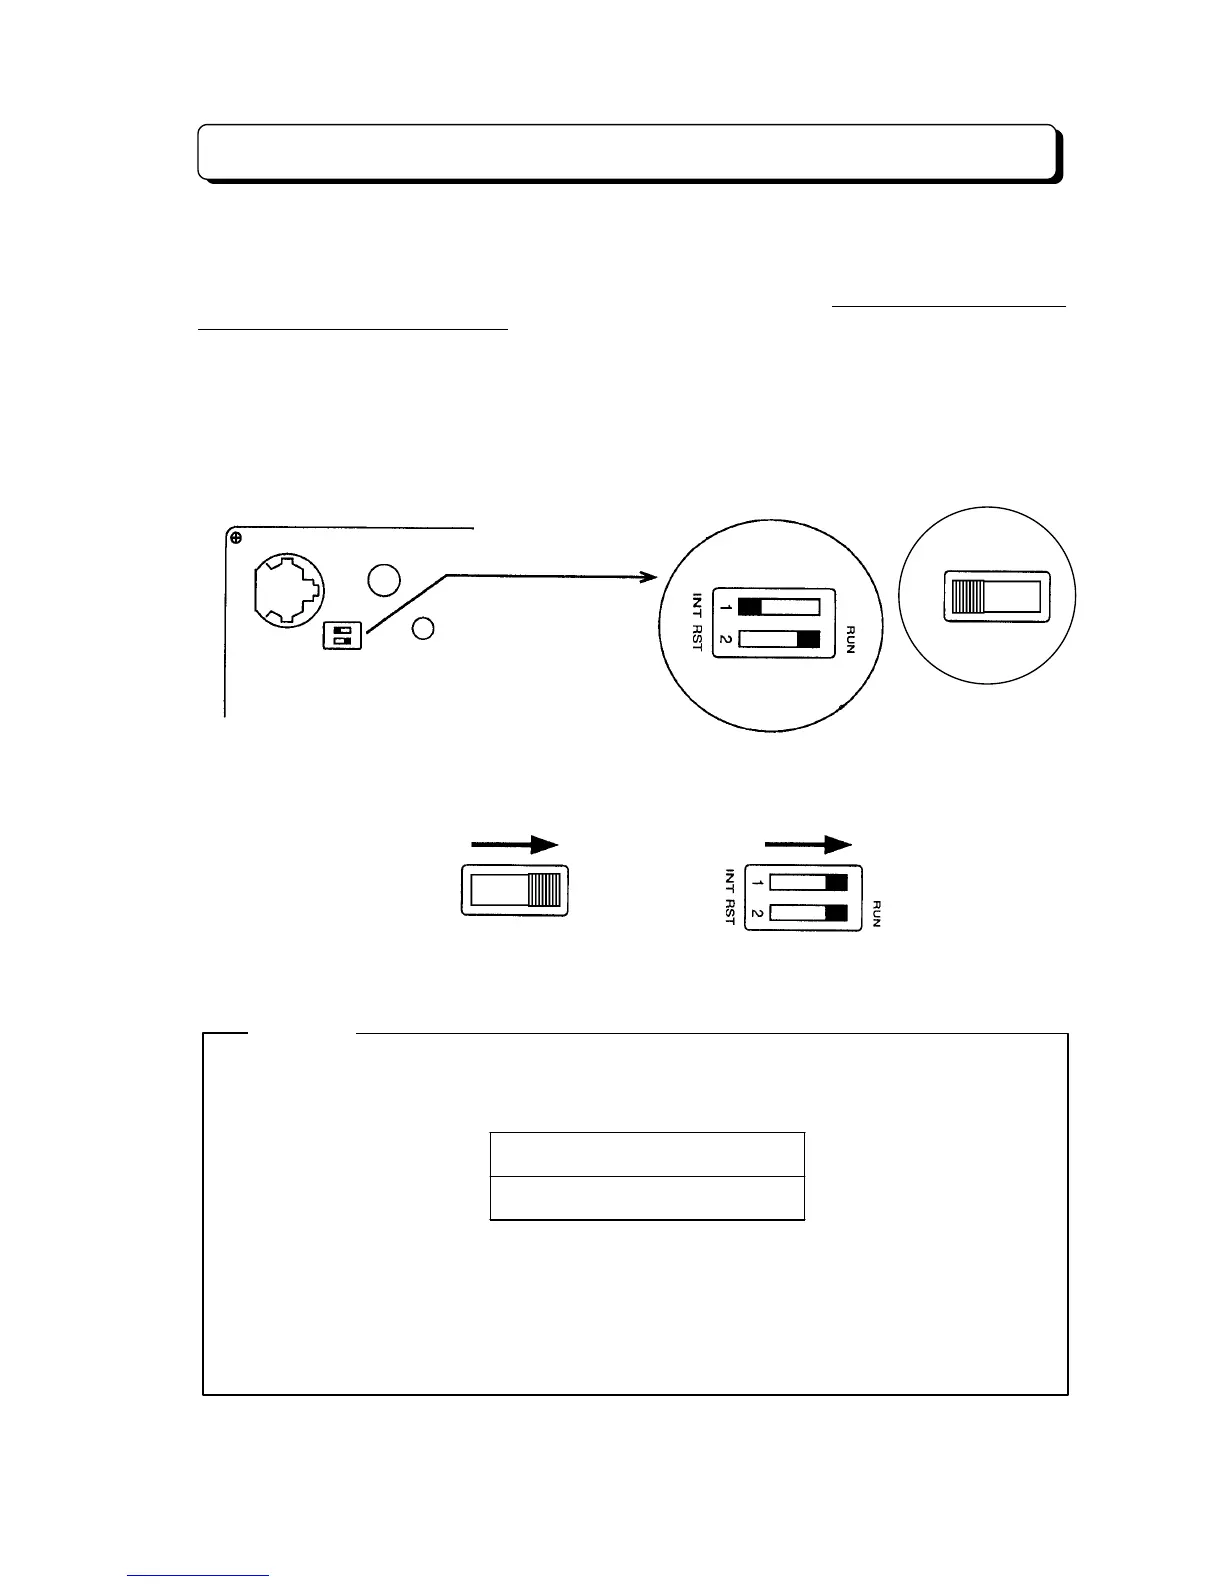
1. Power Supply switch is OFF condition.
2. When entering Programming Mode at first time, the Switch-1 on the NX7E-308M/408M-A1 or
NX7E-24CPU-B1 unit should be set at the left side to
INT
. Power up the CPU. The system is
initialized with the default values.
3. After you changed System Data, you must set the Switch-1 knob to right side to
INT
to protect
your System Data. This switch must always remain in the
RUN
position for normal operation.
(Refer to "Enter the System Data Setting Operation")
NOTICE
If you exited Programming Mode without setting Switch-1 to the right position, the Display
indicates as follows;
CHECK# SW# SETTING
#############--C
To correct this;
1. Press #. (Return to the Programming Mode)
2. Change the Switch-1 position. (Move to right to RUN)
3. Press HOLD key. (Exit from Programming Mode)
(TX-Z 824/1232/2464)
RST
NX7E-408M-A1 or NX7E-24CPU-B1
(TX-Z 308)
INT
SW1
(TX-Z 308) (TX-Z 824/1232/2464)
INT