¾
3-3-1
¾
Installing the TX-Z 2464 Main Equipment
The Main Equipment should be installed in a clean, dry, centrally located spot (such as a closet), where it
is out of direct sunlight. The area should be free of moisture (water, dampness, etc.), and away from any
equipment which might vibrate. You should choose a location that is well ventilated, where the
temperature does not exceed that of a normal room.
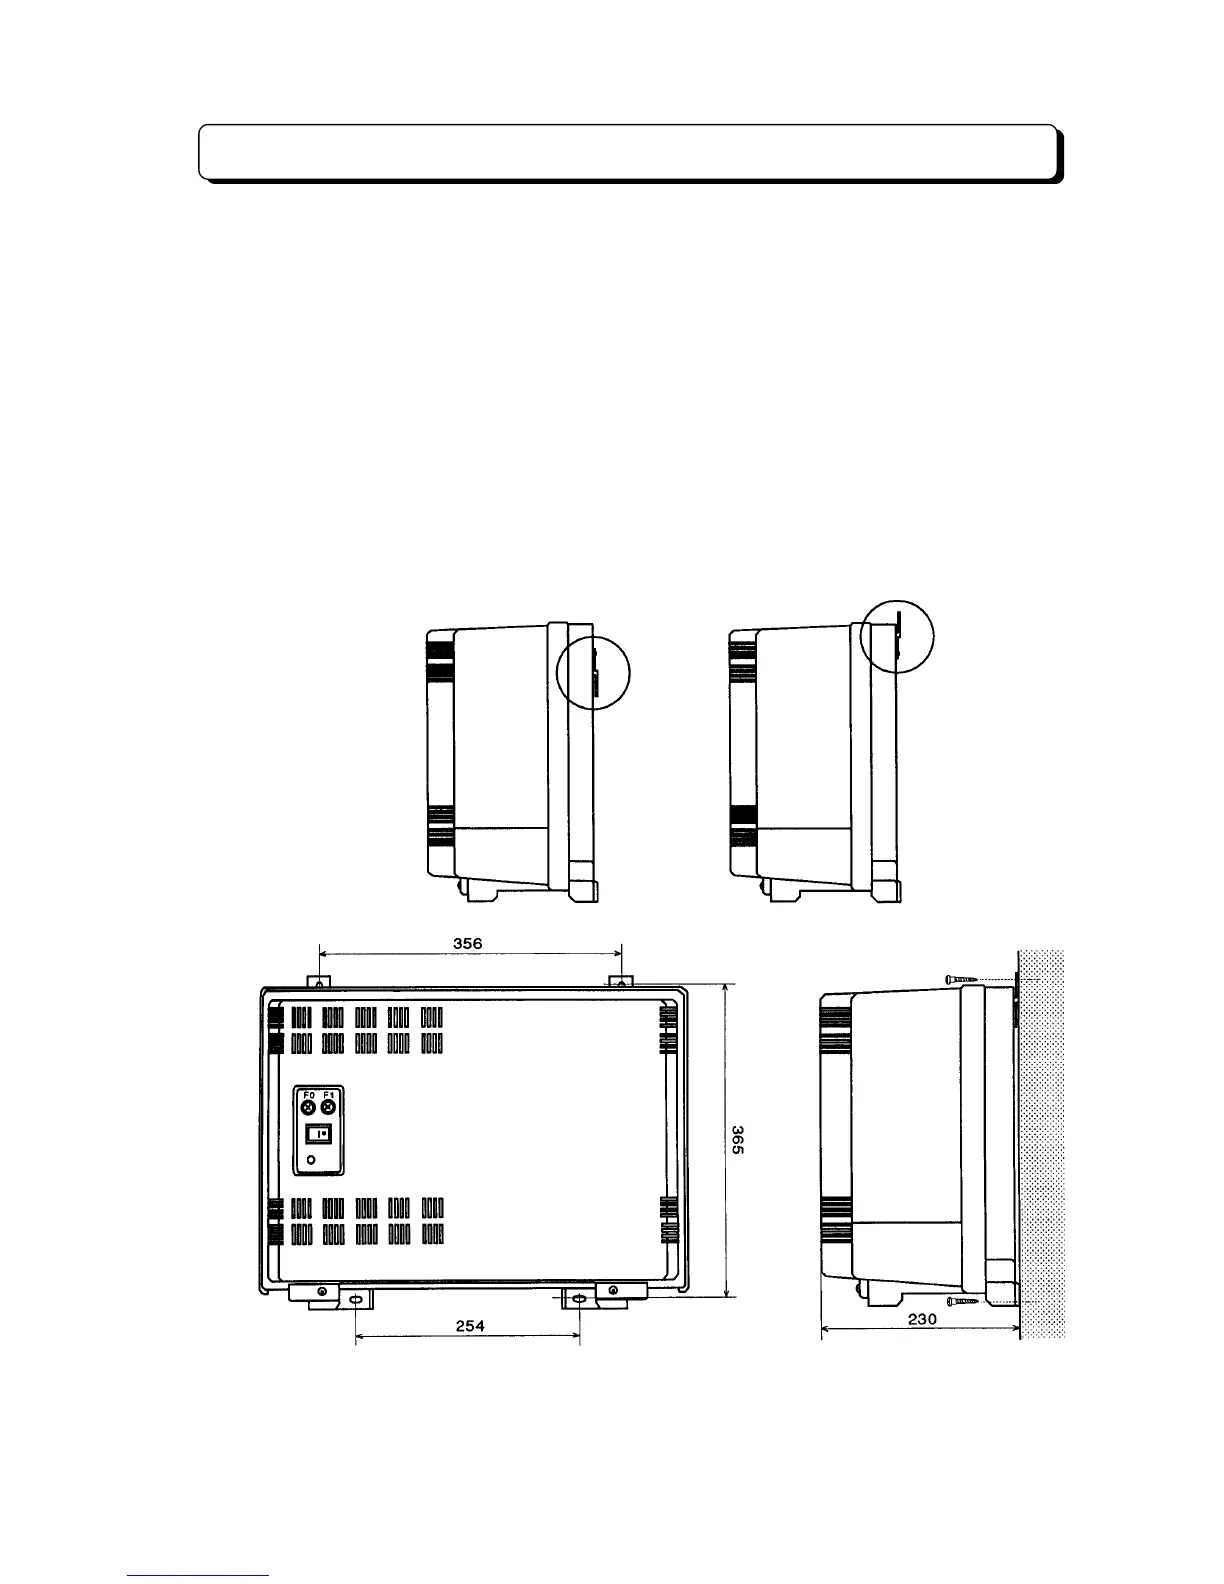
Step 1:
Remove the wall mounting brackets after loosening their two retaining screws.
Step 2:
Reinstall the mounting brackets, upside down, and screw them.
Step 3:
Tack-fasten two of the four wood screws (provided with Main Equipment) on the wall at about
356 mm apart.
Step 4:
Place the two holes of the main unit over the tacked wood screws to hang the Main Equipment
on the wall and then fully tighten the wood screws.
Step 5:
Fasten another two screws on the wall through the two bottom holes of the Main Equipment.
Note:
The wall where the TX-Z 2464 Main Equipment is to be mounted must be able to support a
weight of TX-Z 2464 Main Equipment.