¾ 7-1-5 ¾
Installing the Caller-ID Adaptor (TX-Z 824/1232/2464)
1. Installing the Caller-ID Adaptor
The Caller-ID adaptor should be installed in a
clean, dry, centrally-located spot where is out
of direct sunlight. The area should be free of
moisture (water, dampness, etc.) and away
from any equipment which might vibrate. You
should choose a location that is good
ventilated, where the temperature does not
exceed that of normal room. It must be
installed near area of TX-Z Main Equipment.
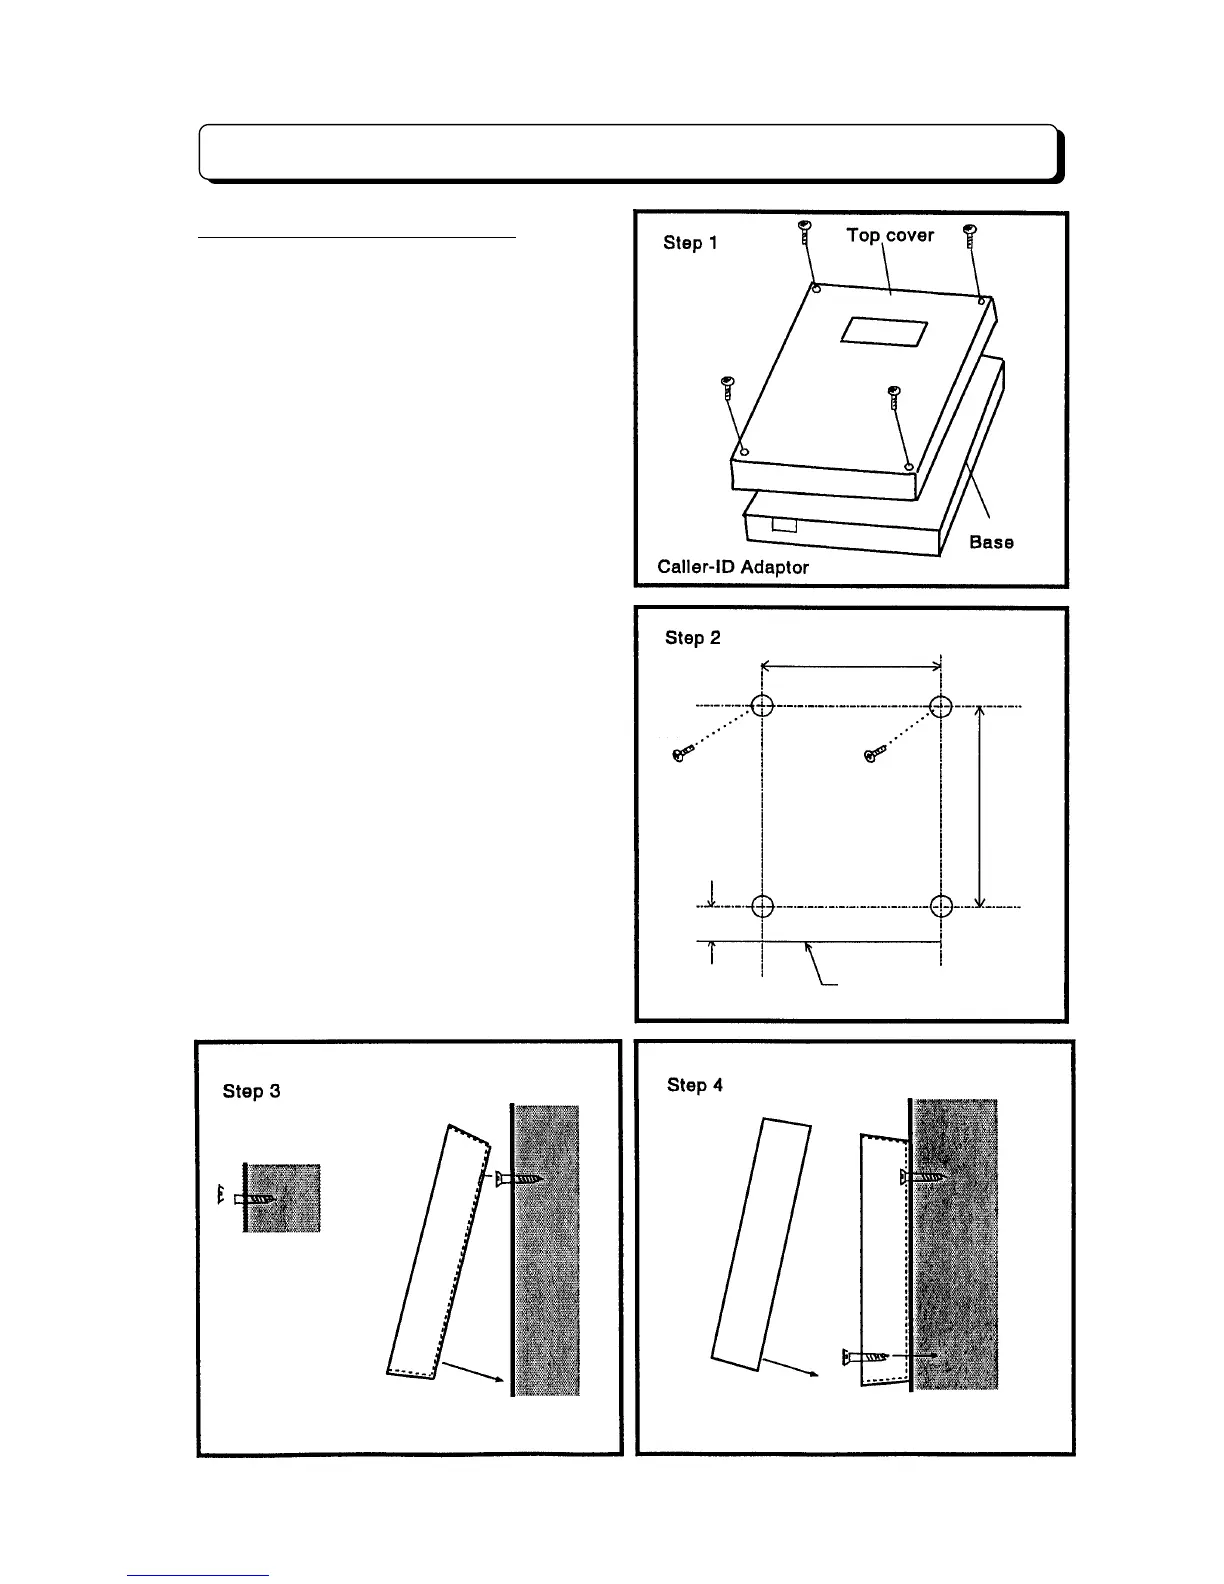
Step 1:
Loosen the four screws and take off
the top cover as the illustration.
Before wall mounting the Caller-ID
adaptor, the top cover of adaptor
must be taken off.
Step 2:
Tack-fasten two of the four wood
screws (provided with Caller-ID
adaptor) on the wall at about 163 mm
apart.
Step 3:
Place the two holes of the main Unit
over the tacked wood screws to hang
the Caller-ID adaptor on the wall and
then fully tighten the wood screws.
Step 4:
Fasten another two screws on the
wall through the two bottom holes of
the Caller-ID adaptor.
163 mm
220 mm
Adaptor bottom line
30 mm