¾
3-2-11
¾
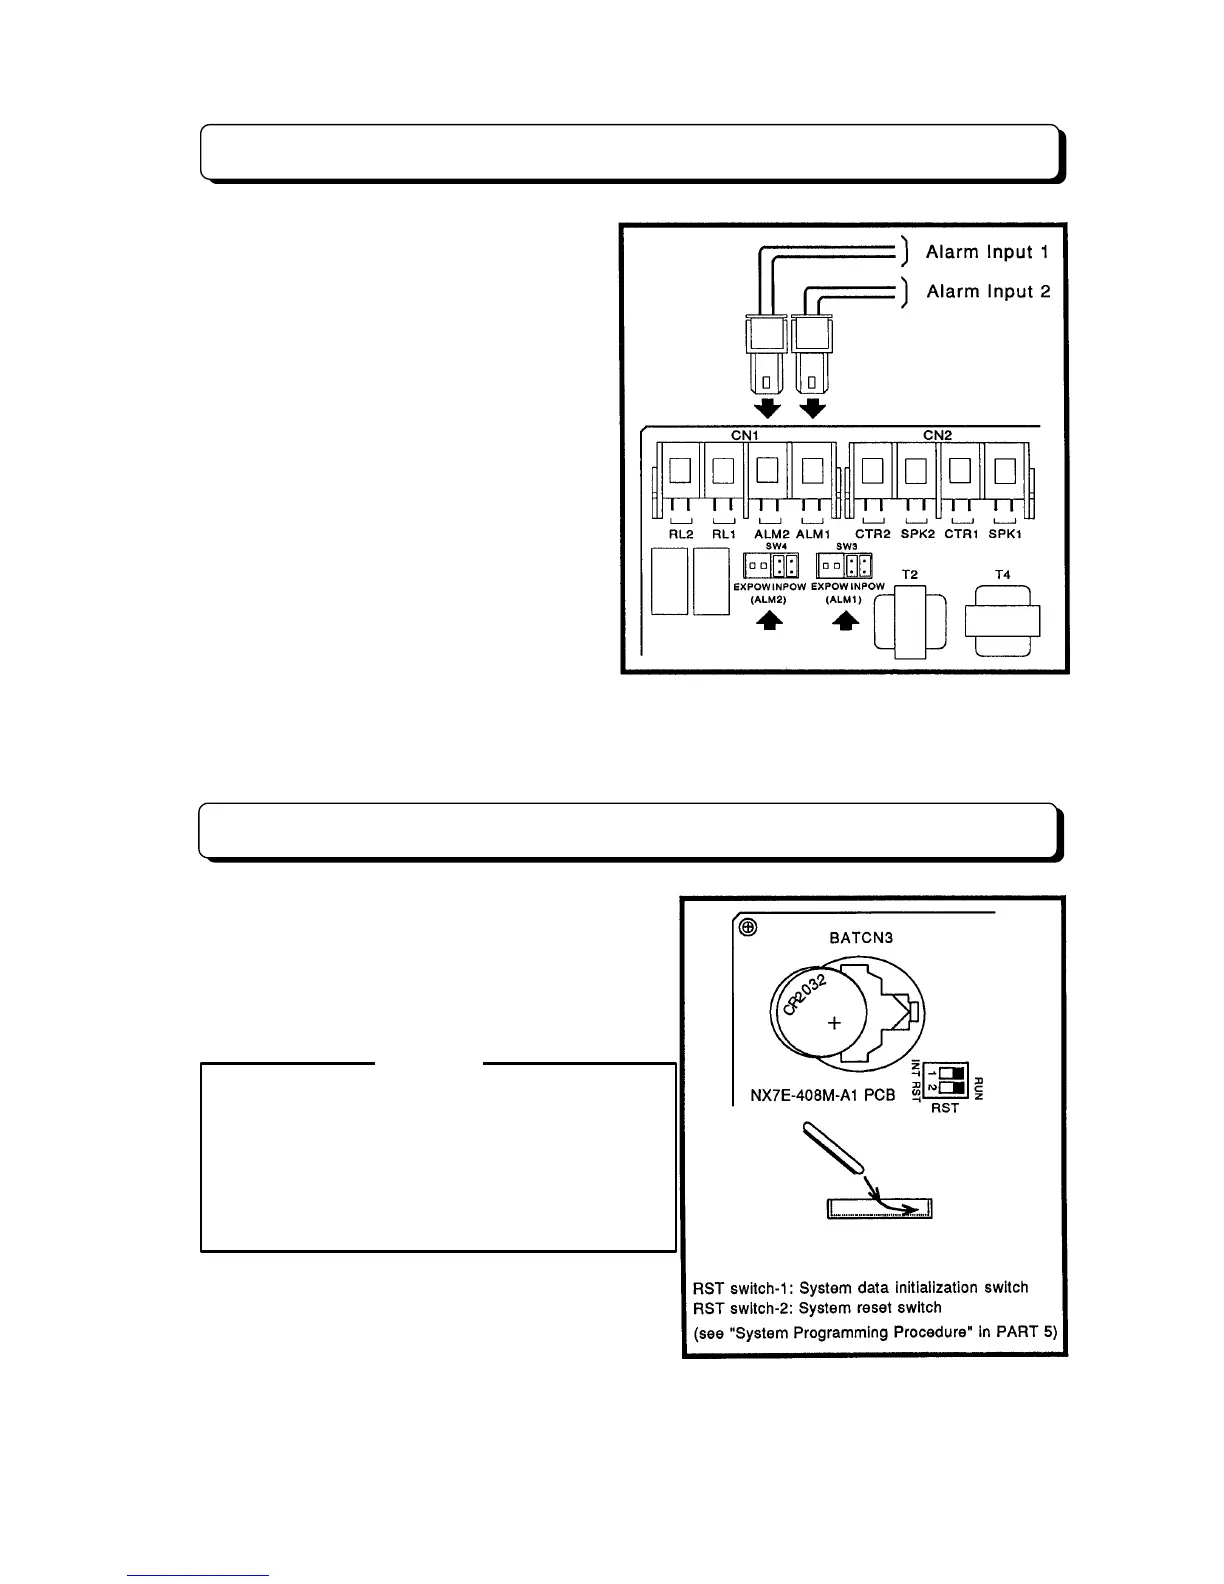
Installing External Alarm Sensor
This section provides information on the
installation of an external alarm. Two alarms
can be connected to the system. Programming
determines if the alarm inputs require an open
or a closed circuit.
Specifications:
When using internal power.
Loop Resistance: Less then 100 ohms.
When using external DC power.
Supplied DC power to system:
5 to 24 V DC with 0.65 mA to 4.5 mA.
Step 1:
Connect wires form External Alarm 1 to
the connector on the 8DHEXU-A1 PCB labeled
ALM1.
Step 2:
Connect wires form External Alarm 2 to
the connector on the 8DHEXU-A1 PCB labeled
ALM2.
NOTE:
When using internal power to connect the dry contact of alarm-detecting device to the system, set
SW3 for Alarm 1 or SW4 for Alarm 2 to the INPOW position.
Lithium Battery Installation
Locate and remove the lithium battery in the upper left-
hand corner of NX7E-408M-A1 PCB. Remove the old
battery and replace it with the new battery as
illustration. The battery, when fully charged, will retain
memory contents for approximately 24 months.
Battery Type:
SONY CR2032 Lithium Battery
CAUTION
- The battery may explode if they are not replaced
properly.
- Never replace with battery other than the ones
specified by the manufacturer (battery of the same
type or the equivalent).
- Dispose of spent batteries as instructed by the
manufacturer of the battery.
* "B" flashes on the display of the Key Telephone
when system battery is low. Replace it with the new
battery. (If battery is not installed in the system, "B"
is not indicated on the display.)