¾ 7-1-2 ¾
Installation of 3CIDU-A1 Unit (TX-Z 308)
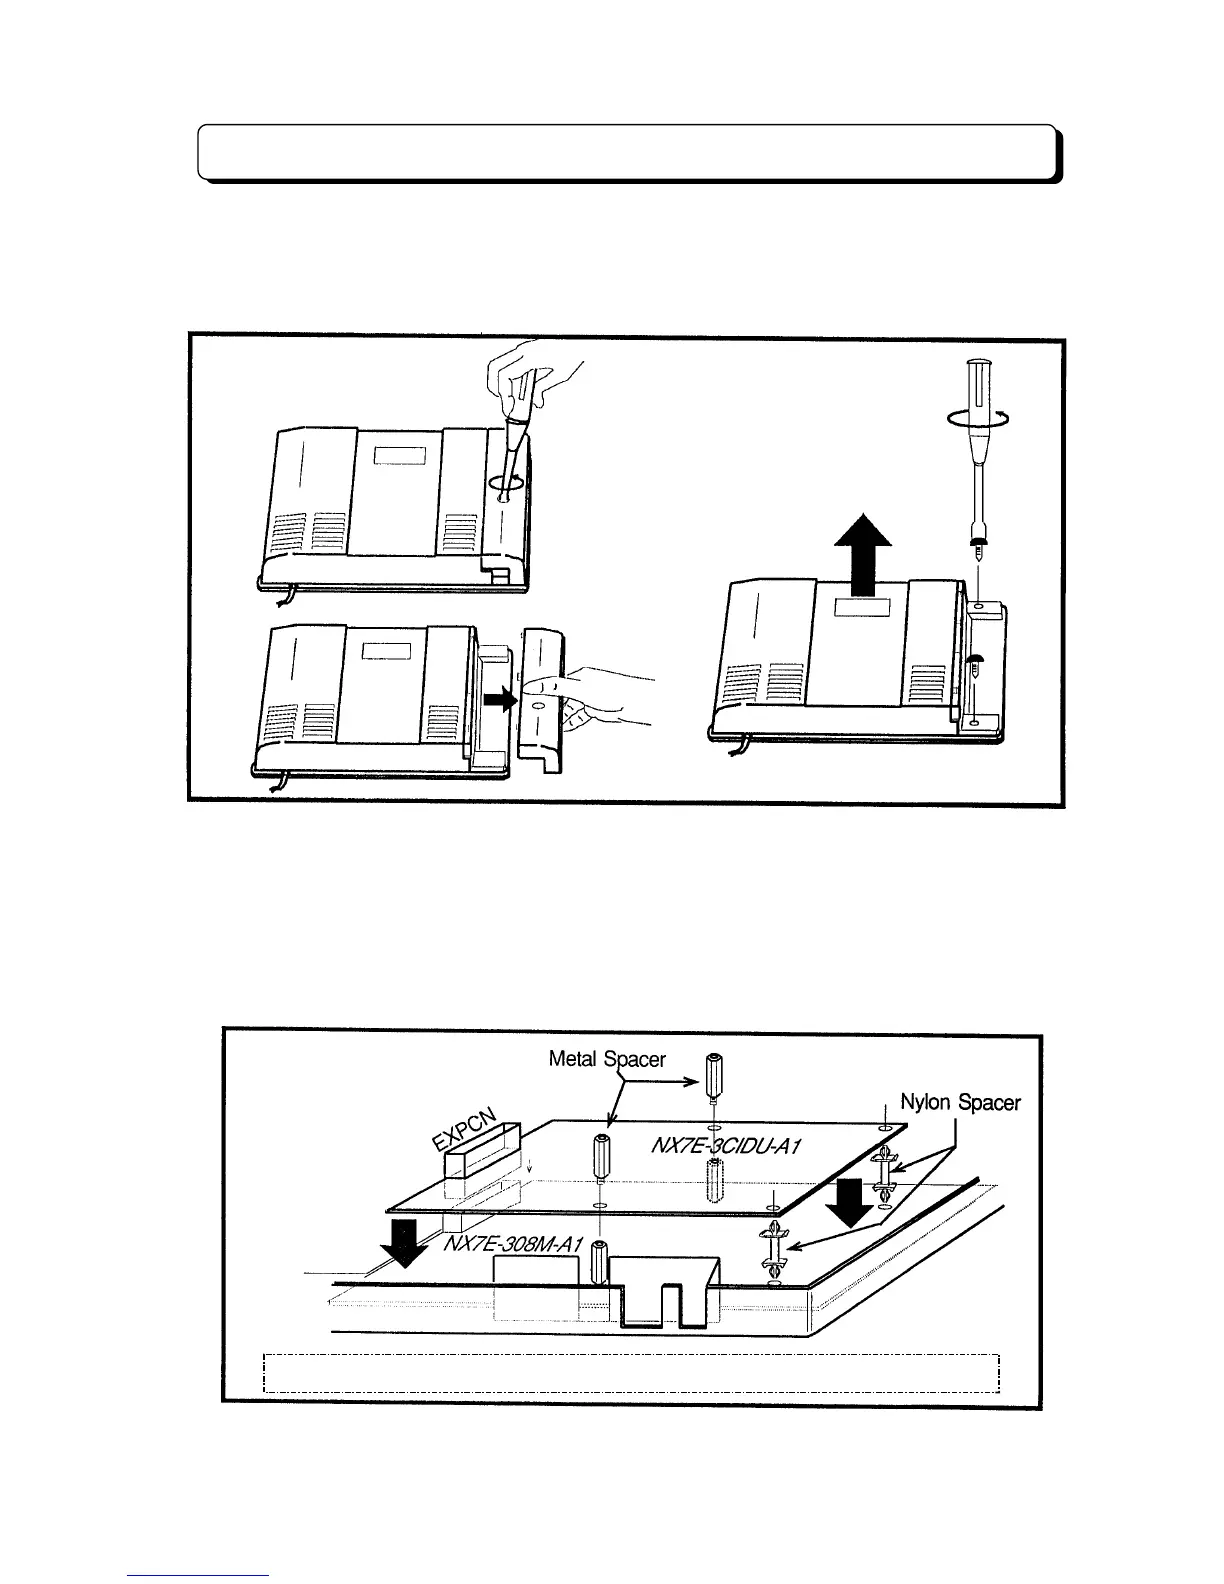
Open the upper housing of main equipment
1. Disconnect the AC cord from an AC outlet.
2. Loosen the screw and remove the front cover.
3. Loosen the two screws and remove the upper housing.
Installation of 3CIDU-A1 Unit
To install 3CIDU Unit in the Main Equipment
1. Attach the two Nylon Spacer (included) to the holes on the Main Unit.
2. Attach the 3CIDU Unit to the connector labeled EXPCN and Nylon Spacer on the Main Unit.
3. Secure the 3CID Unit with Metal Spacer (included).
Note:
If the option Unit (3DHEXU, 3SMDR or 3FAXU) has been installed in the Main
Equipment, Remove the option unit from the main unit and install the 3CIDU Unit First,
then mount the removed option unit on the 3CIDU Unit.
Caution: Option Unit must be connected 2 options maximum on the main unit.