¾ 7-1-8 ¾
Installing the Caller-ID Adaptor (TX-Z 824/1232/2464)
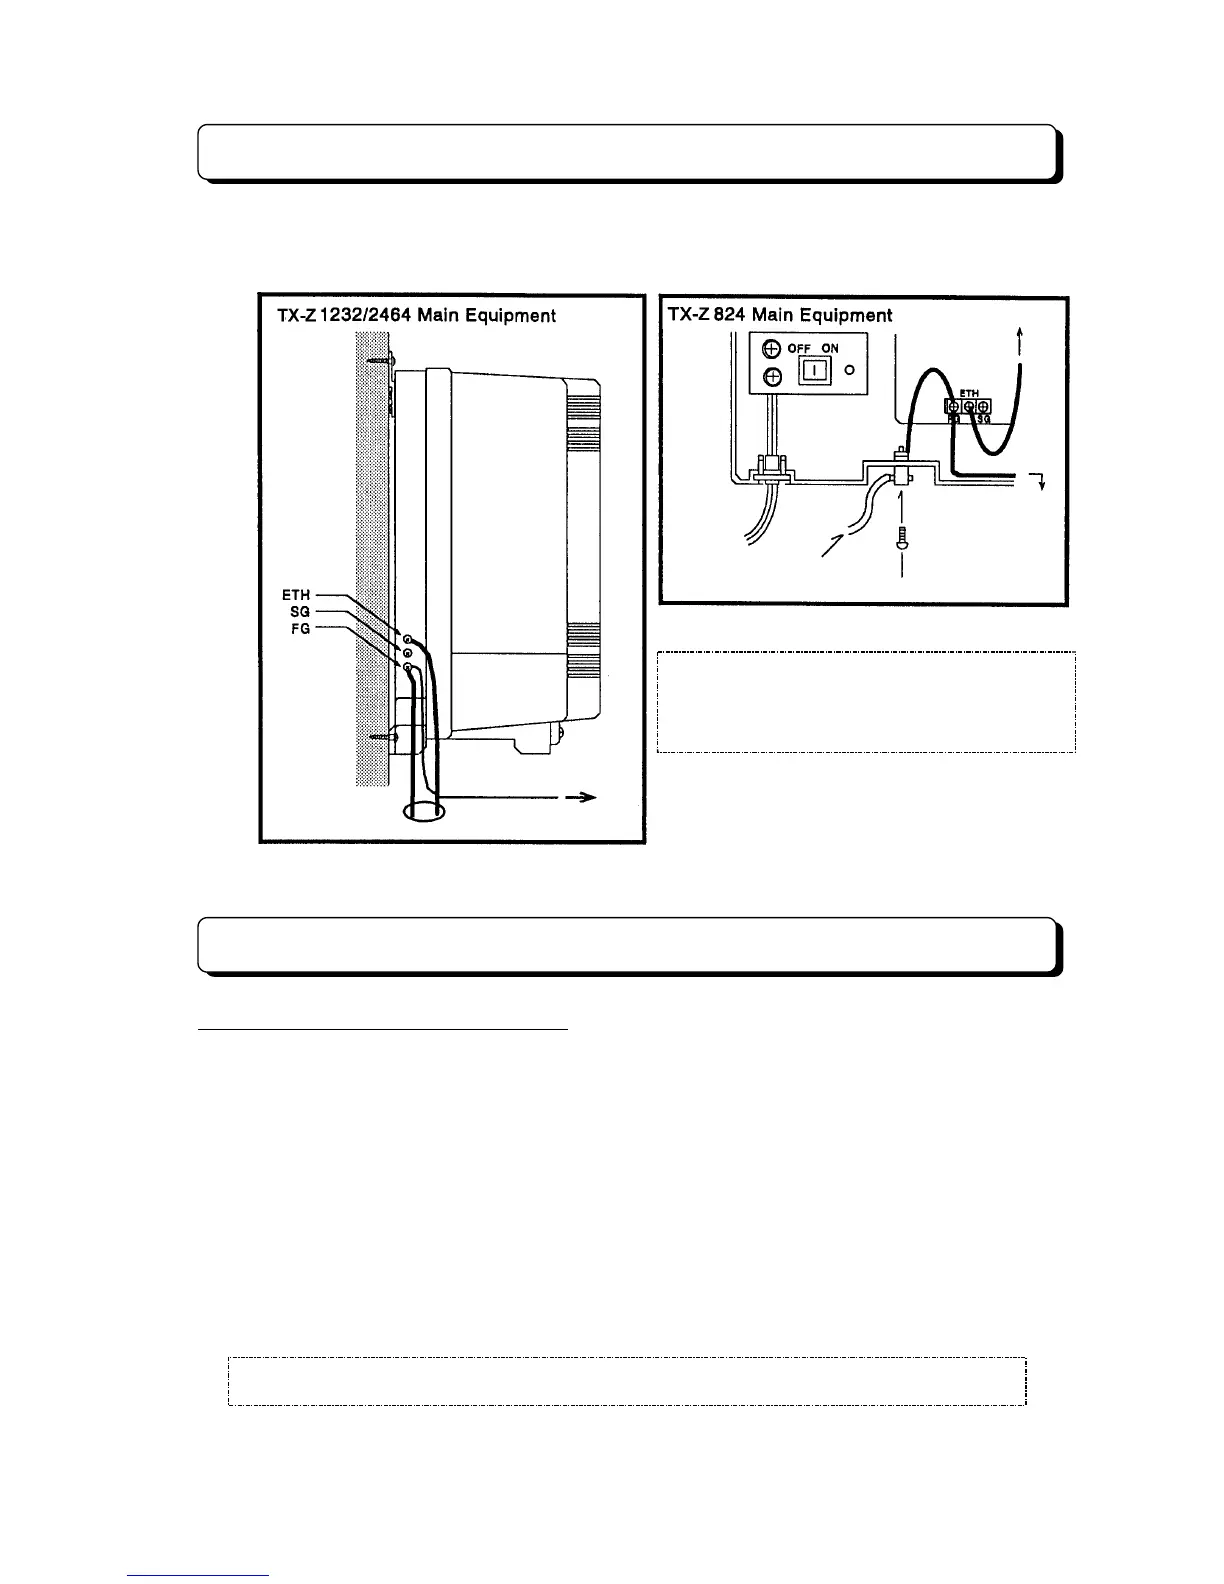
(3) Wiring diagram for accessory cables & Grounding Cables (Cont'd)
The wiring of grounding cable must be as illustrations.
Installing the SMCID PBA (TX-Z 824/1232/2464)
5. Installing the NX7E-()SMCID-A1 PBA
The NX7E-()SMCID-A1 PBA provides the SMDR feature & Caller-ID feature.
The NX7E-()SMCID-A1 PBA shall be mounted on TX-Z Main Equipment as follows.
(1) TX-Z 824 System
Step 1:
Main Equipment must be power off before mounting the NX7E-8SMCID-A1 PBA.
Step 2:
Mount the NX7E-8SMCID-A1 PBA on the connector labeled EXPCN and Nylon Spacer on
the Units (NX7E-408M-A1, NX7E-208E-A1 or NX7E-008E-A1).
Step 3:
Connect the Caller-ID cable to the CBCN connector and G terminal, then mount the SMDR
Jack Cable Assembly on the bottom side of the Main Equipment, and then insert the RS-
232C Jack into the RSCN connector on the NX7E-8SMCID-A1 PBA.
Note 1:
Set SW1 at the proper Bit Rate Position.
Note 2:
Set SW2 on "RUN" side (Not on "TEST" side).
IMPORTANT!!: After all the connections are completed, turn the Power Switch ON.
To NX7E-208E-A1
To ETH terminal of
Caller-ID adaptor
NX7E-408M-A1
AC Cord
Grounding Cable
Screw
IMPORTANT
Surely connect the Grounding cable to
Earth Ground properly to protect the unit.
To Earth Ground
To ETH terminal of
Caller-ID adaptor