3
Basic copy operations
3-76 CS193/CS173/CS163
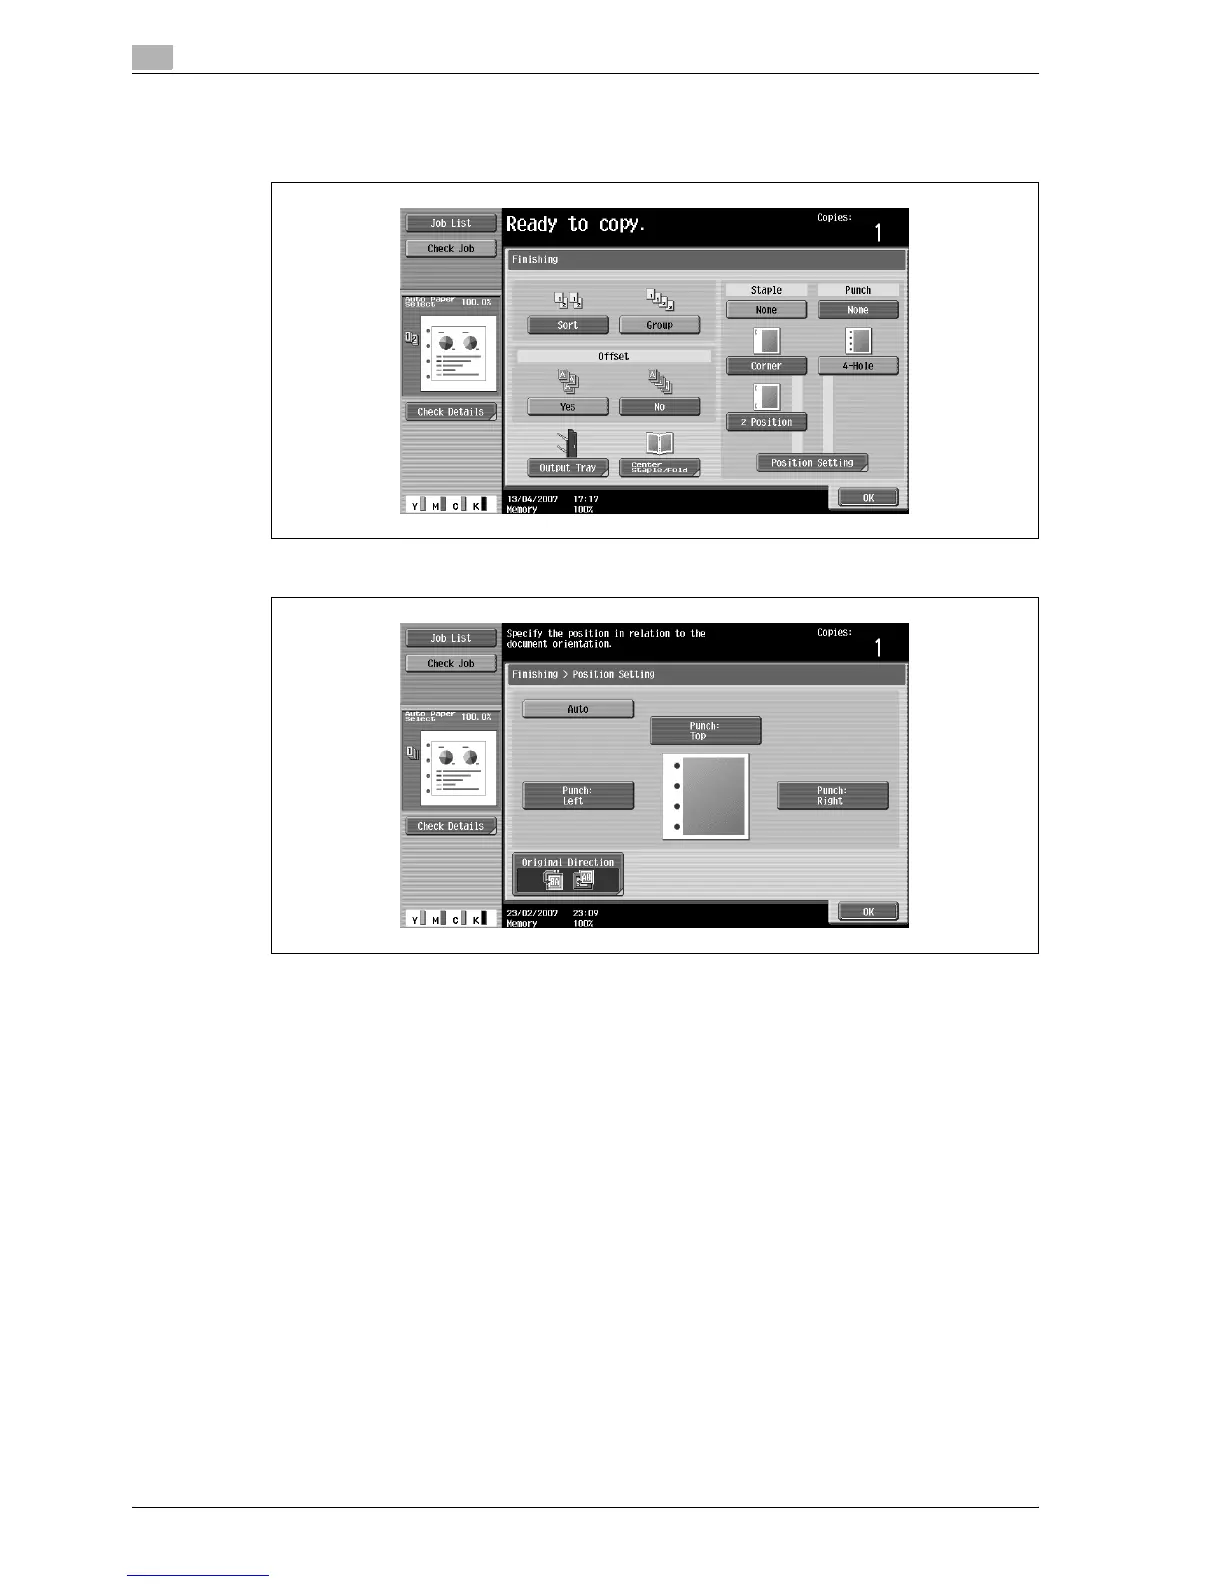
– To cancel the Punch setting, touch [None].
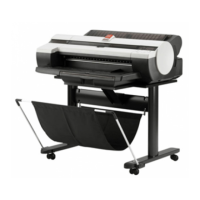
3 Touch [Position Setting].
– Select the punched hole position, and then touch [OK].
– Touch [Auto] to automatically determine the position of the punched holes according to the
orientation of the loaded original. If the original length is 297 mm or less, the holes are punched
along the long side of the paper. If the original length is more than 297 mm, the holes are punched
along the short side of the paper.
– If "Auto" is selected for the stapling position, load the original with the top toward the back of the
machine. If the original is loaded in any other orientation, the stapling will not be correctly
positioned.
– If "Auto" is selected, the punched hole position is set at the top or at the left.
– To cancel the setting and select the default, press the [Reset] key.
4 If desired, touch [Original Direction], and then select the setting appropriate for the original.
– For details on specifying the original orientation, refer to "Selecting the original orientation (Original
Direction settings)" on page 3-24.
5 Touch [OK].
The Basic screen appears again.