CS193/CS173/CS163 9-13
Replacing toner cartridges and staple cartridges and emptying punch scrap box
9
9.3.1 To replace the imaging unit
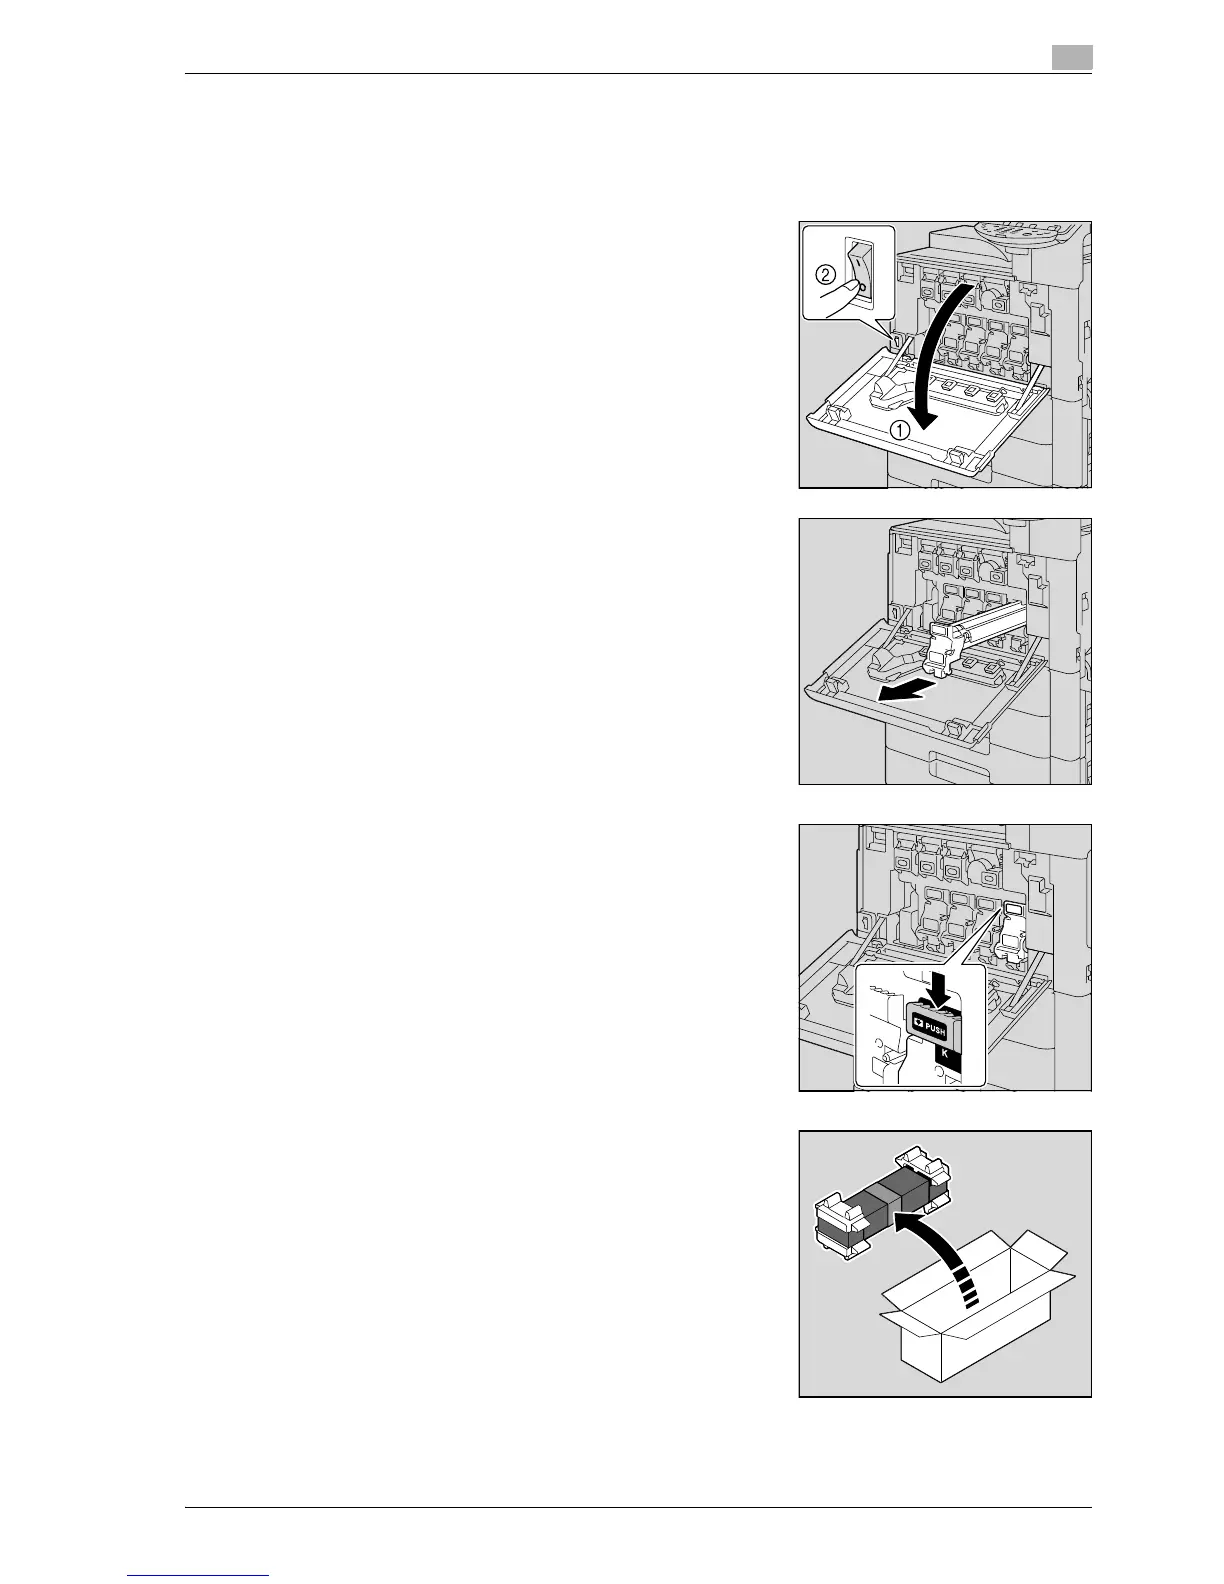
1 Press the [Power] (auxiliary power) key.
Check that the touch panel is turned off.
2 Open the front door, and then set the main power switch to o.
– Check that an imaging unit of the same color as the one to
be replaced has been prepared.
3 Press down to release the unlock lever of the imaging unit to
be replaced.
4 Pull the imaging unit towards you to remove it.
5 Remove the imaging unit from its packaging.
– The imaging unit can easily be damaged by light. Leave the
imaging unit in the black protective bag until immediately
before it is to be installed.
– Do not hold the top part of the imaging unit, otherwise the
PC drum may be damaged, resulting in decreased image
quality.