CS193/CS173/CS163 12-45
Utility mode
12
3 Touch [7 Expert Adjustment].
The Expert Adjustment screen appears.
4 Touch [2 Printer Adjustment].
The Printer Adjustment screen appears.
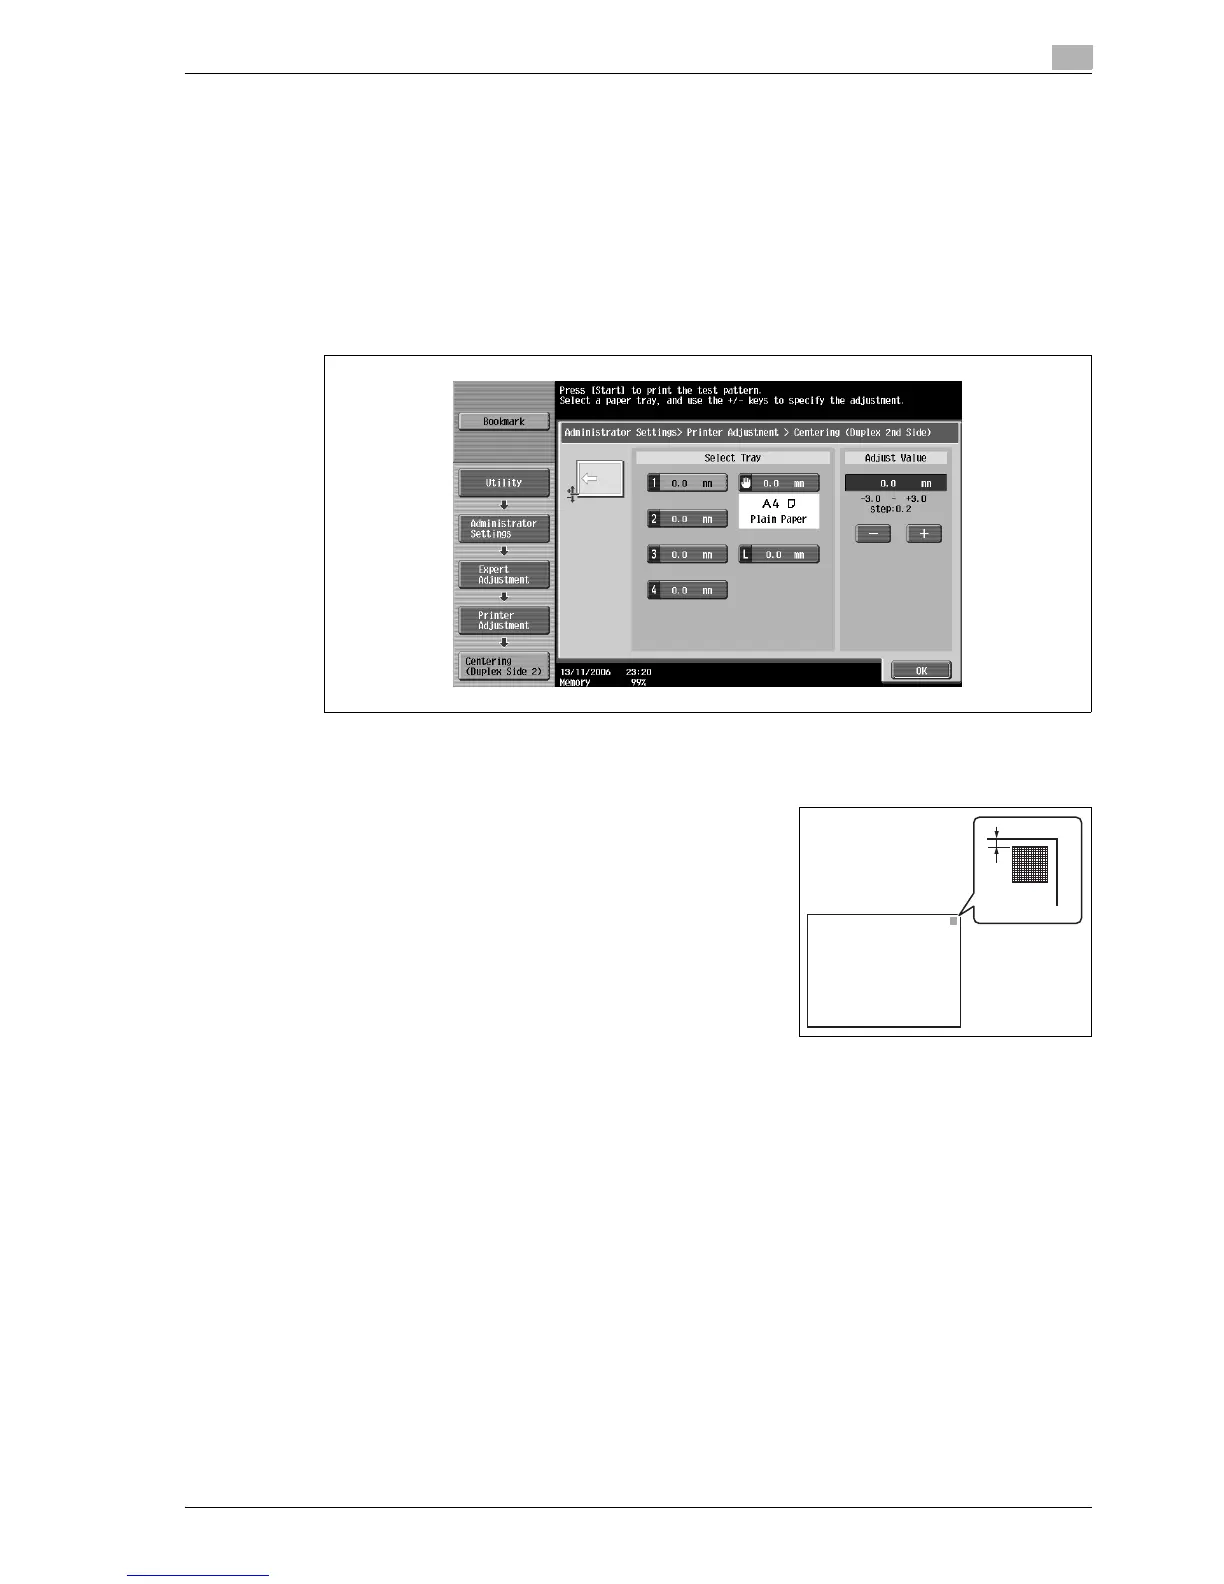
5 Touch [4 Centering (Duplex 2nd Side)].
The Centering (Duplex 2nd Side) screen appears.
6 Touch the button for the paper tray to be set.
7 Press the [Start] key.
A test pattern is printed.
8 Check that the distance from the starting print position of the
test pattern to the edge of the paper (d) is 3 mm (±0.5 mm).
– If the distance is 2.4 mm or less, touch [+] to increase the
adjustment (between 0.2 mm and 3.0 mm).
– If the distance is 3.6 mm or more, touch [-] to reduce the
adjustment (between -0.2 mm and -3.0 mm).
– If the distance is between 2.5 mm and 3.5 mm, continue
with step 10.
– Each time [+] or [-] is touched, the value is increased or
decreased by one increment.
9 Press the [Start] key.
The adjusted test pattern is printed.
10 Adjust the distance from the starting print position of the test pattern to the edge of the paper.
– Check that the distance has been adjusted to between 2.5 mm and 3.5 mm.
– If more adjustment is necessary, repeat steps 8 and 9.
– To adjust the print position for a different paper tray, return to step 6.
11 Touch [OK].
– To cancel the setting and select the default, press the [Reset] key.
The print position is adjusted.
d
d: 3.0 mm ± 0.5 mm