Rovema CMK Operator’s Manual
Section 7: Working with Components
200246 CMK Operators Manual (02/06/2006) 7-15
Carton Magazine
Front and Rear Pusher Adjustment Instructions
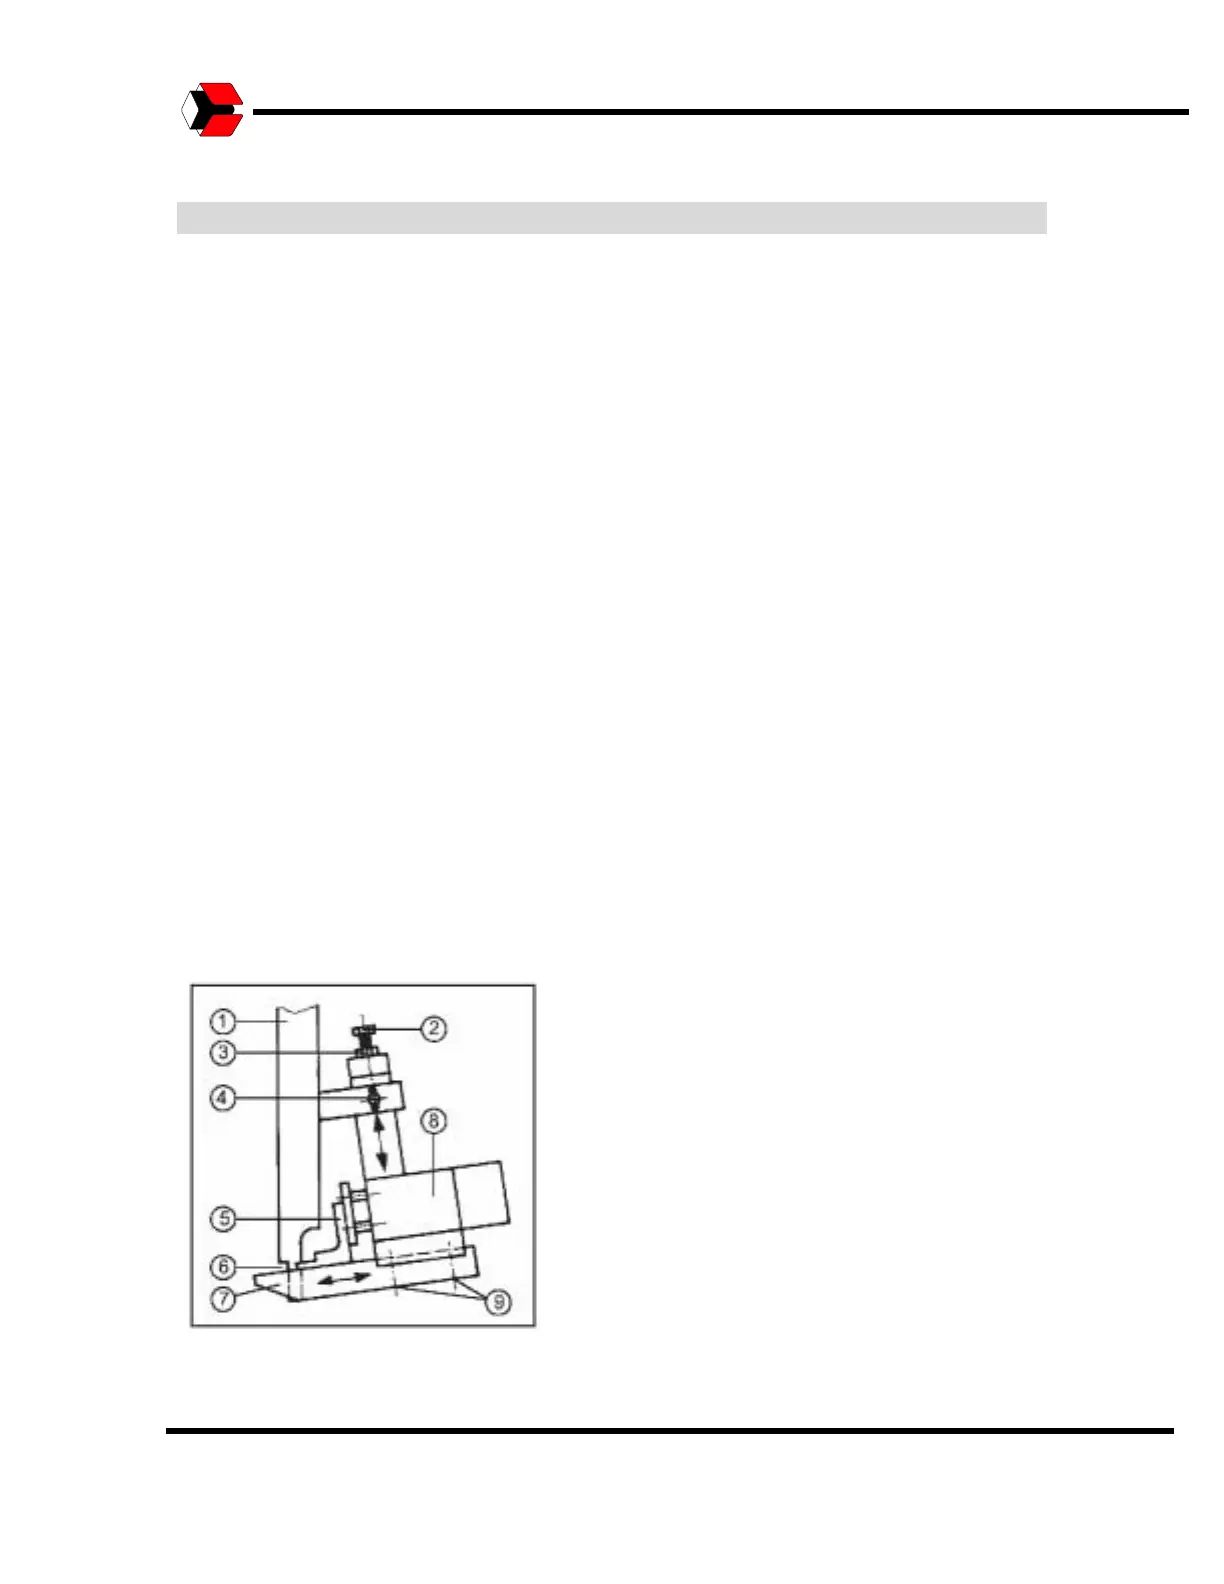
The illustration below shows the fastening screws for the pusher. The
adjustments for the rear pusher #5 and holding surface #7 are the same as in the
illustration for the front pushers.
The rear pushers are inclined somewhat forward and their position may be
adjusted. This inclination is required to make it possible to push off the cartons.
The gap (#6) holds the carton after it has been pushed back by the front pushers.
The carton is held in place until the rear pushers (#5) are activated.
This gap (#6) can be adjusted to process cartons of different thicknesses. The
lock nut (#3) and clamping screw (#4) must be loosened to adjust the gap. The
adjustment screw (#2) can be used to adjust the height of the gap. The
dimension for the height of the gap should be 125% the thickness of the carton.
The carton holding surface (#7) is held in place in slots on the activation cylinder.
Loosening the fastening screws (#9) makes it possible to change the position of
the holding surface related to the pusher.
If cartons with very different thicknesses are used, it may be necessary to
change the pusher (#1). The thickness of the pusher should be about 75 % the
thickness of the carton. It should not be any thicker than one carton or two
cartons will be pushed off. To replace the pusher, loosen the fastening screw and
replace the pusher with a new one.
Figure 7.7
Pusher Adjustments.