Rovema CMK Operator’s Manual
Section 5: Operator Controls
200246 CMK Operators Manual (02/06/2006) 5-26
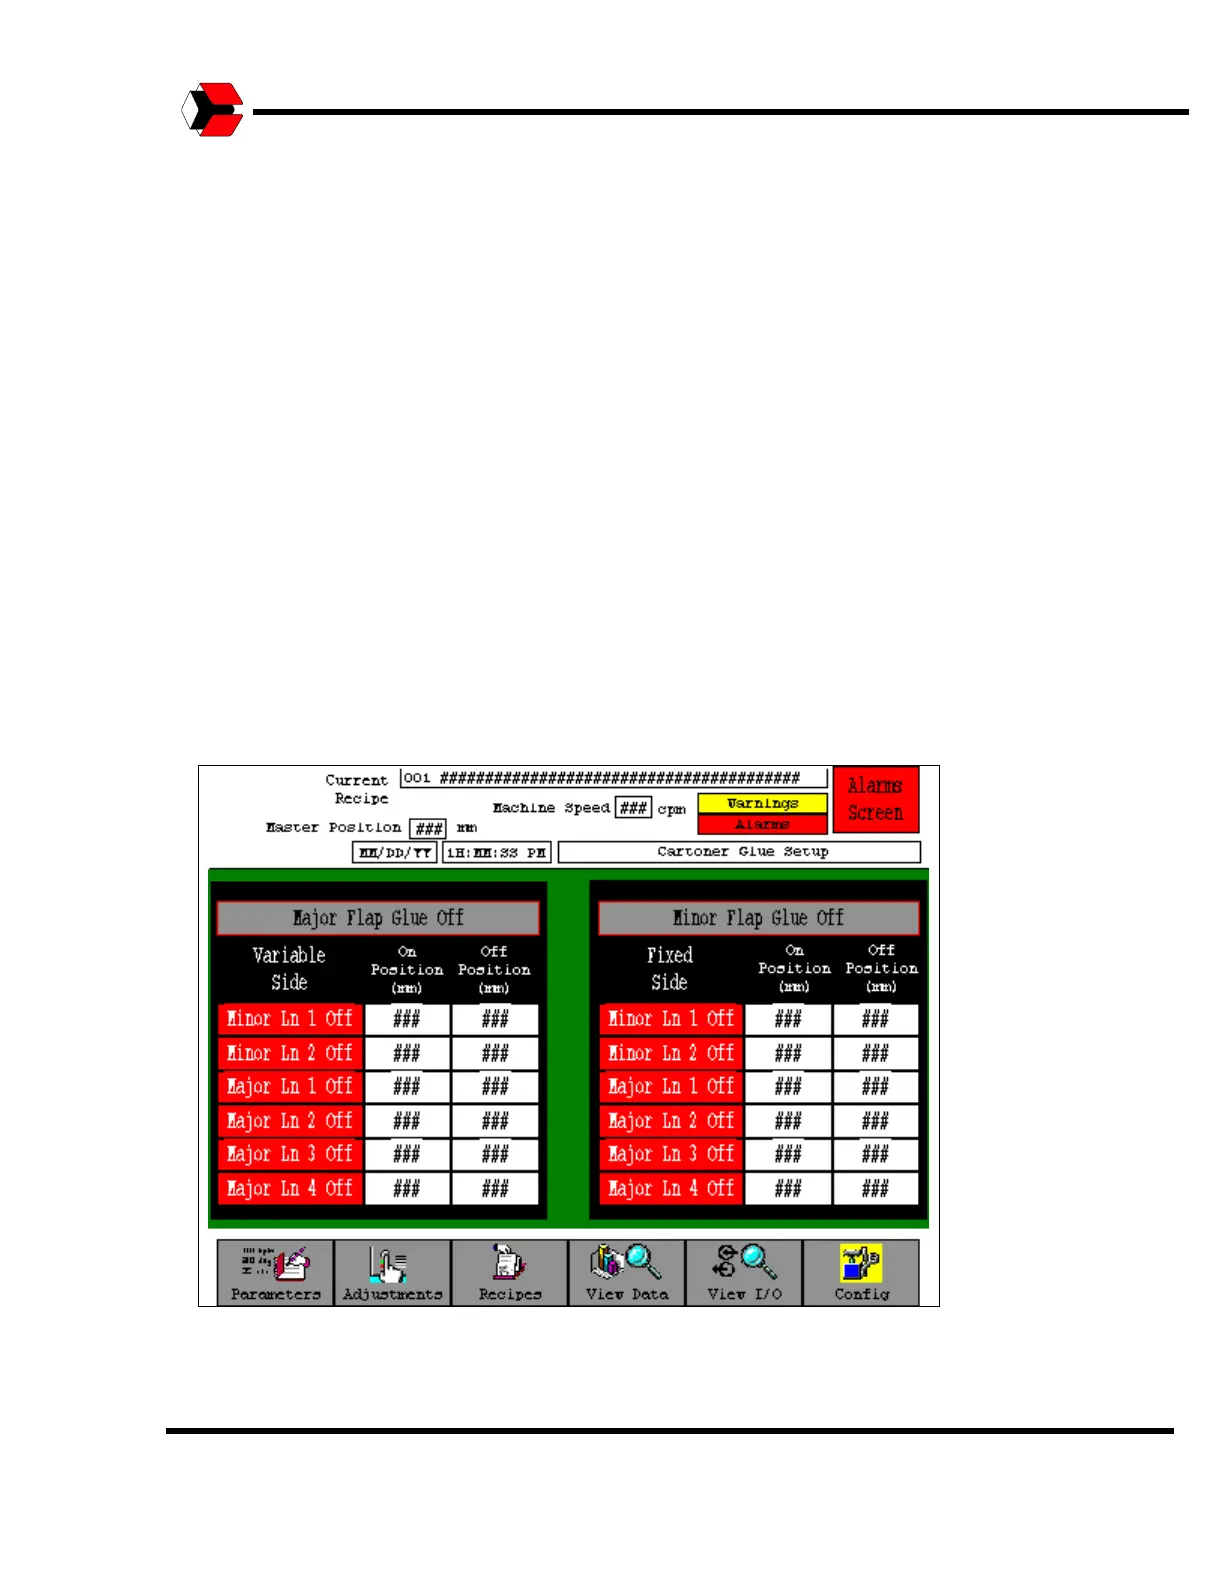
Cartoner Glue Setup Screen
The Glue Setup screens provide a simple means of enabling and configuring the
glue zones on the CMK. The CMK has two glue zones, “Major Flap Glue” and
“Minor Flap Glue”.
Each glue zone has a “master” enable switch. This “master” enable switch is
located at the top of each screen’s working area. If the “master” enable switch is
OFF, none of the line stitches in the zone will operate. If the “master” enable switch
is ON, then the line stitches may be enabled and configured.
Each glue zone also has line stitches, which may be enabled and configured. The
“On Position” and “Off Position” for each line stitch correlate to the carton axis
positions. The Minor Line positions are for the side flaps. The Major Line positions
are for the upper and lower flaps. In addition separate settings are also provided for
Fixed and Variable Side line stitches. This is necessary because of unavoidable
variations in position and air pressure between the glue gun heads on each side of
the machine.
The glue zone enables and glue-stitching parameters are included in the recipe
function, thus the settings can be saved and re-loaded for each different product.
Figure 5.32
Shows the Glue Setup Screen.