EasyManuals Logo

SATO CT4-LX User Manual

SATO CT4-LX
564 pages
To Next Page IconTo Next Page
To Previous Page IconTo Previous Page
Page #446 background imageLoading...
Page #446 background image
Replacing the Print Head
446
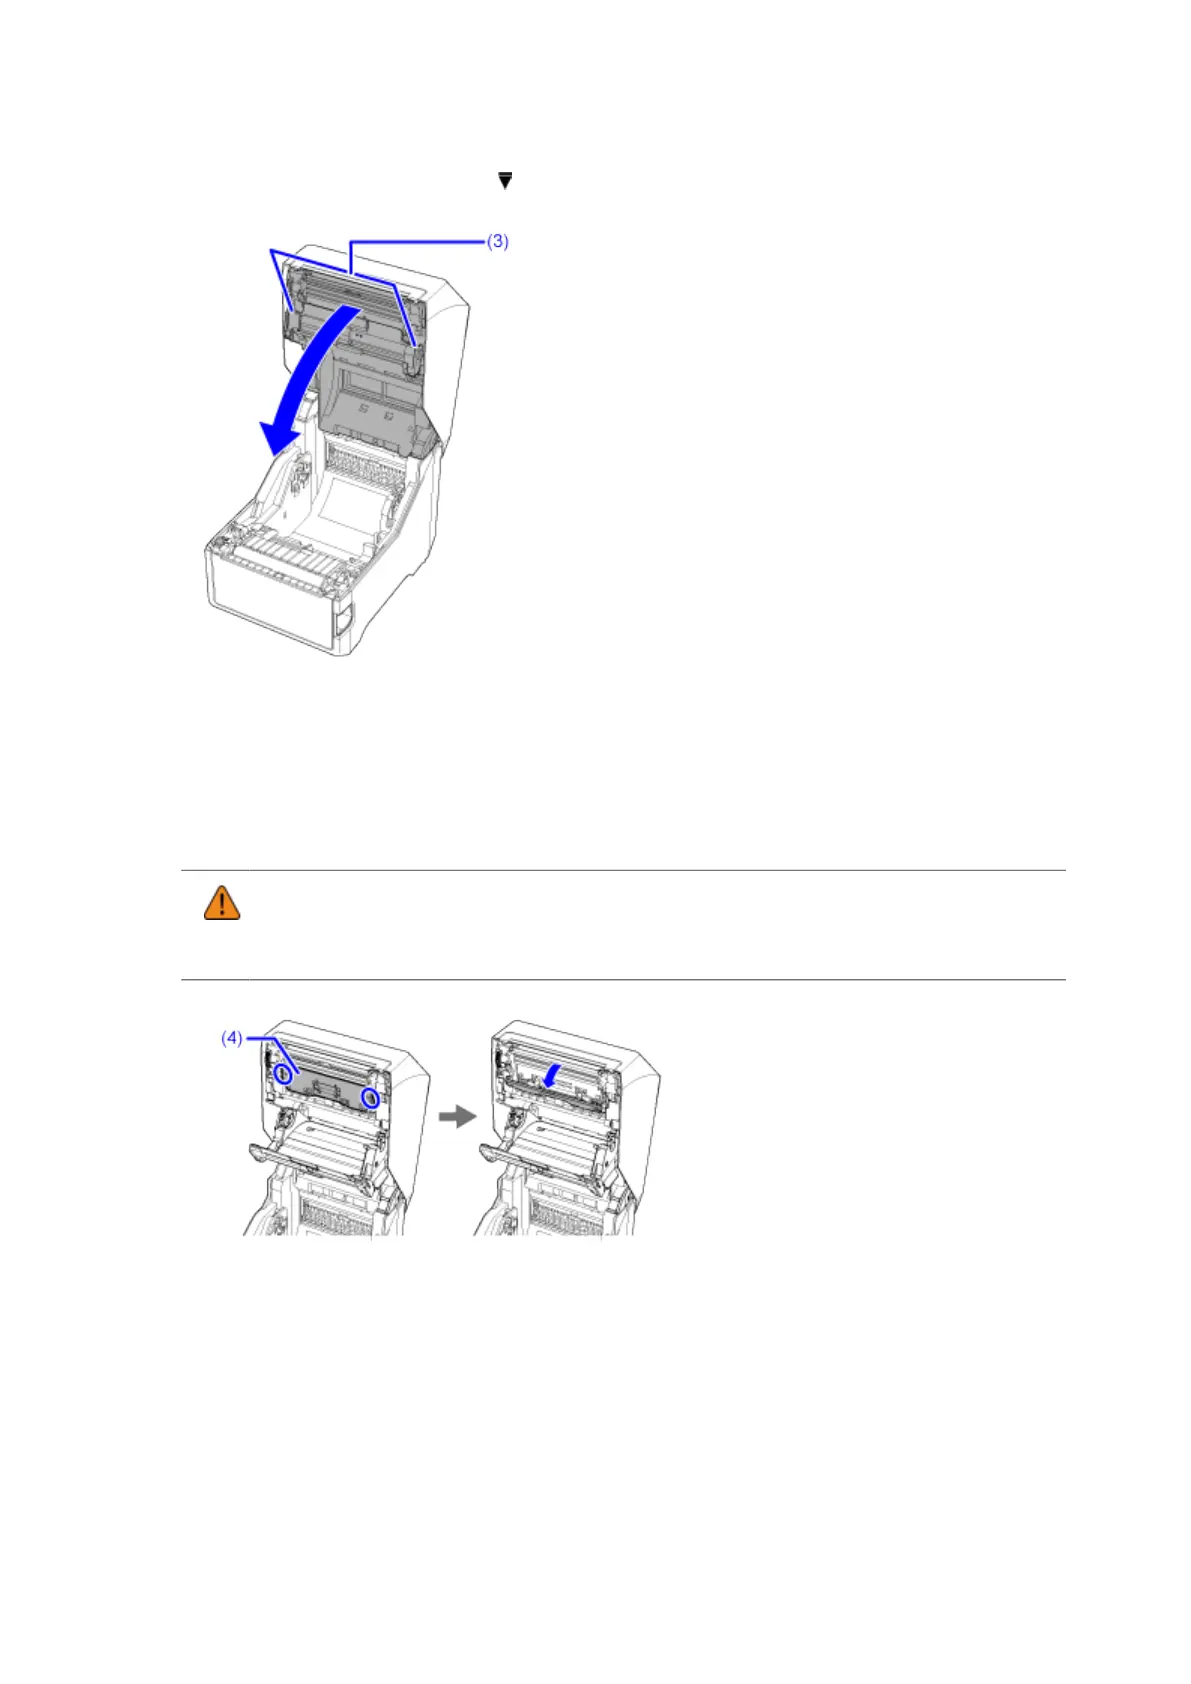
The parts (3) are indicated by the (ribbon cover open) marks on the combined direct thermal/
thermal transfer model.
4. On the combined direct thermal/thermal transfer model, remove the ribbon if it is
loaded.
5. Put your fingers on the 2 tabs, on the left and right sides, on the head cover (4) and
open it toward the front.
The head cover opens in 2 stages. Open it so the opening is about 45 degrees.
• The print head and its surroundings are hot after printing. Wait until the product cools
down.
• Touching the edge of the print head with your bare hand could cause injury.
6. Take out the print head (5).

Table of Contents

Questions and Answers:

Question and Answer IconNeed help?

Do you have a question about the SATO CT4-LX and is the answer not in the manual?

SATO CT4-LX Specifications

General IconGeneral
Print MethodThermal Transfer / Direct Thermal
Print Resolution203 dpi
Max Print Width4.09 inches (104 mm)
Media TypeRoll, Fan-fold
Media Thickness0.0025 to 0.008 inches (0.0635 to 0.2032 mm)
Ribbon Width0.98 inches (25 mm) to 4.09 inches (104 mm)
Ribbon Length984 feet
ConnectivityUSB, Ethernet, Bluetooth
Supported Barcode TypesPDF417, QR Code
Power Requirements100-240 VAC, 50/60 Hz

Related product manuals