EasyManuals Logo

SATO CT4-LX User Manual

SATO CT4-LX
564 pages
To Next Page IconTo Next Page
To Previous Page IconTo Previous Page
Page #448 background imageLoading...
Page #448 background image
Replacing the Platen Roller
448
Replacing the Platen Roller
You can easily remove and replace a damaged or worn platen roller.
• Do not connect or disconnect the power cord while your hands are wet. Doing so could
cause an electric shock.
• Disconnect the power cord from the AC outlet before you replace the platen roller.
1. Make sure that the product is powered off, and disconnect the power cord from the
AC outlet.
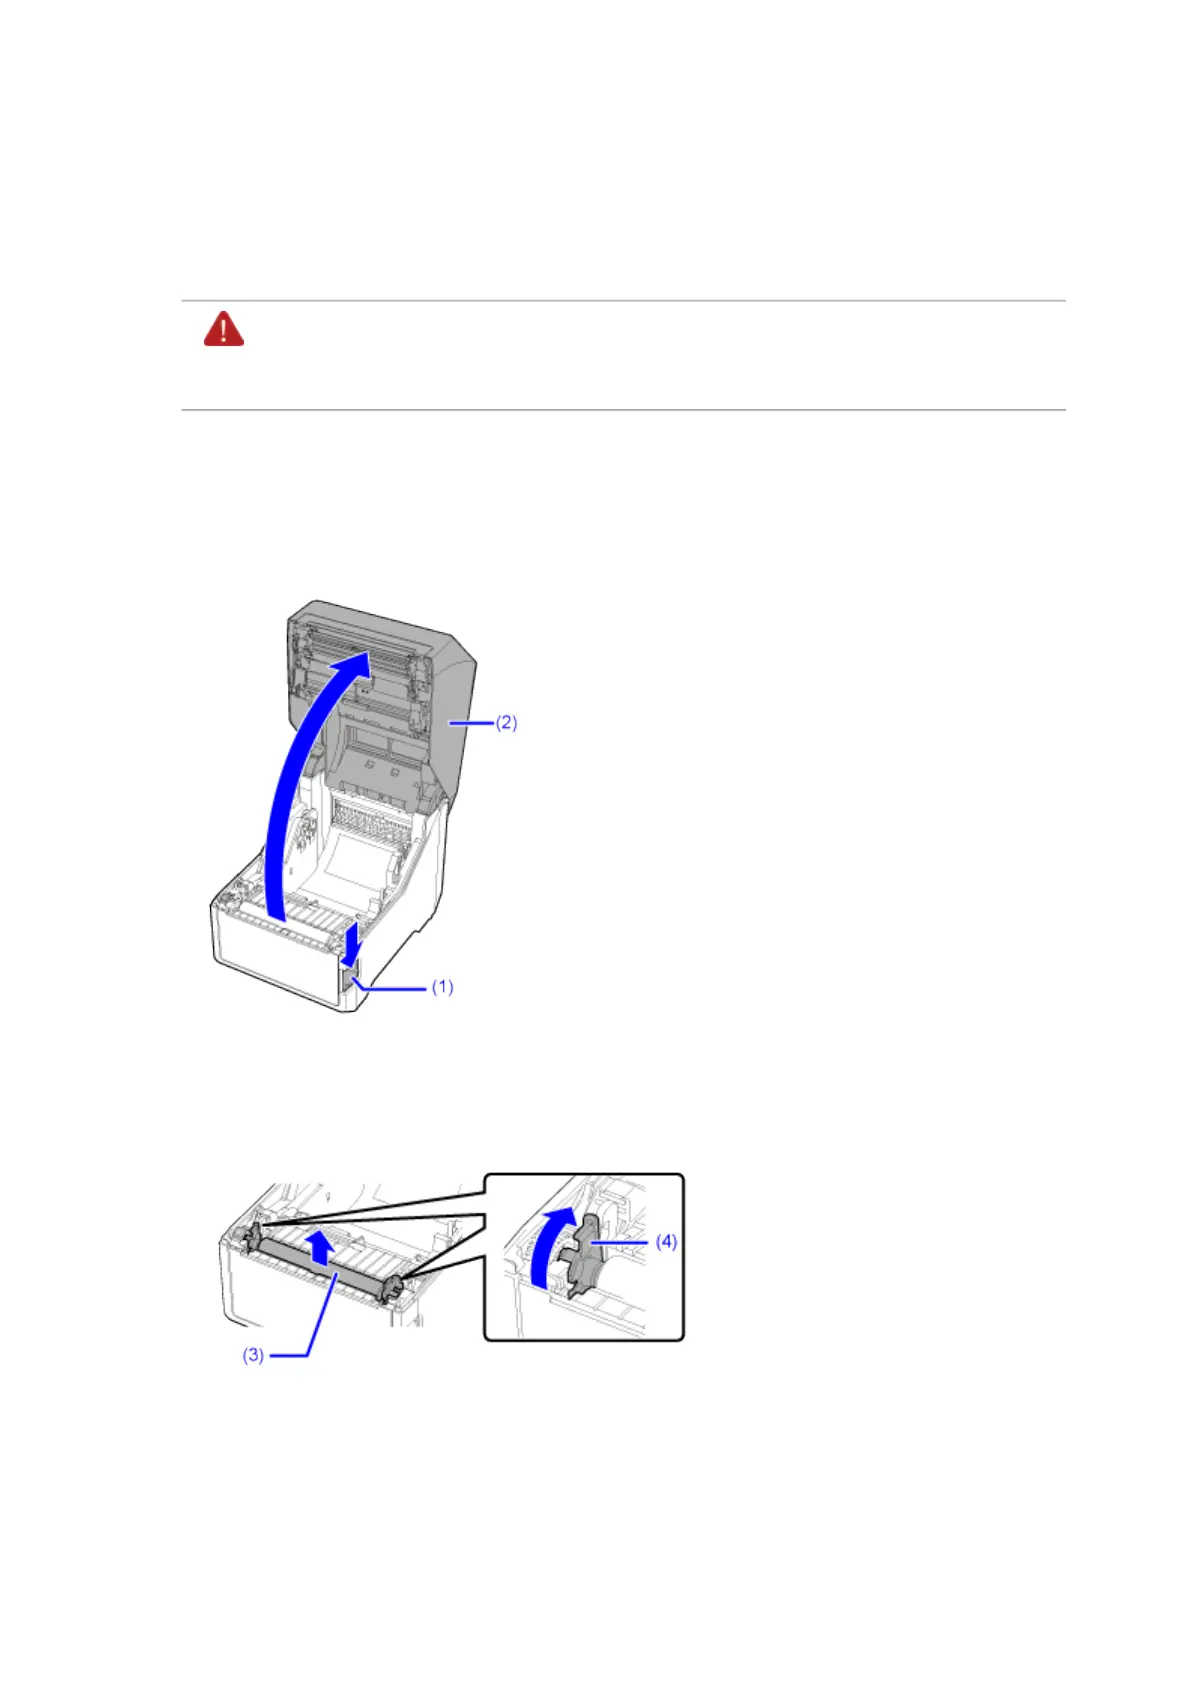
2. Press the cover open latch (1) to open the top cover (2).
3. Remove the media if it is already loaded.
4. Raise the 2 levers (4) of the platen roller (3) to remove the platen roller.

Table of Contents

Questions and Answers:

Question and Answer IconNeed help?

Do you have a question about the SATO CT4-LX and is the answer not in the manual?

SATO CT4-LX Specifications

General IconGeneral
Print MethodThermal Transfer / Direct Thermal
Print Resolution203 dpi
Max Print Width4.09 inches (104 mm)
Media TypeRoll, Fan-fold
Media Thickness0.0025 to 0.008 inches (0.0635 to 0.2032 mm)
Ribbon Width0.98 inches (25 mm) to 4.09 inches (104 mm)
Ribbon Length984 feet
ConnectivityUSB, Ethernet, Bluetooth
Supported Barcode TypesPDF417, QR Code
Power Requirements100-240 VAC, 50/60 Hz

Related product manuals