Vista Digital Mixing System
8-8 Vista 8 Differences
SW V3.5 Date printed: 05.04.2005
8.3 Functional Differences: Control Bay
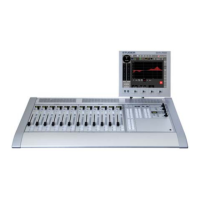
The control bay hosts twelve faders and a Vistonics
®
screen as well as the
keys for monitoring functions, dynamic automation, talkback etc. known
from other Vista consoles. The faders and the Vistonics
®
screen are fully
independent from the rest of the console in terms of view changes and
scrolling. A separate set of four keys provides independent scrolling func-
tionality of this section. In the strip setup window of the graphic controller,
a second page (“tab”) has been introduced, allowing to set-up the strip us-
age of the control bay. Four fader pages with ten strips each are provided
as a standard. By scrolling once to the left and the right, an extension of up
to 120 strips is available for channel access within the control bay.
The Vistonics
®
screen is used as a collection of 40 level controls, usually
representing a duplicate view of the fader bays’ channel faders. The Vis-
tonics
®
controls will then not only give access to the channel faders and
graphically indicate their settings, but is also indicate a real-time level me-
ter on the screen right next to the corresponding rotary control. This allows
viewing up to 40 meters at a glance while having direct access to all of
their corresponding faders by using the rotary control next to it. Tweaking
any of the console’s output levels is therefore extremely easy and fast.
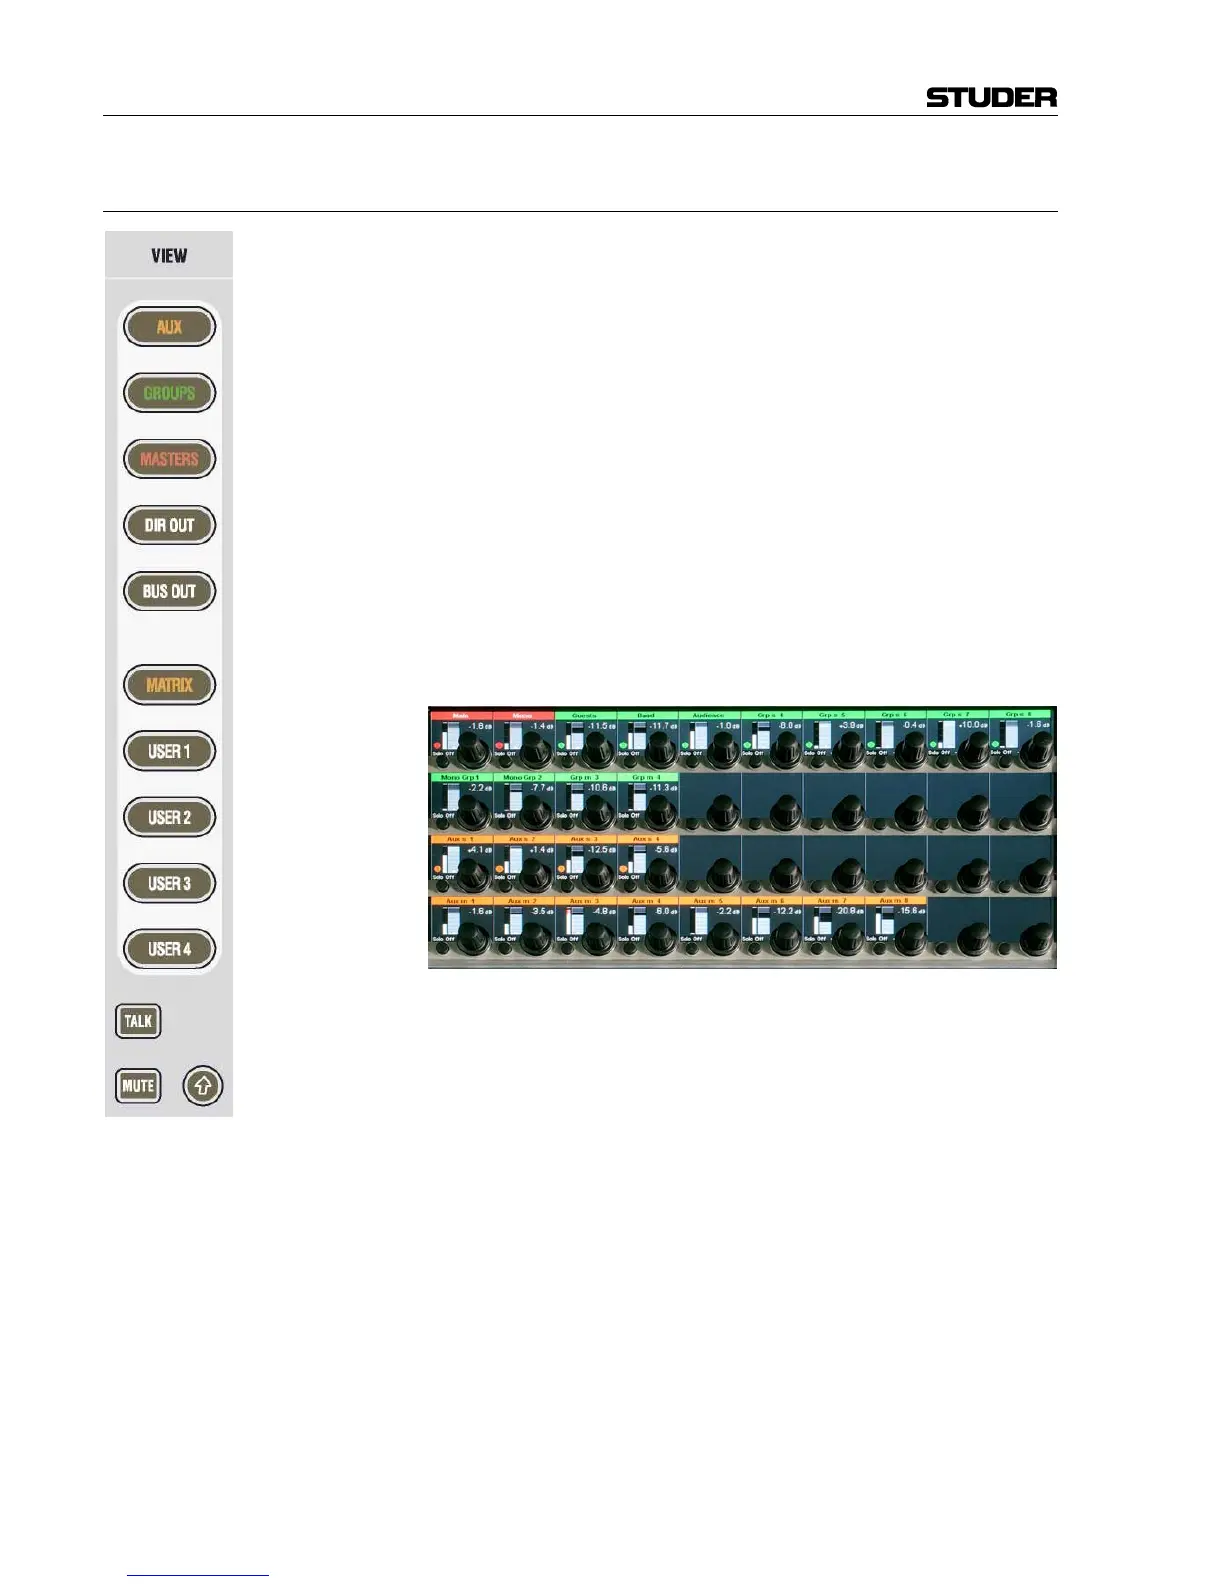
The VIEW keys on the right-hand side of the control bay allow access to
some predefined channel types (AUX, GROUPS, MASTERS, DIRECT OUT,
BUS OUT) as well as to five user-definable views. By using the third page
(
Vistonics Views tab) of the strip setup window (next page), it is possible
to define the five user setups in a way very similar to the known strip setup
window. In order to make a user view, simply select the Vistonics
®
ele-
ments on the screen and fill them up using the right trackball button. Al-
though primarily intended for outputs, also input faders can be visible and
controlled with these USER views.