10/00
4-23
Phaser 790/DocuColor 2006
REP 5.1
Repairs and Adjustments
Initial Issue
REP 5.1 ADF Assembly
Parts List on PL 17.1
Removal
WARNING
To avoid personal injury or shock, do not perform repair activities with the power switch
on or electrical power applied to the machine.
1. Switch off the machine power and disconnect the machine Power Cord.
2. Disconnect the ADF connector at the rear of the scanner.
WARNING
The ADF Assembly weighs about 11kg. Assistance may be required to move or remove
the ADF. Attempting to move the ADF without assistance could result in serious injury.
CAUTION
Handle the ADF by the front and rear sides. Handling the assembly by the left and right sides
will cause the ADF frame to be deformed.
CAUTION
After the ADF is removed, orient the unit on a work surface, so the ADF weight is not applied
directly to the counter balances. Otherwise, the ADF frame could be deformed.
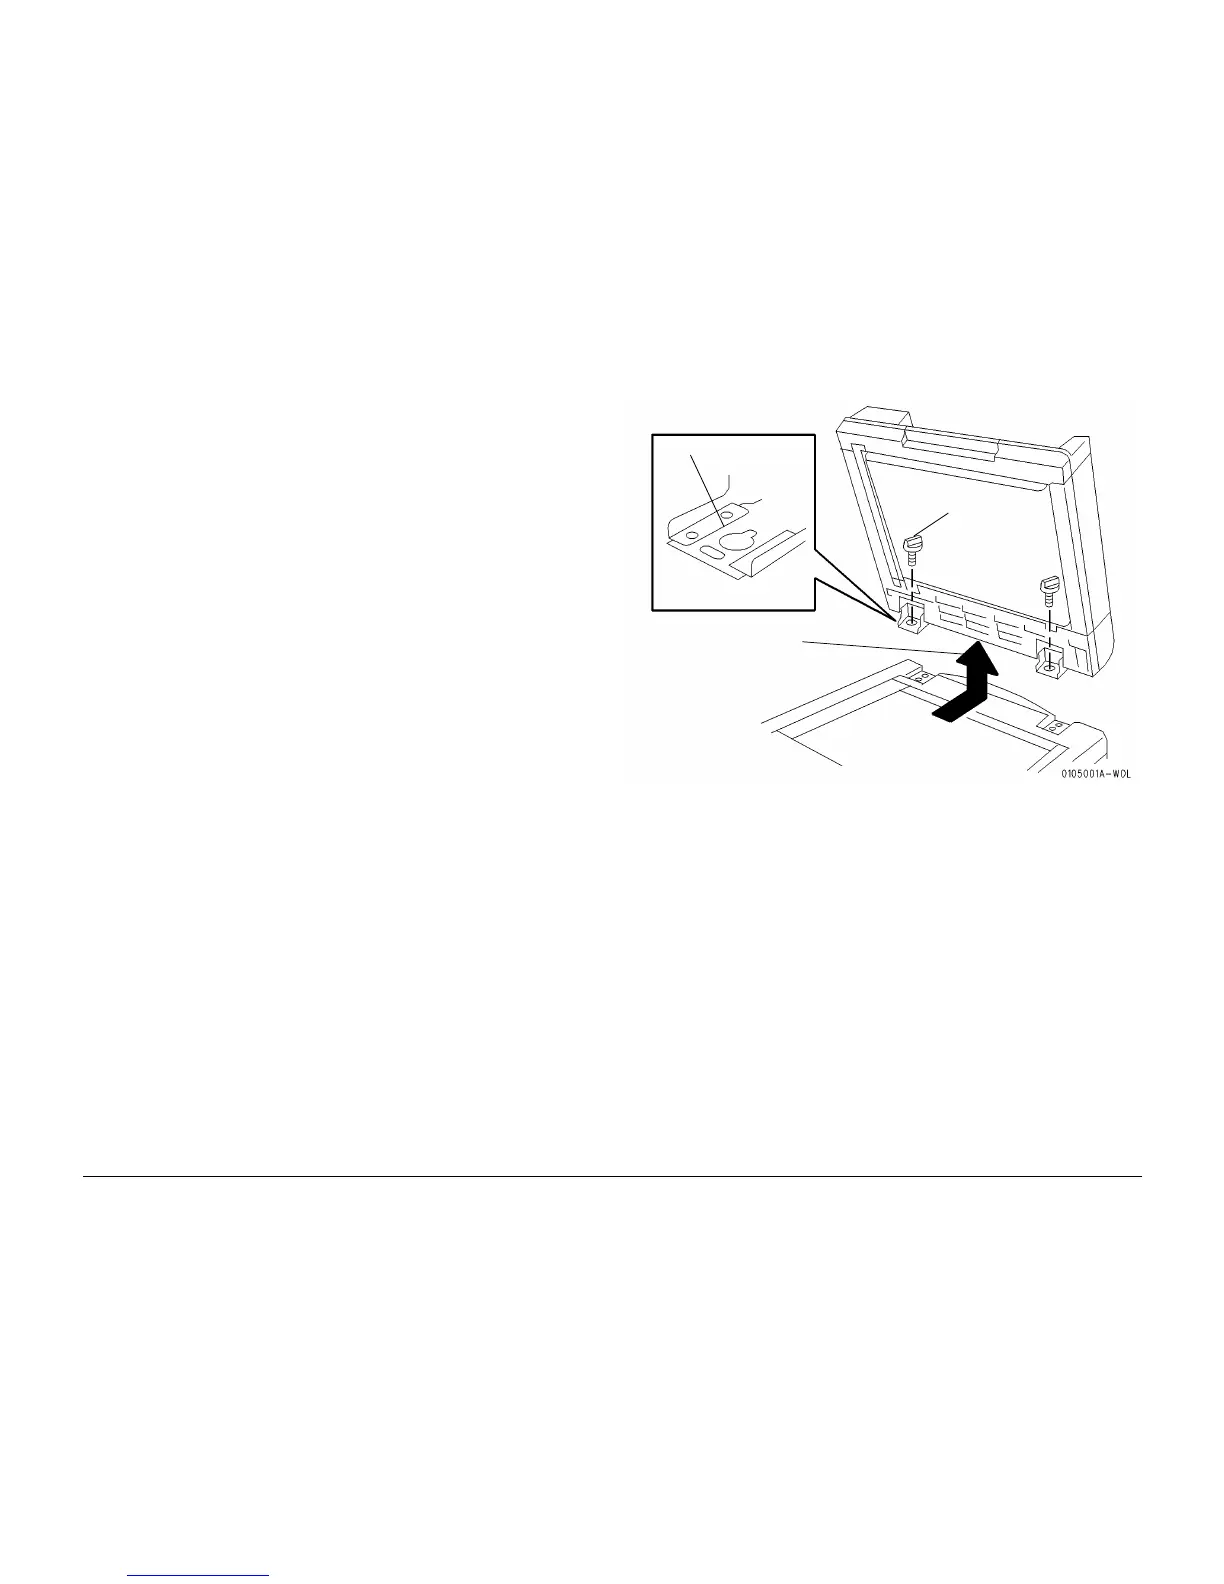
3. Remove the ADF Assembly. (Figure 1)
Figure 1 Removing the ADF
Replacement
1. Perform the procedure for removal in reverse.
2. Perform an ADF Side Registration adjustment (ADJ 5.1)
3. Perform an ADF Lead Edge Registration adjustment (ADJ 5.2)
4. Perform an ADF Height adjustment (ADJ 5.3)
5. Perform an ADF Front-to-rear Positioning adjustment (ADJ 5.4)
1
Remove the two
Thumb Screws
2
See CAUTION - Remove the
ADF by moving it towards the
rear of the machine until the
slotted holes allow the ADF to
be lifted straight up off the
retaining pins
Slotted Hole