10/00
4-164
Phaser 790/DocuColor 2006
ADJ 10.1
Initial Issue
Repairs and Adjustments
ADJ 10.1 Fuser Nip
Purpose
The purpose is to adjust the fuser nip in order to ensure correct fusing of documents.
Check
1. Ensure that the machine is in the Ready condition.
2. Make several Internal Nip Test Pattern copies for the check (GP 15).
3. Open the Fuser Assembly.
4. Insert one of the copies into the nip, with image side up, and using the thumb wheel,
advance the black copy into the nip.
5. Leave the copy between the rolls.
6. Remove the copy after 10 to 20 seconds.
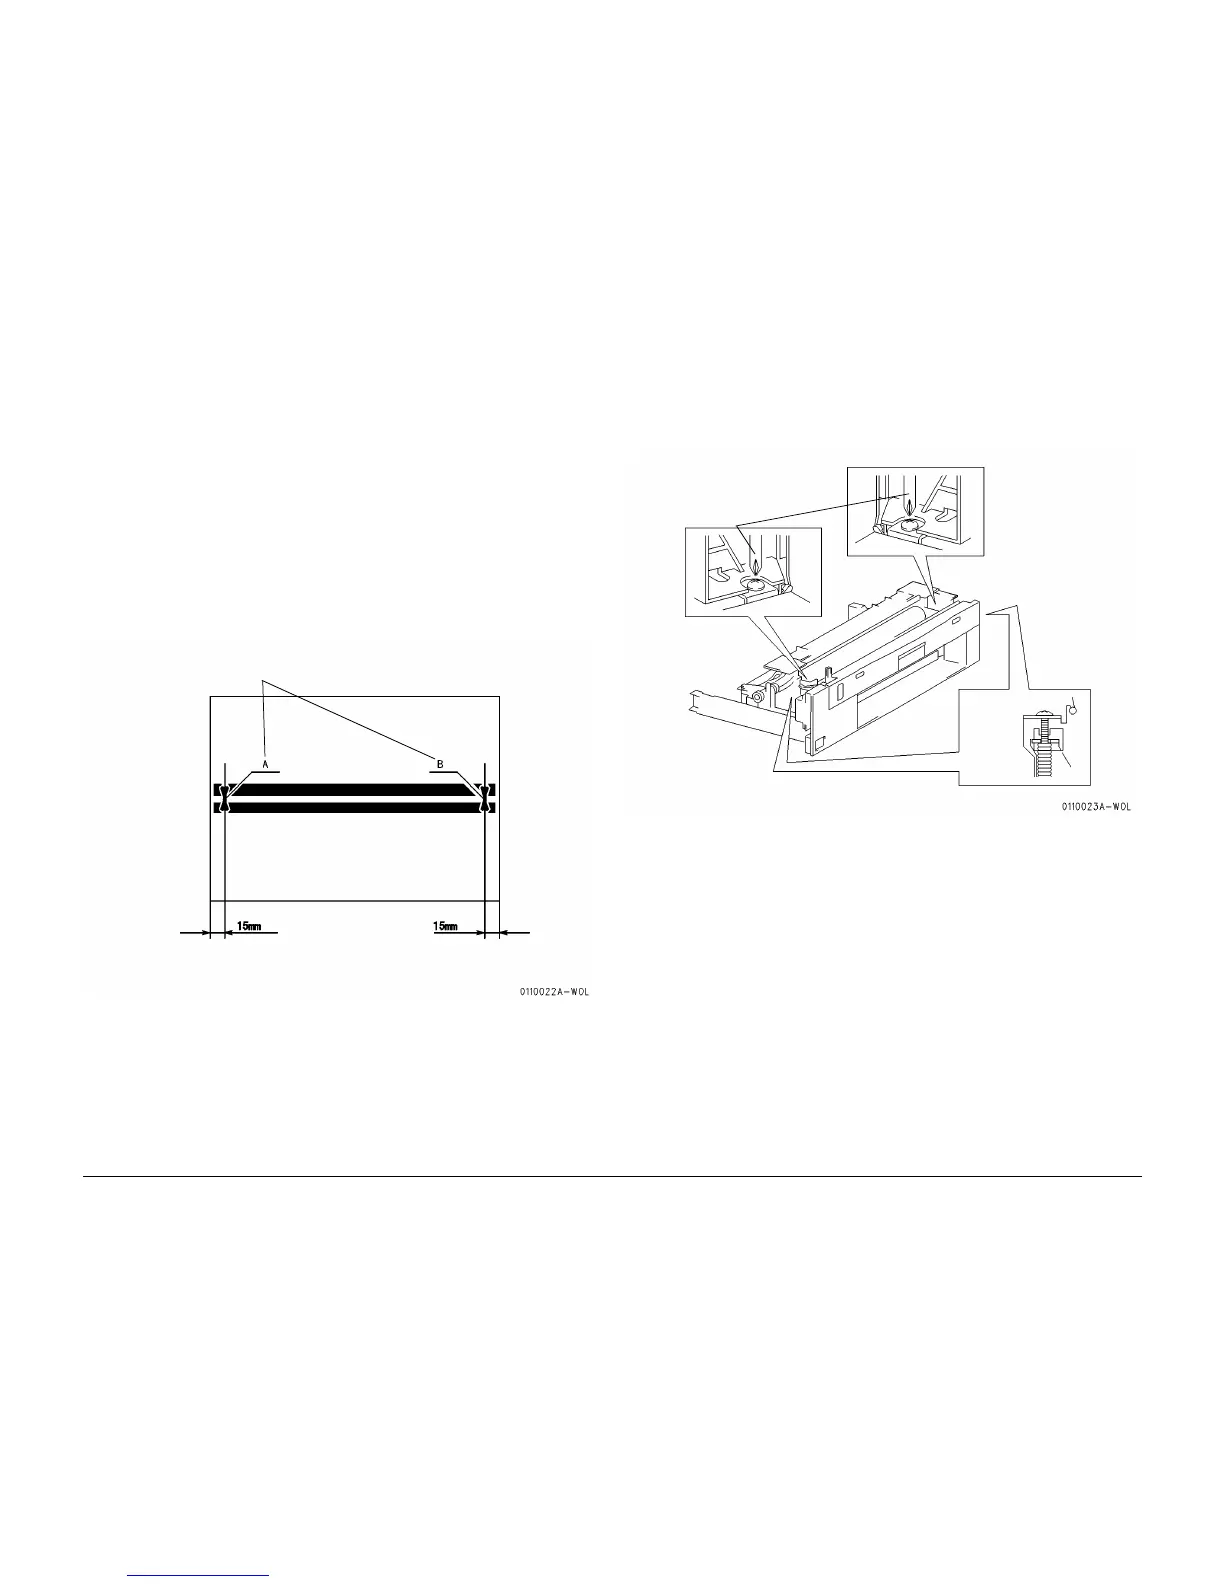
7. Check the Fuser Nip (Figure 1). Measure the width of the impression left by the nip.
8. If the measurement is not in specification, perform the adjustment.
Figure 1 Checking the Fuser Nip
Adjustment
1. Remove the Upper Guide Assembly (REP 10.3).
2. Adjust the Fuser Nip (Figure 2).
3. Perform the check again.
Figure 2 Adjusting the Fuser Nip
2
Check:
The width of the
nip is 7.0 mm and
the difference
between the two
measurements is
less than or equal
to 0.3 mm
1
Measure the width of the nip at points A and B
1
Turn the screw, at front or rear,
CLOCKWISE to increase or COUN-
TERCLOCKWISE to decrease the
width of the nip