10/00
4-107
Phaser 790/DocuColor 2006
REP 9.19
Repairs and Adjustments
Initial Issue
REP 9.19 BTR 2 Cam Assembly
Parts List on PL 7.1
Removal
WARNING
To avoid personal injury or shock, do not perform repair activities with the power switch
on or electrical power applied to the machine.
1. Switch off the machine power and disconnect the machine Power Cord.
2. Remove the Rear Cover (REP 14.4).
3. Remove the Copy/Print Cartridge (REP 9.1).
4. Remove the Tension Lever (REP 9.15).
5. Remove the Left Inner Cover Assembly (REP 14.5).
6. Remove the Fuser Assembly (REP 10.1).
7. Remove the Belt Cleaner (REP 9.17).
8. Remove the BTR 2 Assembly (REP 9.18).
9. Remove the BTR Cam Clutch (REP 9.23).
10. Open the Bypass Tray / Registration Assembly.
11. Remove the IBT Assembly (REP 9.16).
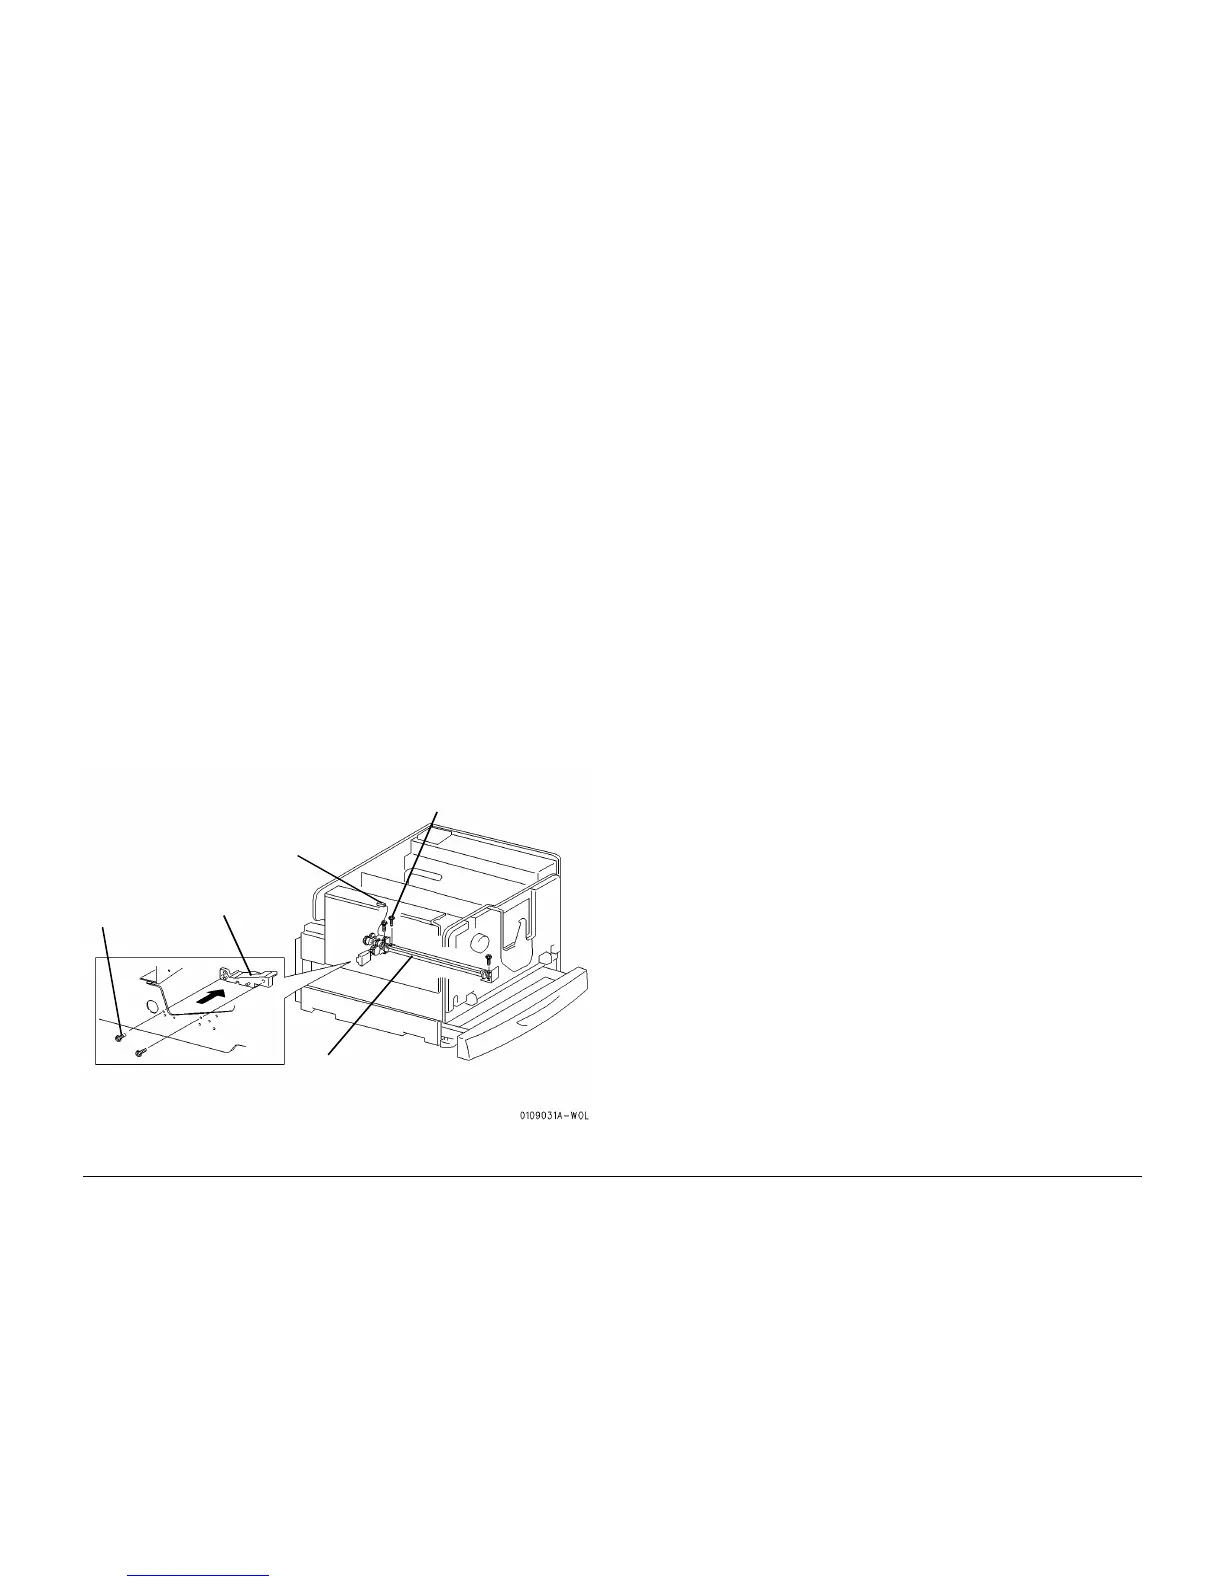
12. Remove the BTR 2 Cam Assembly (Figure 1).
Replacement
1. Reinstall the BTR 2 Cam Assembly in the reverse order of removal.
Figure 1 Removing the BTR 2 Cam Assembly
1
Remove the
screws
2
Remove the
bracket
3
Disconnect the sen-
sor connector
4
Reach in from the front and
remove the three screws
5
Remove the BTR 2 Cam
Assembly from the front