10/00
4-87
Phaser 790/DocuColor 2006
REP 8.39
Repairs and Adjustments
Initial Issue
REP 8.39 Duplex Nip Solenoid
Parts List on PL 15.1
Removal
WARNING
To avoid personal injury or shock, do not perform repair activities with the power switch
on or electrical power applied to the machine.
1. Switch off the machine power and disconnect the machine Power Cord.
2. Remove Tray 1 Assembly. (REP 7.6)
3. Remove the Duplex Tray Assembly. (REP 8.27)
4. Remove the Feeder Left Cover.
5. Remove the Inverter/Lower Assembly. (REP 8.35)
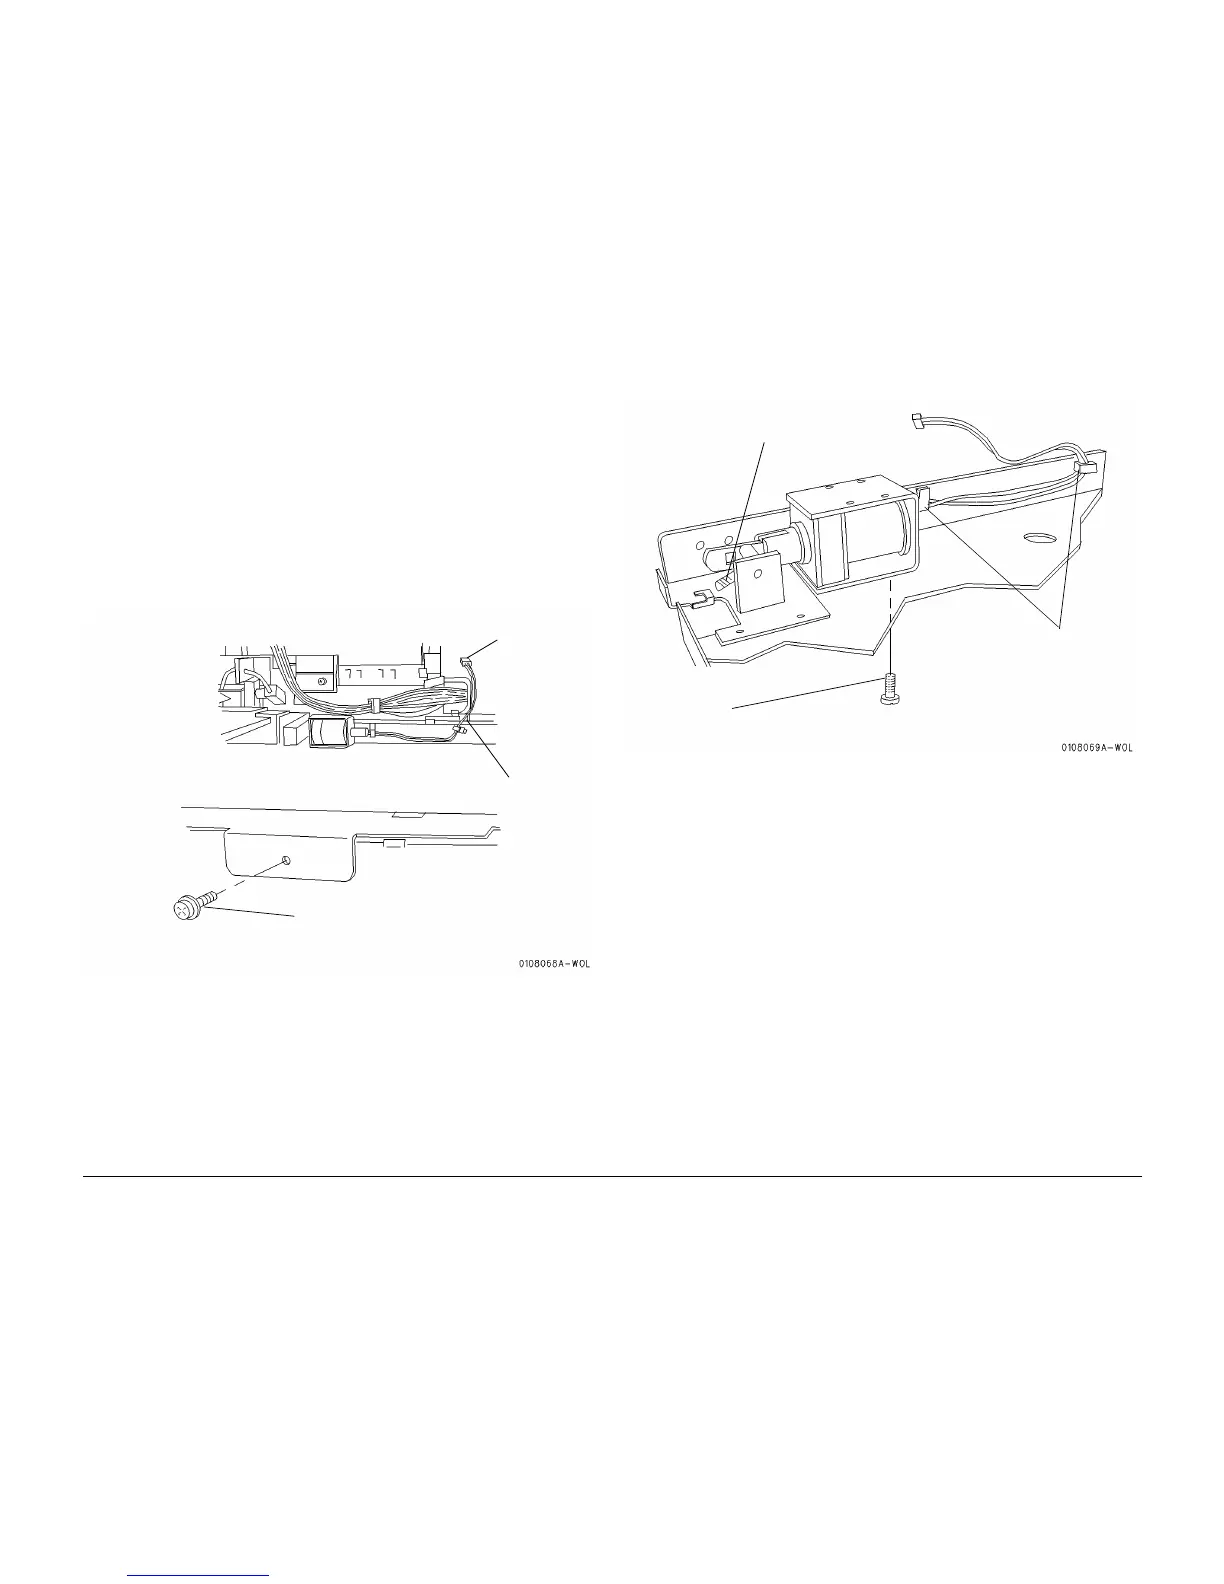
6. Remove the Lower Chute. (Figure 1)
Figure 1 Removing the Lower Chute
7. Remove the Duplex Nip Solenoid. (Figure 2)
Figure 2 Removing the Duplex Nip Solenoid
Replacement
1. Perform the removal procedure in reverse.
2. When replacing the Lower Chute, make sure the guide pins at the rear of the chute are
positioned to the locating holes in the frame.
1
Disconnect the
connector
2
Release the
wires from the
clip
3
Remove the screw and pull the
Lower Chute from the machine
Viewed inside the front of the machine
1
Release the
wires from the
clips
3
Remove the screw and the
Duplex Nip Solenoid
2
Disconnect the spring