Periodic Inspection and Maintenance
8
8.5 Replace the Drive
YASKAWA SIEPC71061705H GA700 Series Technical Manual 415
Screw Size Screw Shape Adapter
Bit
Torque Driver Model
(Tightening Torque)
Torque Wrench
Model Manufacturer
M6
Bit SF-BIT-HEX 5-50 PHOENIX CONTACT -
5 - 9 N∙m
(44.3 - 79.9 lbf∙in)
*2
*3
Bit SF-BIT-SL 1,2X6,5-70 PHOENIX CONTACT -
3 - 3.5 N∙m
(26.6 - 31.0 lbf∙in)
*2
*3
M8 Bit SF-BIT-HEX 6-50 PHOENIX CONTACT -
8 - 12 N∙m
(70.8 - 106.2 lbf∙in)
*2
*3
M10 Bit SF-BIT-HEX 8-50 PHOENIX CONTACT -
12 - 14 N∙m
(106.2 - 123.9 lbf∙in)
*2
*3
*1 When wiring drive models 2056, 4089, and smaller, select the correct tools for the wire gauge.
*2 Use 6.35 mm (0.25 in) bit socket holder.
*3 Use a torque wrench that can apply this torque measurement range.
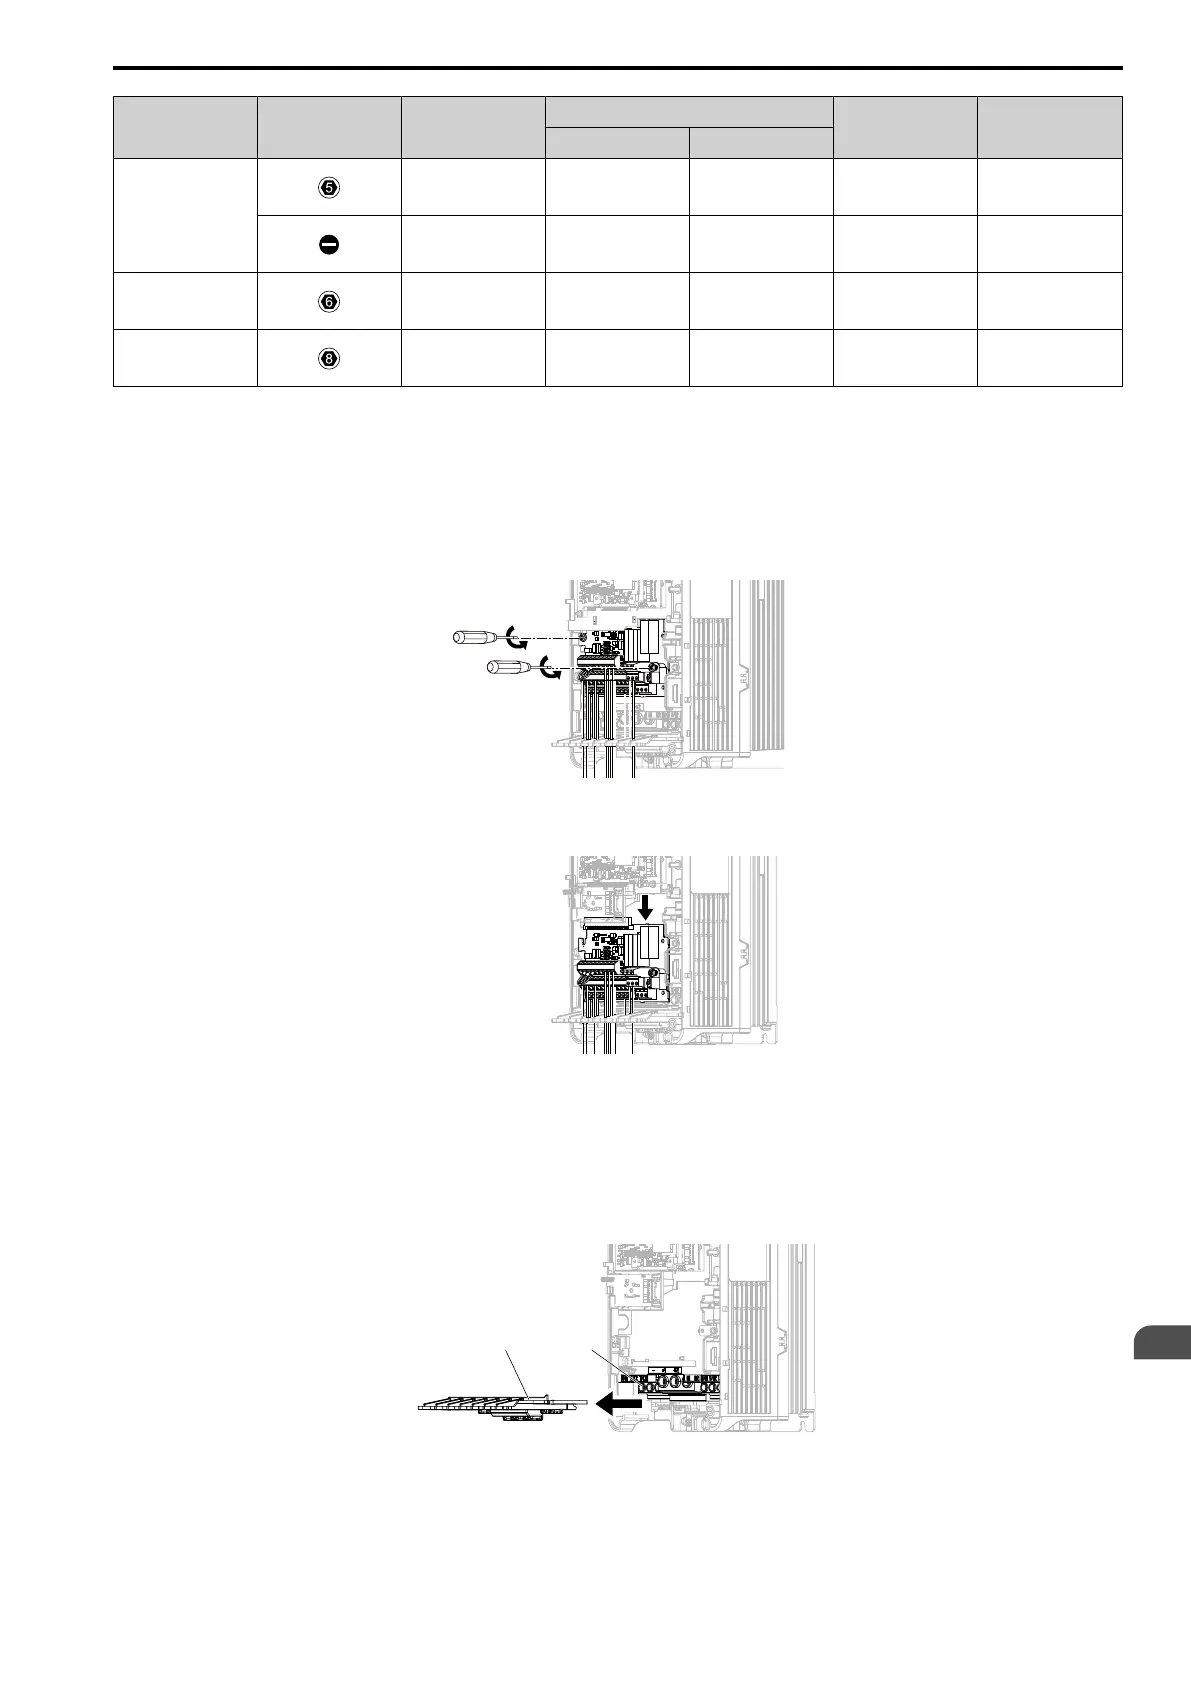
■ Remove the Control Circuit Terminal Block
Remove the keypad and the drive front cover before doing these steps.
1. Loosen the screws on the control circuit terminal block.
Figure 8.70 Loosen the Screws
2. Slide the wired control circuit terminal block down and remove it.
Figure 8.71 Remove the Control Circuit Terminal Block
■ Wire a New Drive
Remove the keypad, front cover, and control circuit terminal block of the new drive. Wire the drive to the main
circuit terminal block before you install a wired control circuit terminal block.
1. Pull the wiring cover away from the drive to remove it.
A - Wiring cover B - Main circuit terminal block
Figure 8.72 Remove the Wiring Cover
 Loading...