5.
Tilt the CBC back and forth gently and carefully to ensure that the buer is
evenly distributed across the top of the baes. If you do not tilt the CBC back
and forth, the buer sticks to the baes because of surface tension.
6.
Verify that the buer is at or above the ll line.
7.
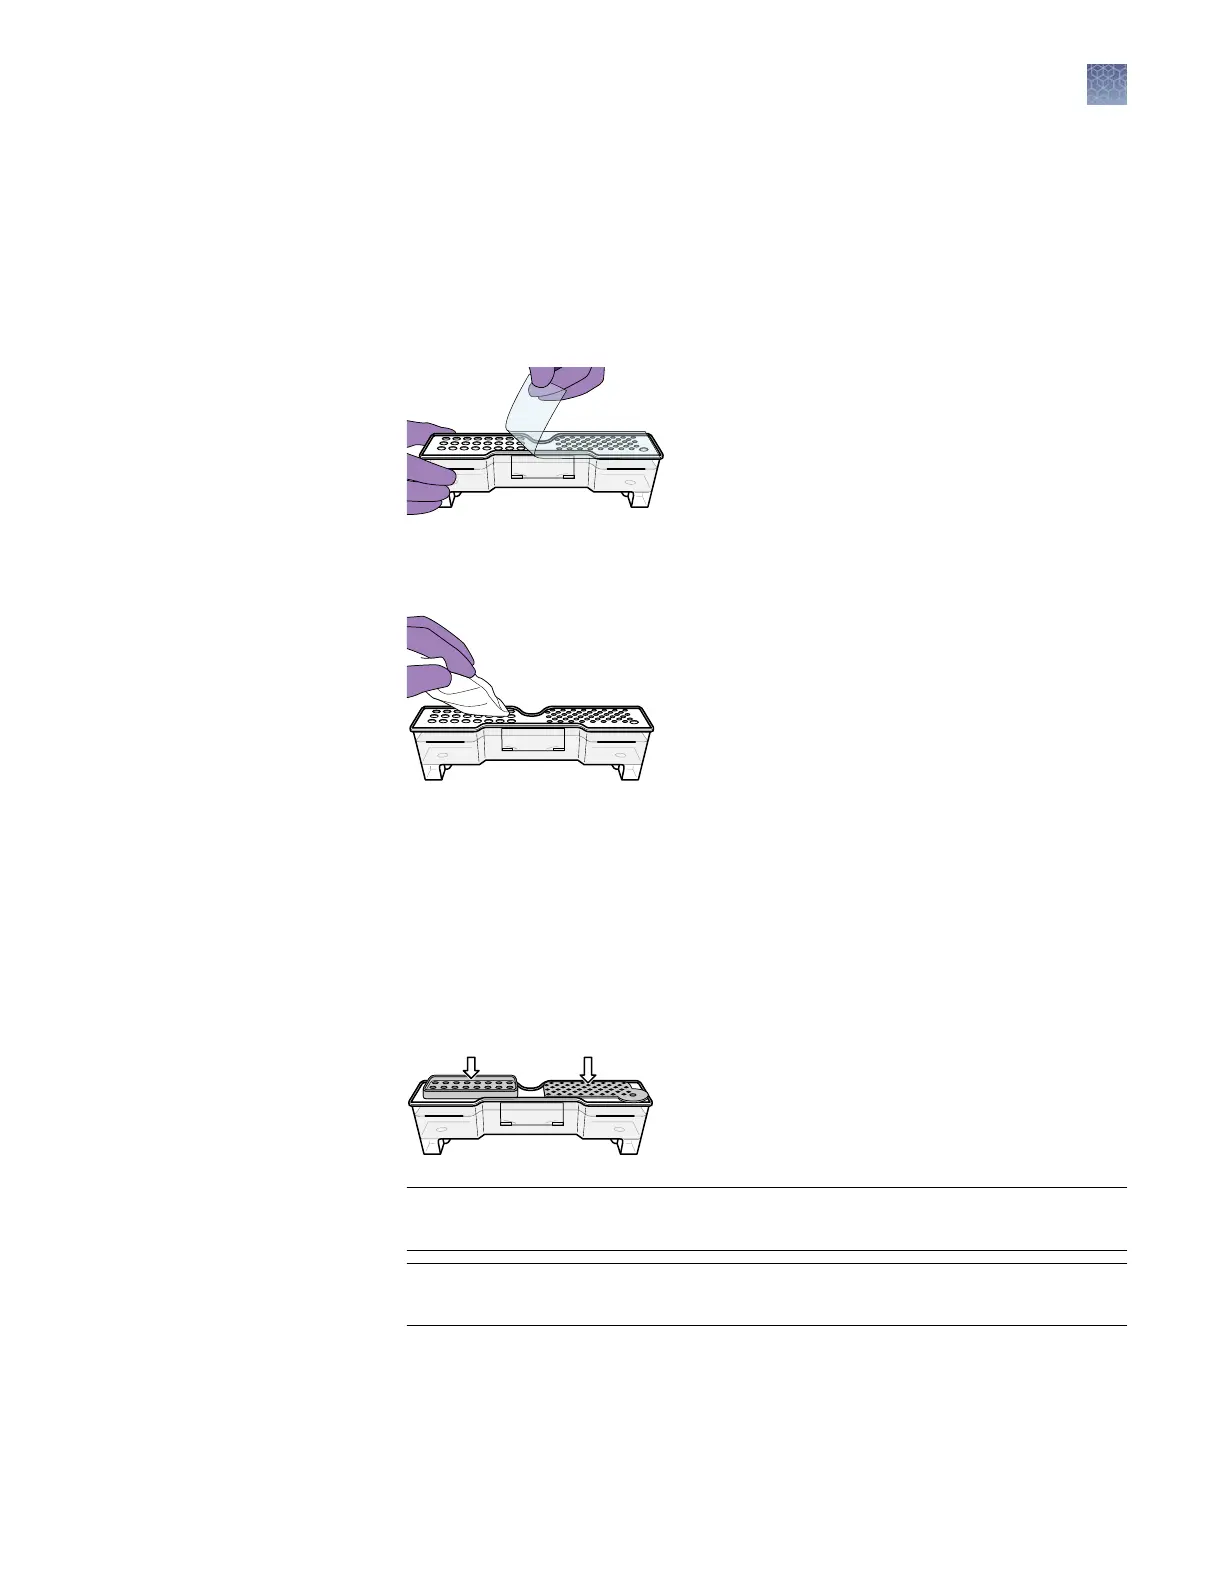
When ready to install the CBC, place the container on a at surface (such as a lab
bench) and peel o the seal.
8.
W
ipe o any buer on top of the CBC with a lint-free tissue. Ensure that the top
of the container is dry. Moisture can cause arcing and termination of a run.
9.
Place the appropriate septum on each side of the CBC:
a.
Align the buer septum (the part that is symmetrical) ov
er the 24 holes of
the CBC.
b.
Push the septum lightly into the holes to start, then push rmly to seat it.
c.
Align the capillary washing septum over the other chamber of the CBC.
d.
Push the septum lightly into the holes to start, then push rmly to seat it.
IMPORTANT! Look at the CBC from the side and ensure that there is no gap
betw
een the container and the lip of the septum.
IMPORTANT! Ensure that the w
ashing septum is securely seated to prevent
displacement of the septum during operation.
10.
Click the T
ray buon on the front panel to move the autosampler to the front
position.
Chapter 9 Maint
ain the Instrument
Install buffers
9
3500/3500xL Genetic Analyzer User Guide—Data Collection Software v3.1
231