Prepare the plate assembly on a clean, level surface. Wear gloves when handling
septa. Do not heat plates that are sealed with septa.
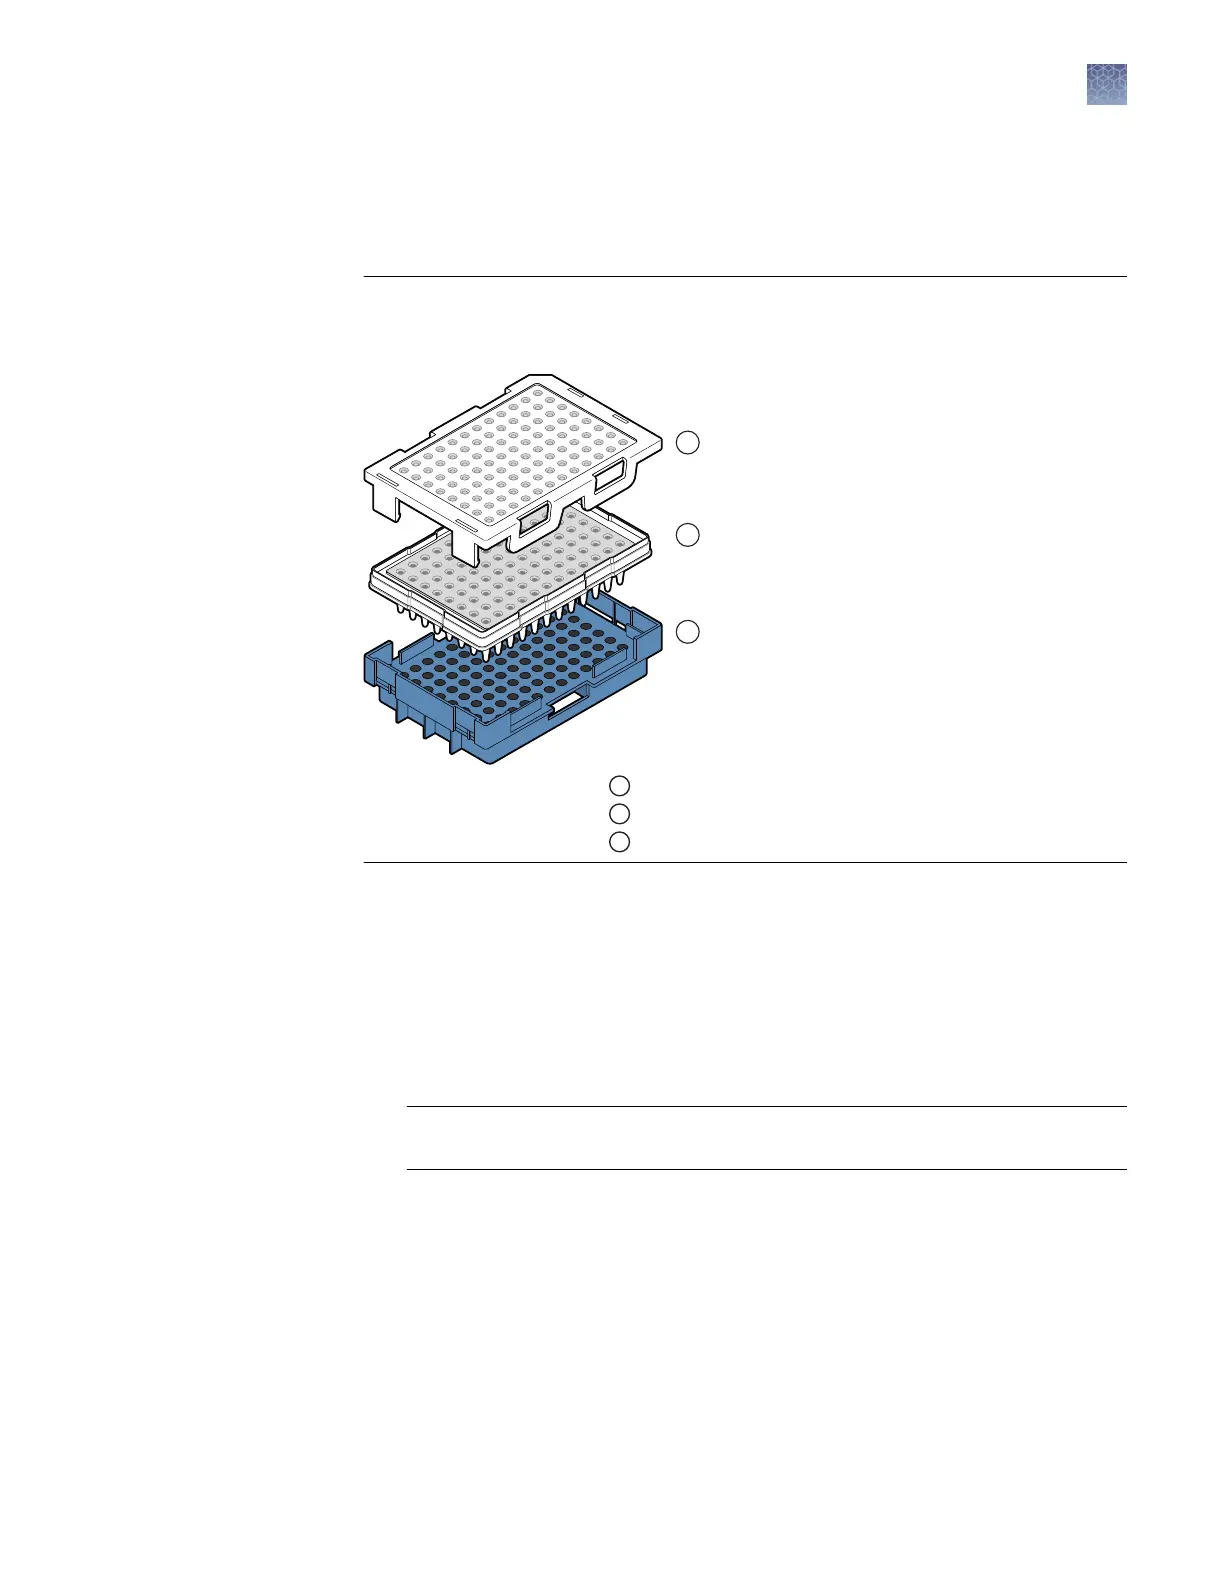
96-w
ell plate assembly
IMPORTANT! Use the correct plate base for standard plates. Using the wrong plate
base may aect performance. See
Appendix D, “Catalog numbers“ for plate assembly
specications and catalog numbers.
1
Plate retainer
2
Plate with septa strip
3
Plate base
1.
Align the holes in the septa with the w
ells of the plate (general purpose supply),
then press down rmly on the septa until the septa lies at on the plate.
2.
Place the plate into the plate base.
3.
Snap the plate retainer (cover) onto the plate, septa, and plate base.
4.
Verify that the holes of the plate retainer and the septa are aligned. If holes are
not aligned, take it apart, then re-assemble.
IMPORTANT! The array tips will be damaged if the plate retainer and septa
holes do not align correctly
.
5.
If the contents of any well contain bubbles or are not located at the boom of the
well, briey centrifuge the plate, remove the plate from the centrifuge, and verify
that each sample is positioned correctly in the boom of its well.
Prepare the plate
assembly
Chapter 3 Set up and run
Prepare and load sample plates
3
3500/3500xL Genetic Analyzer User Guide—Data Collection Software v3.1
53