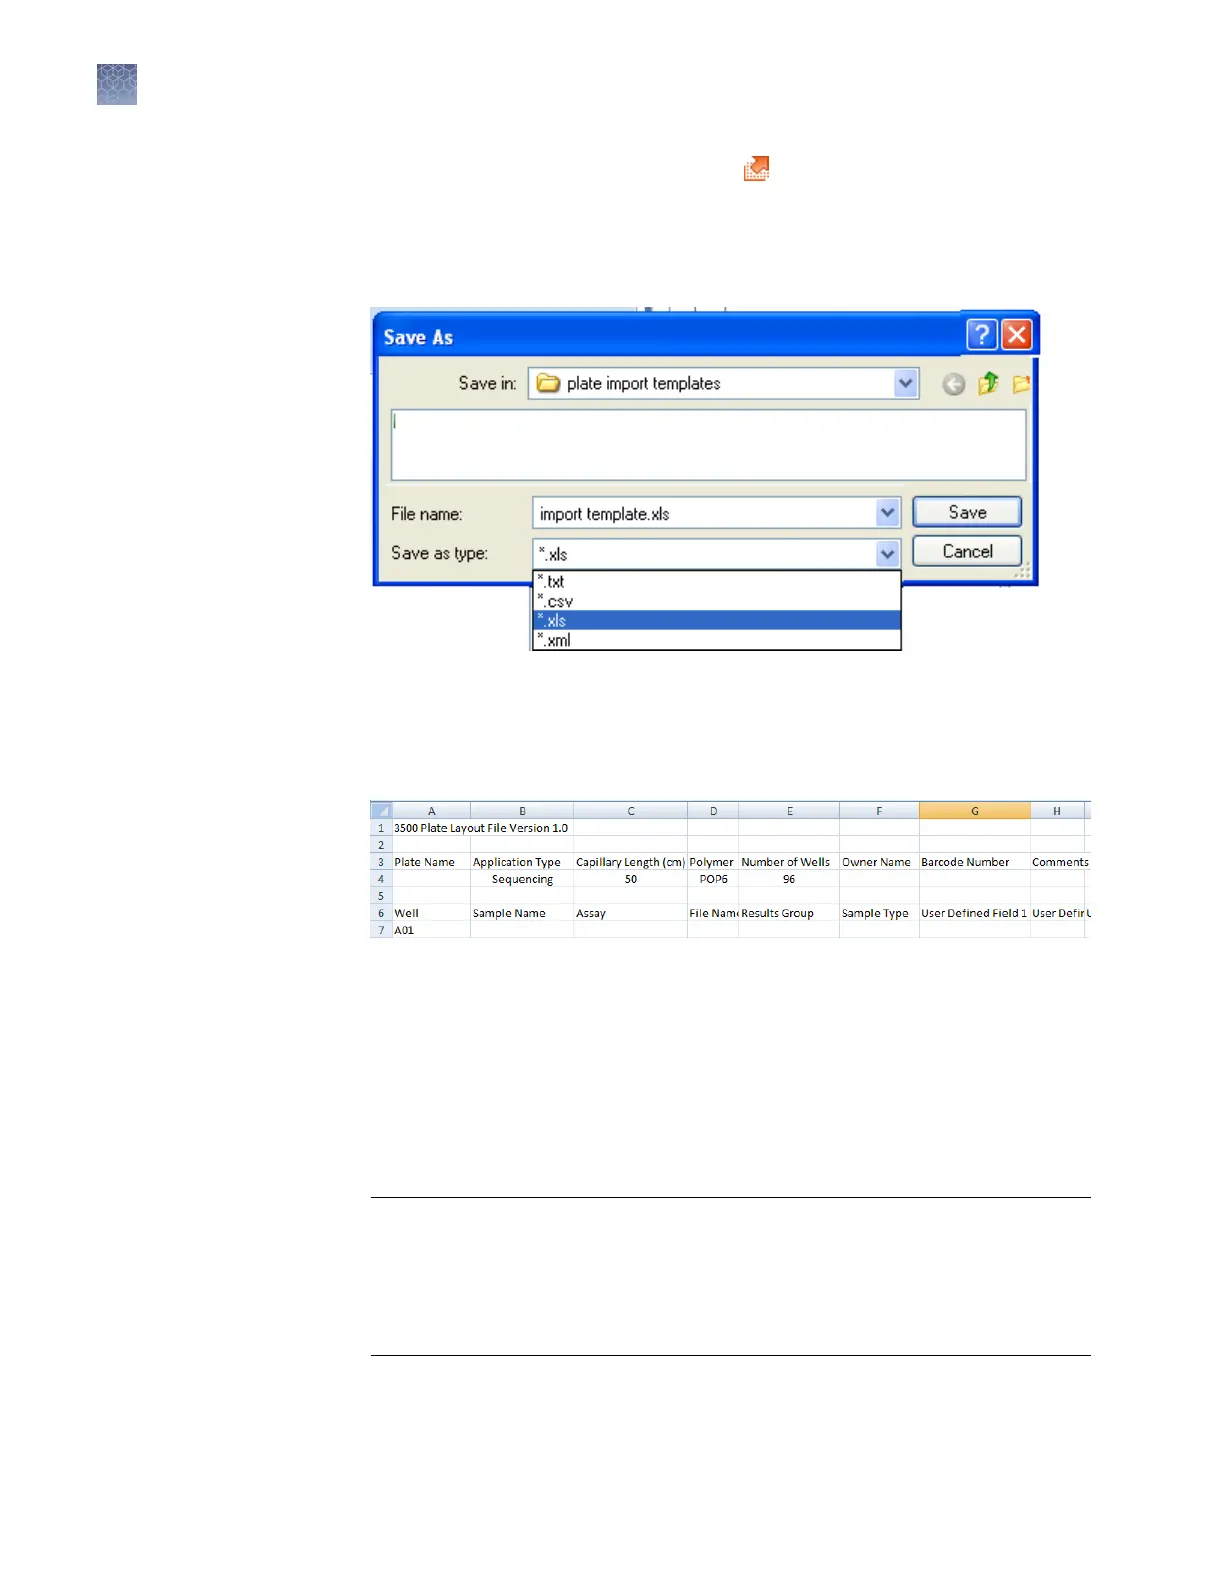
5.
In the Assign Plate Contents screen, click Export.
Not
e: Before you click Export, you can assign other plate elements to the plate
import template as described in “Assign plate contents“ on page 44.
6.
Select a le type for the plate import template.
7.
Enter a name and location for the plate record template.
8.
Click Save.
The gure below shows the format of the exported plate.
1.
Open a plate import template (see “Create a plate import template“
on page 77.
2.
Save the plate import template under a new name.
3.
Enter sample names (required).
4.
(Optional) Enter information for the remaining columns. Note: If you specify
assay, results group, or le name convention names, the names you enter must
exactly match the names of existing items in the library.
IMPORTANT! If y
ou copy/paste sample or plate information into the Assign
Plate Contents screen or into a plate import le, copy from a plain text editor
such as Notepad. Do not copy from a word processing program such as
Microsoft
™
Word
™
, which may include invisible, non-ASCII characters. Non-
ASCII characters in plate or sample information may cause a run to stop or may
prevent a run from starting.
5.
Sav
e the plate import le.
Create a plate
import fil
e
Chapter 3 Set up and run
More features in Assign Plate Contents
3
78
3500/3500xL Genetic Analyzer User Guide—Data Collection Software v3.1