4.
(Optional):
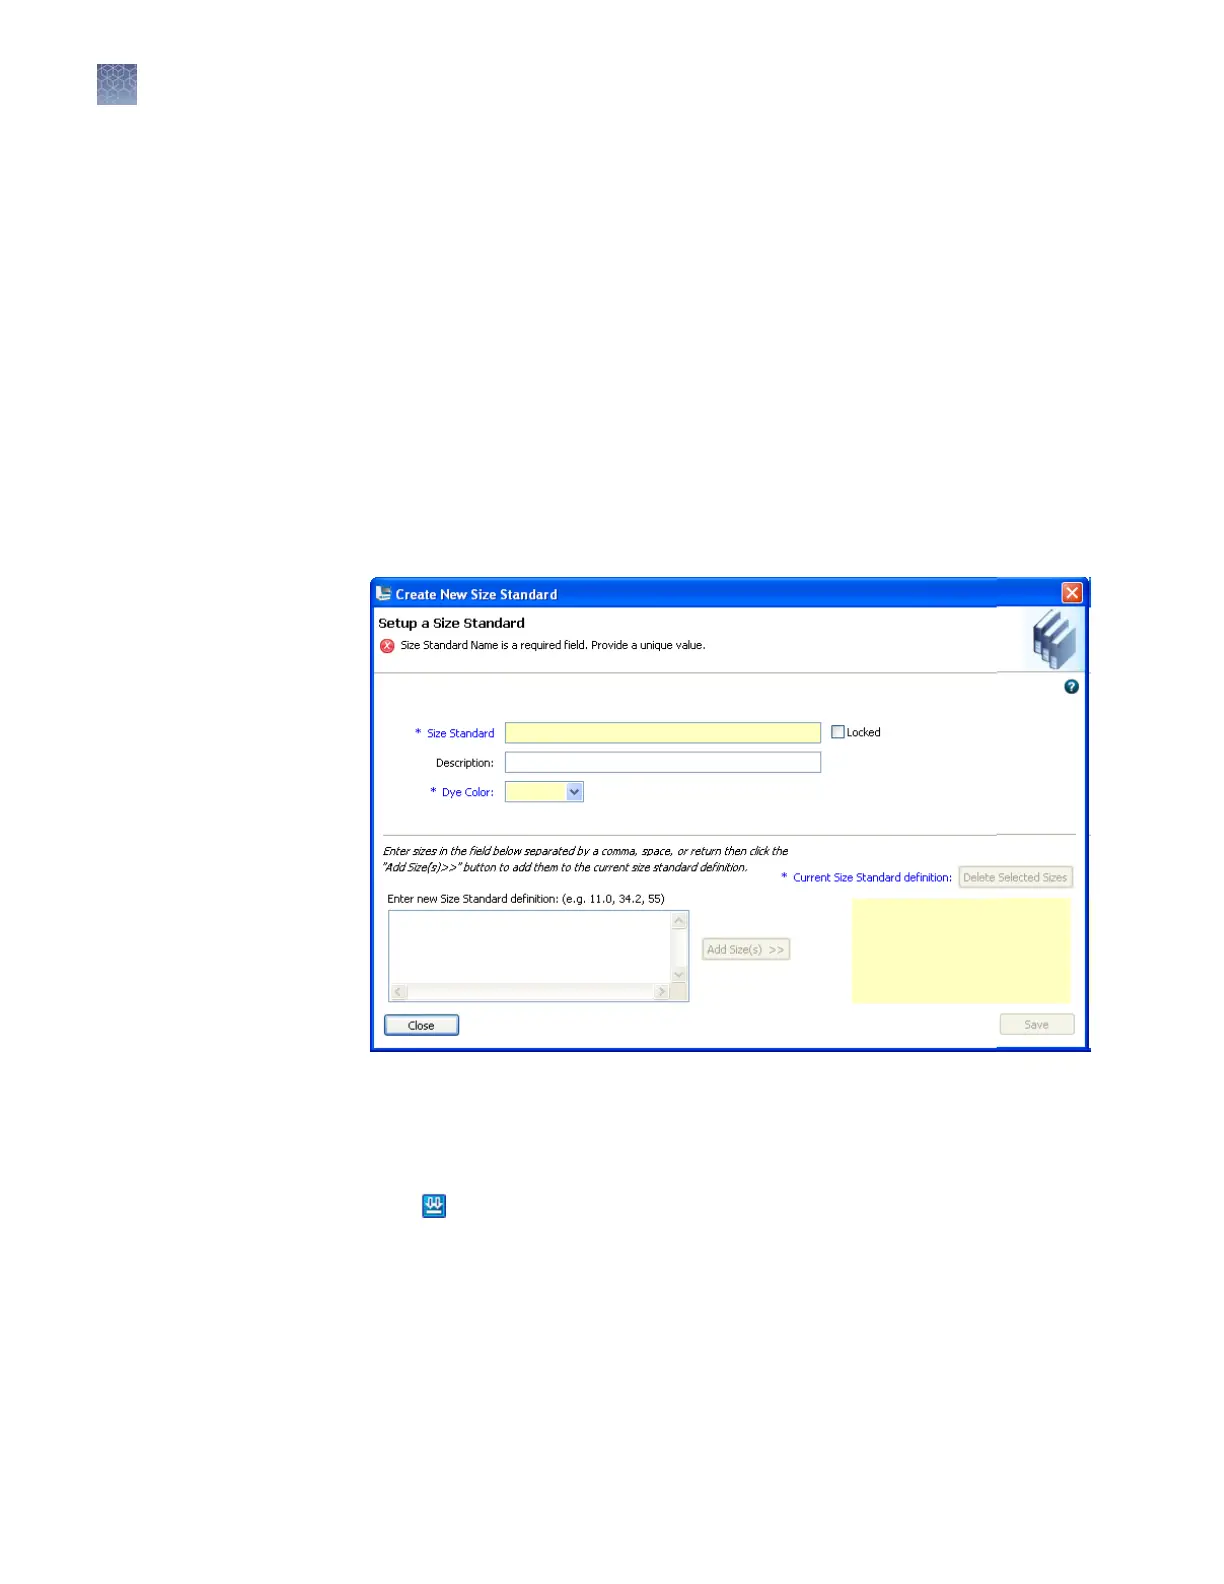
• Select the Locked check box.
When enabled, allows the entry to be unlocked and modied only by the
user who created it, the administrator, or another user with unlock
permissions. Useful when your system includes the SAE module (described
in Chapter Chapter 8, “Use Security, Audit, and E-Sig functions (SAE
Module)“).
• Enter a description.
5.
Select a dye color.
6.
Enter sizes in the list on the left. Separate sizes with a comma, space, or return.
7.
Click Add Sizes.
8.
Click Save.
Figure 22 Cr
eate New Size Standard
1.
Select a factory-provided normalization size standard (indicated in the name
with “+Normalization.”).
2.
Click
Duplicate.
3.
Edit the copy of the normalized size standard. The size standard peaks used to
normalize the data are display
ed in gray and are not editable.
4.
Click Save.
Modify a factory-
pr
ovided
normalization size
standard
Chapter 7 Manage libr
ary resources
Size standards library
7
172
3500/3500xL Genetic Analyzer User Guide—Data Collection Software v3.1