3.
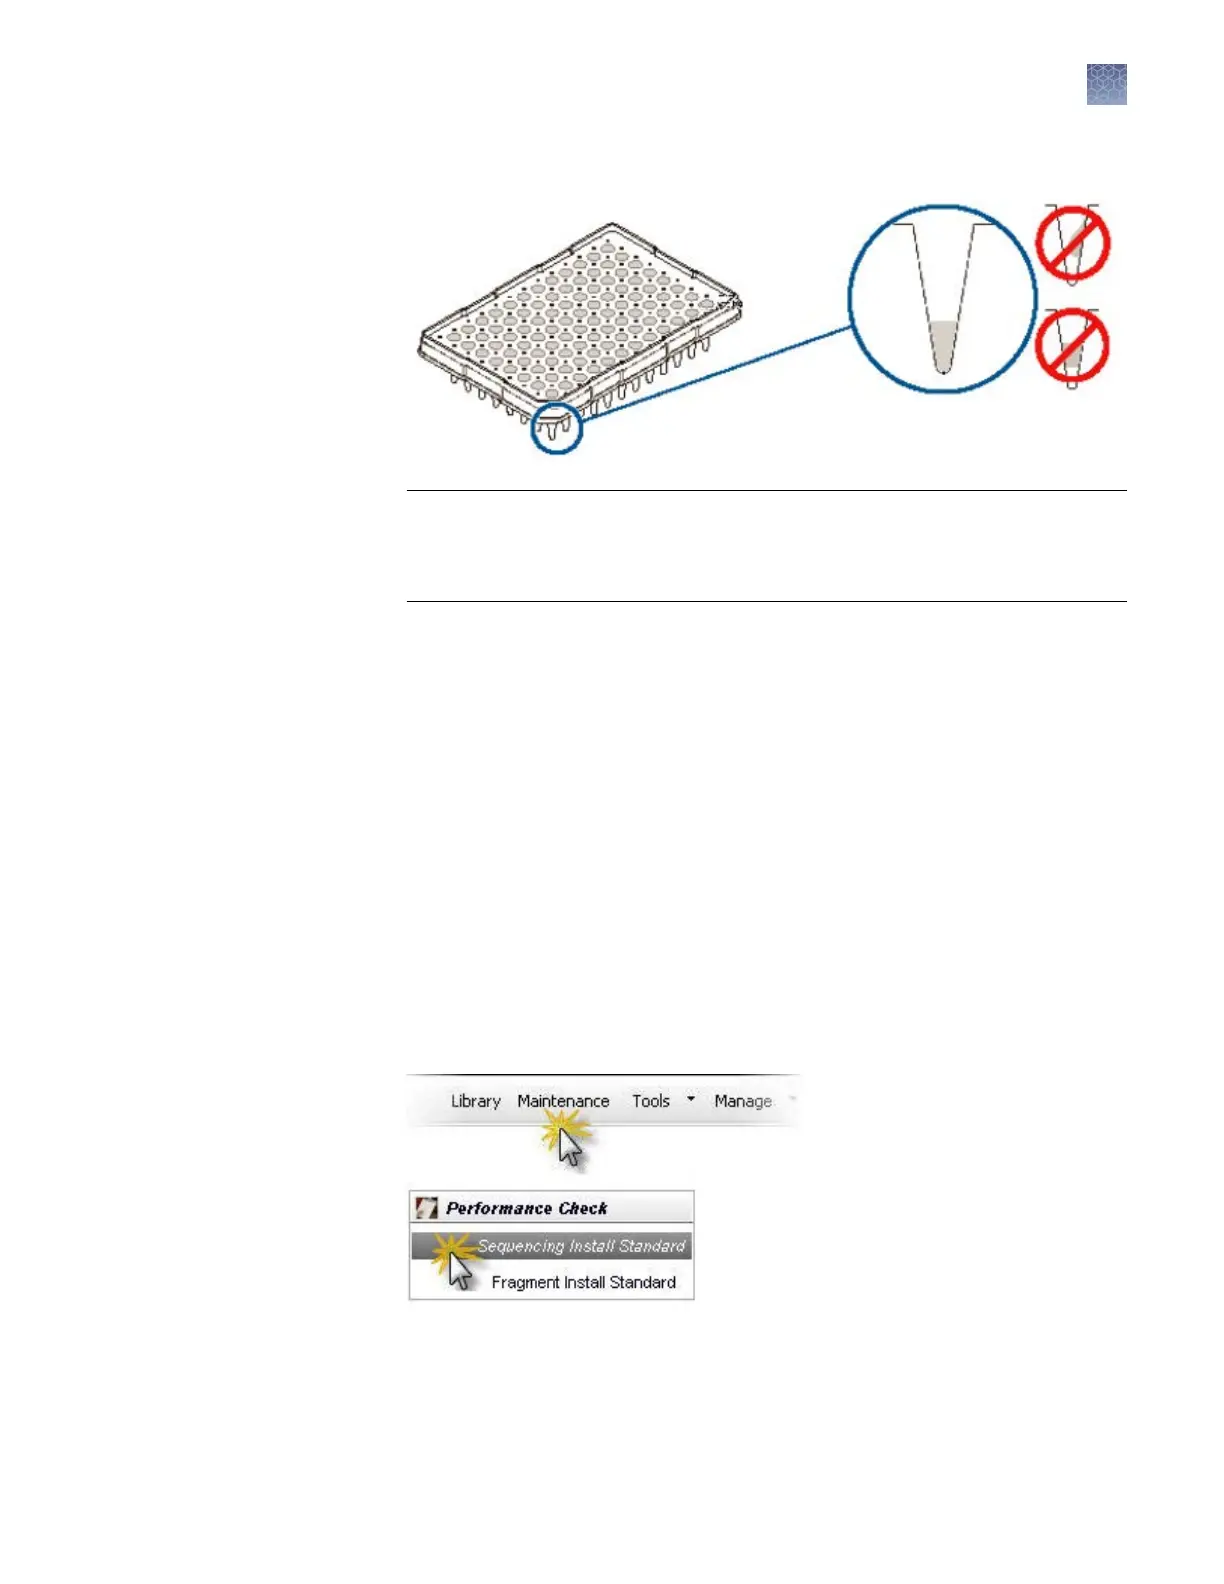
Verify that each standard is positioned correctly in the boom of its well.
IMPORTANT! If the contents of any well contain bubbles or are not located at the
boom of the well, briey centrifuge the plate, remove the plate from the
centrifuge, and verify that each standard is positioned correctly in the boom of
its well.
4.
Store the plate on ice until y
ou prepare the plate assembly and load the plate in
the instrument.
5.
Prepare the plate assembly as described in “Prepare the plate assembly“ on
page 53.
Load the plate in the instrument
1.
Click the Tray buon on the front panel to move the autosampler to the front
position, then open the instrument door.
2.
Place the plate in the autosampler with the labels facing you (or the instrument
door) and the notched corner of the plate in the notched corner of the
autosampler.
3.
Close the instrument door to initialize the instrument.
1.
Access the Sequencing Install Standard screen.
2.
Select the chemistry type.
Not
e: BDTv3.1 with POP-6
™
polymer is not available for the install check (it can
be used for application runs). If your application uses BDTv3.1 with POP-6
™
polymer, select BDTv.1 for the sequencing install check, then perform a separate
Perform a
sequencing ins
tall
check
Chapter 6 Run c
alibrations and install checks
Run a Sequencing install check
6
3500/3500xL Genetic Analyzer User Guide—Data Collection Software v3.1
123