Start the computer and instrument
IMPORTANT! The order in which you turn on the computer and instrument is critical
for proper communication between the instrument and the computer. Follow the
sequence of steps given in this section (power on computer but do not log in, power
on instrument, log in to Windows
™
operating system).
1.
P
ower on the computer and monitor, but do not log in to the Windows
™
operating system.
2.
Verify that the instrument is connected to the appropriate power supply.
CAUTION! Do not unpack or plug in any components until a service
representative has congured the system for the proper operating voltage.
IMPORTANT! Do not rename the computer after the 3500 Series Data Collection
Softw
are 3.1 is installed. The instrument computer has been assigned a unique
name. Changing the name may cause the software to malfunction.
3.
Inspect the instrument interior
. Ensure that:
a.
The oven door is closed.
b.
No objects are left inside the instrument.
IMPORTANT! Misplaced objects left inside the instrument can cause damage.
4.
Close the instrument door
.
5.
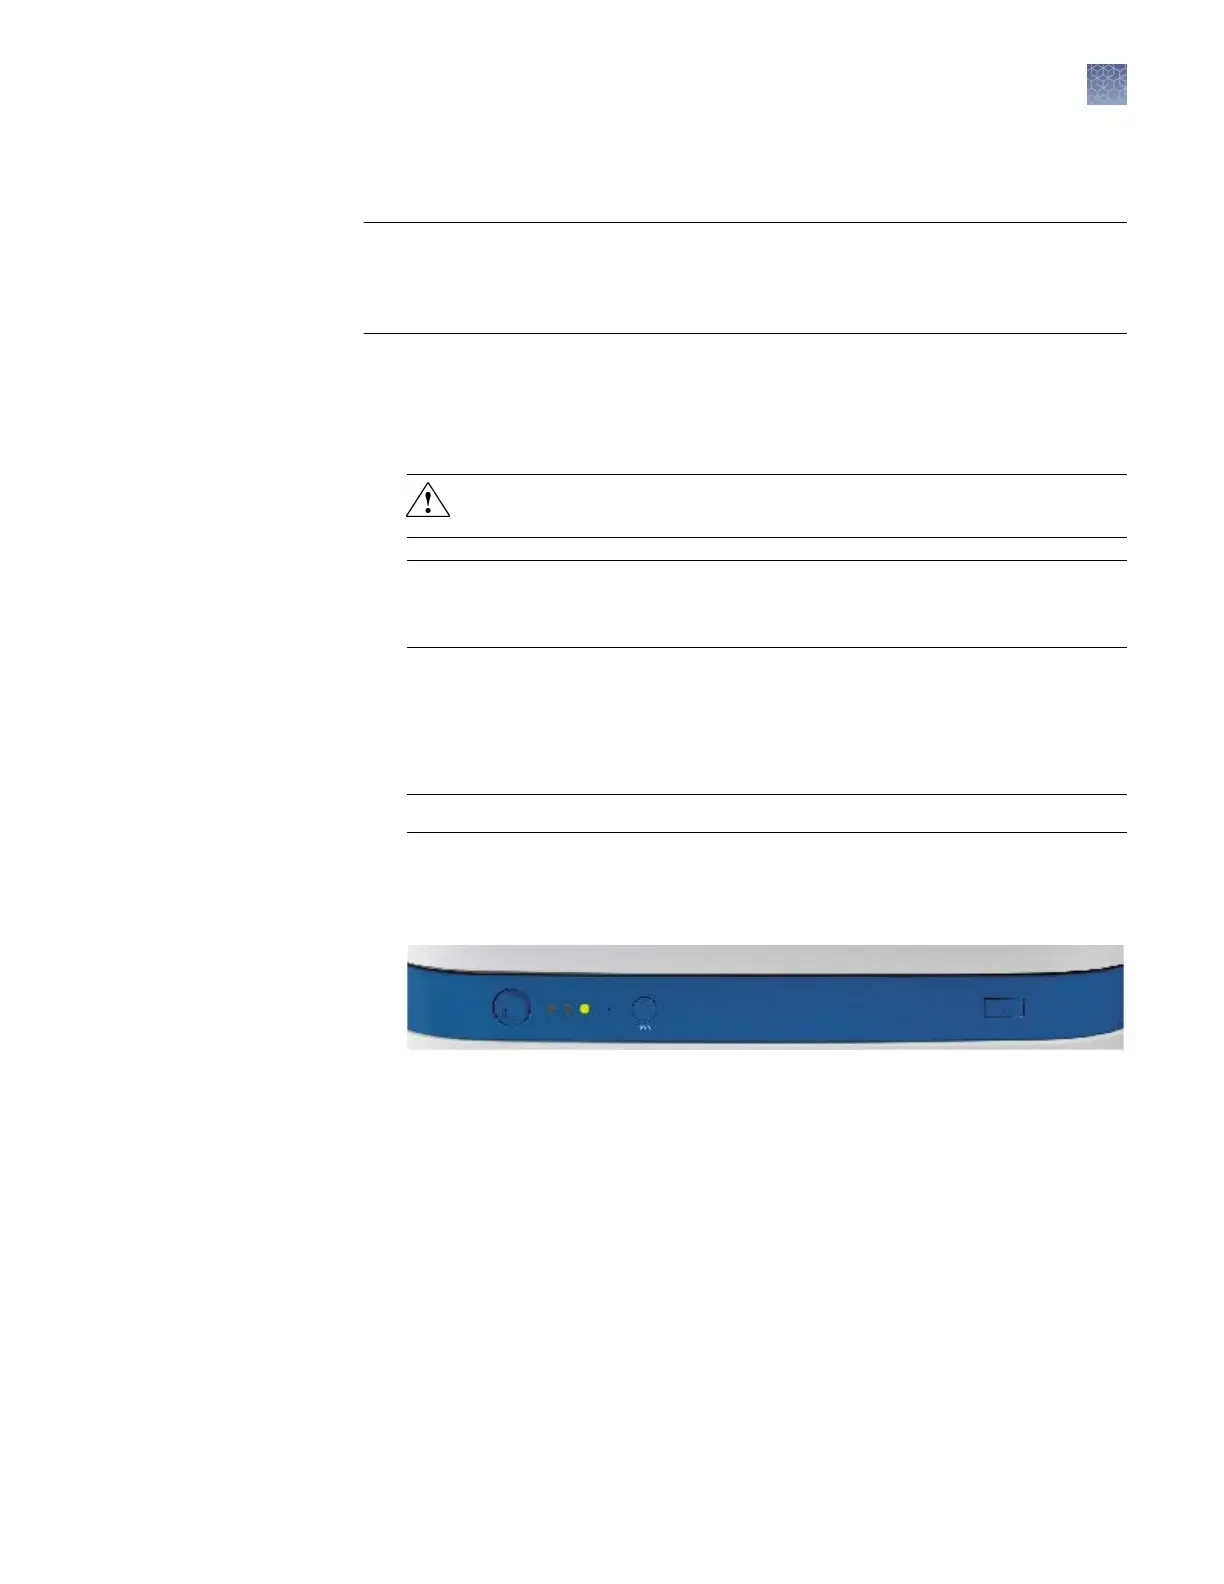
Power on the instrument:
Power button Tray button Light button
a.
Press the pow
er on/o buon on the front of the instrument and wait for the
green status light to turn on.
Note: If the door is open during power on, the yellow light will continue to
ash until you close the door. See indicator descriptions in “Instrument
front panel indicators“ on page 17.
b.
If desired, press the Light buon to turn on the interior light.
c.
Check the instrument status. Ensure the green status light is on and not
ashing before proceeding. See indicator descriptions in “Instrument front
panel indicators“ on page 17.
6.
Log on to the Windows
™
operating system.
Chapter 2 St
art the system
Start the computer and instrument
2
3500/3500xL Genetic Analyzer User Guide—Data Collection Software v3.1
29