Ê Remove the protective cover from the heat sink.
V CAUTION!
Ensure not to touch the heat-conductive paste on the bottom of the
heat sink.
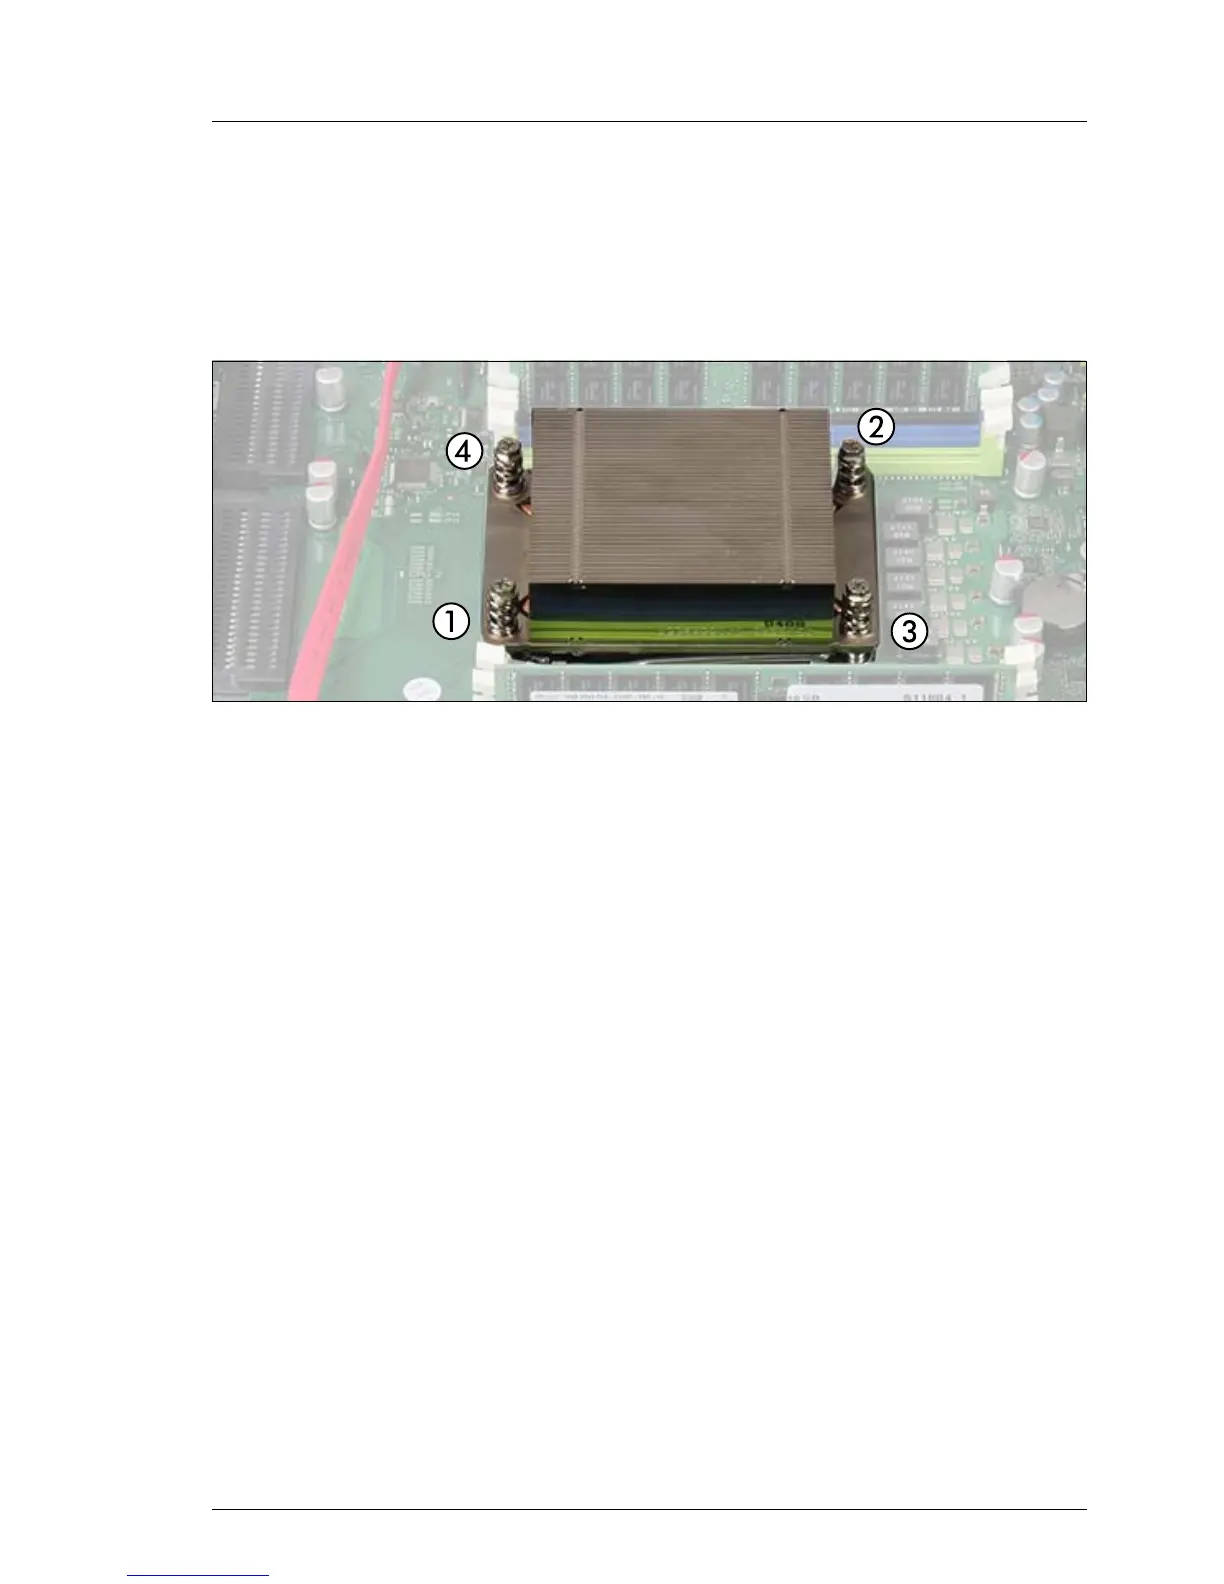
Figure 171: Installing the heat sink
Ê Align the heat sink and fit it on the processor socket.
Ê Position the screws in the holes carefully, making sure they are upright.
V CAUTION!
– Ensure that the screws on the heat sink are properly seated on the
threaded holes.
– Ensure that the heat sink cooling fins match the direction of the
airflow!
Ê Fasten it in a crossover pattern with four screws according to the numbering
(torque 1.0 Nm, the description of this torque value doesn't apply to the
Japanese market.)
11.2.4 Upgrading the main memory
Ê Select an adequate memory configuration for "Two CPUs populated" as
described in section "Basic information" on page 224.
Ê Install memory modules as described in section "Installing a memory
module" on page 234.

 Loading...