Gocator 2300 & 2880 Series
Gocator Web Interface • Scan Setup and Alignment • 88
Exposure can be configured separately for each sensor.
4. Click on the Exposure tab.
5. Select Multiple from the Exposure Mode drop-down.
6. Click the button to add an exposure step.
Up to a maximum of five exposure settings can be added.
To remove an exposure, select it in the exposure list and click the button.
7. Set the exposure level for each exposure to make the Gocator's camera less or more sensitive, as
required.
If Acquire Intensity is enabled, select the exposure step that is used to capture the intensity output.
8. If Acquire Intensity is enabled, select the exposure step that is used to capture the intensity output.
9. Run the sensor and check that laser profiling is satisfactory.
If laser profiling is not satisfactory, adjust the exposure values manually. Switch to Video mode to use
video to help tune the exposure; see Exposure on page 84 for details.
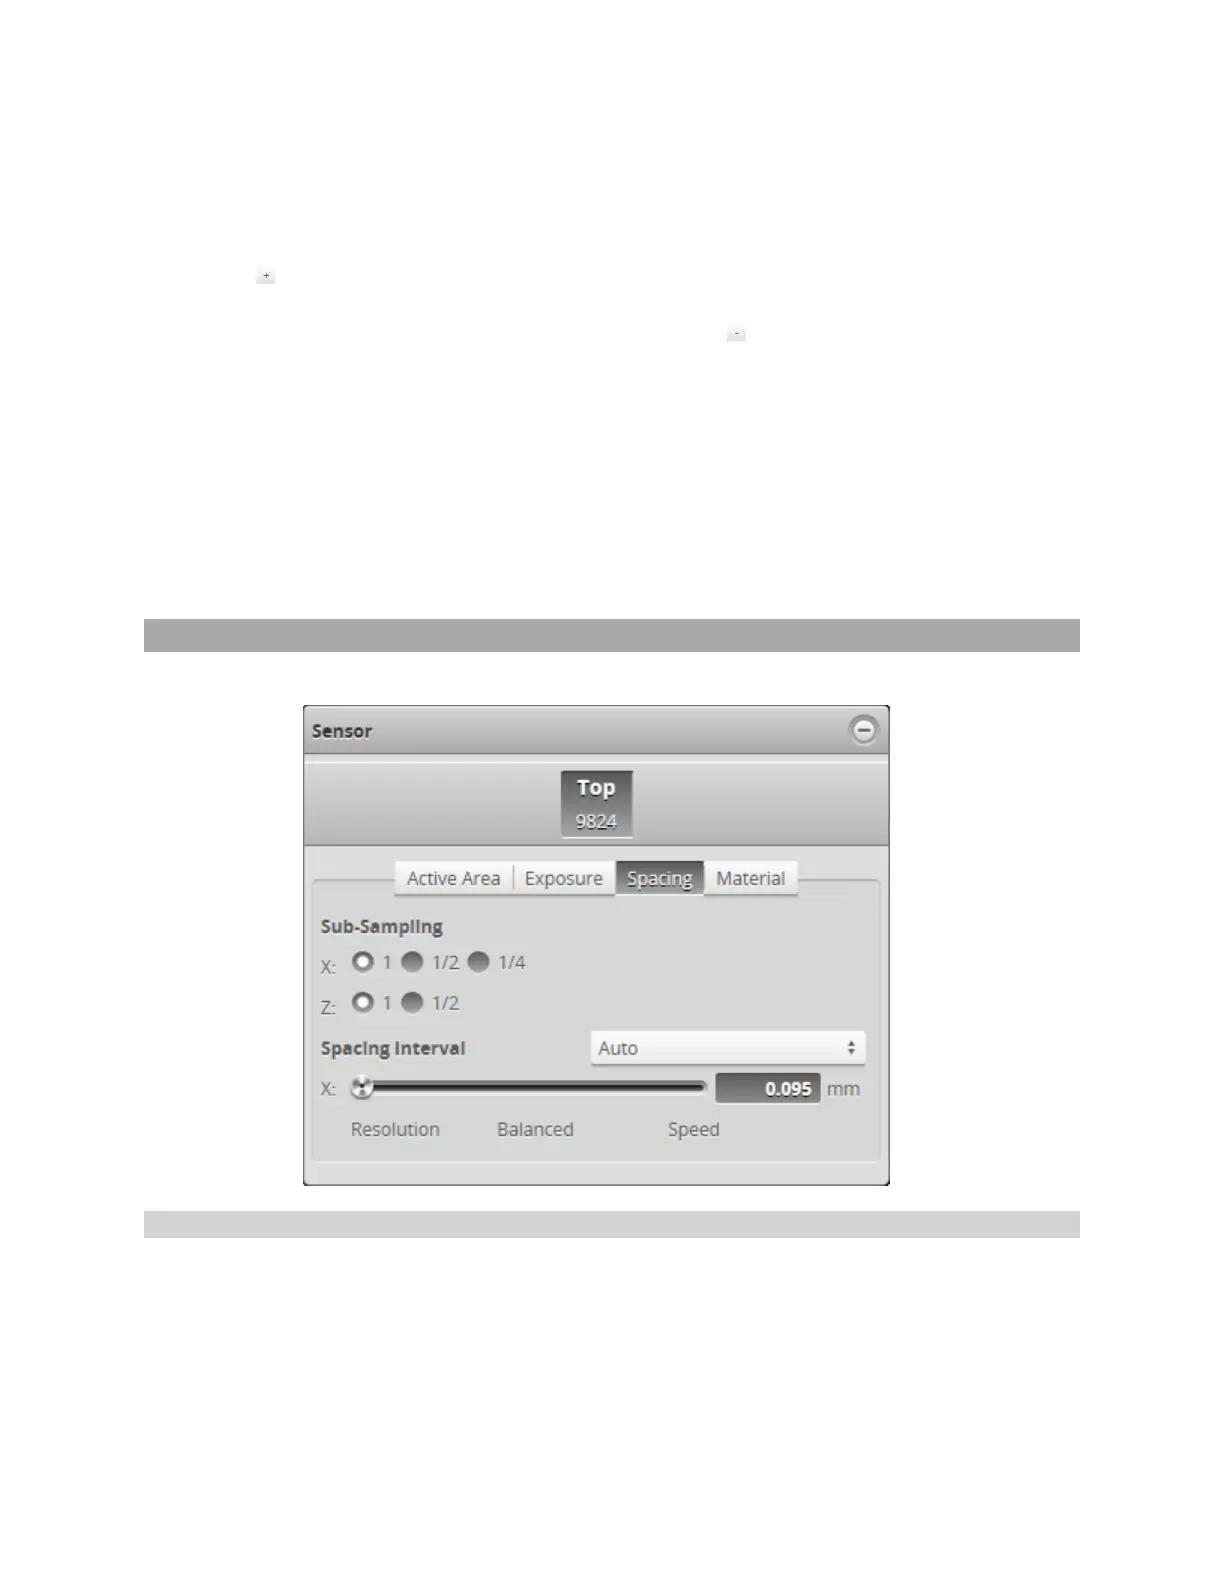
Spacing
The Spacing tab lets you configure settings related to spacing (sub-sampling and spacing interval).
Sub-Sampling
Sub-sampling reduces the number of camera columns or rows that are used for laser profiling, reducing
the resolution. Reducing the resolution increases speed or reduces CPU usage while maintaining the
sensor's field of view. Sub-sampling can be set independently for the X axis and Z axis.
The X sub-sampling setting is used to decrease the profile's X resolution to decrease sensor CPU usage.
The X setting works by reducing the number of image columns used for laser profiling.
 Loading...