SCANNER 15 February 2006
3-24
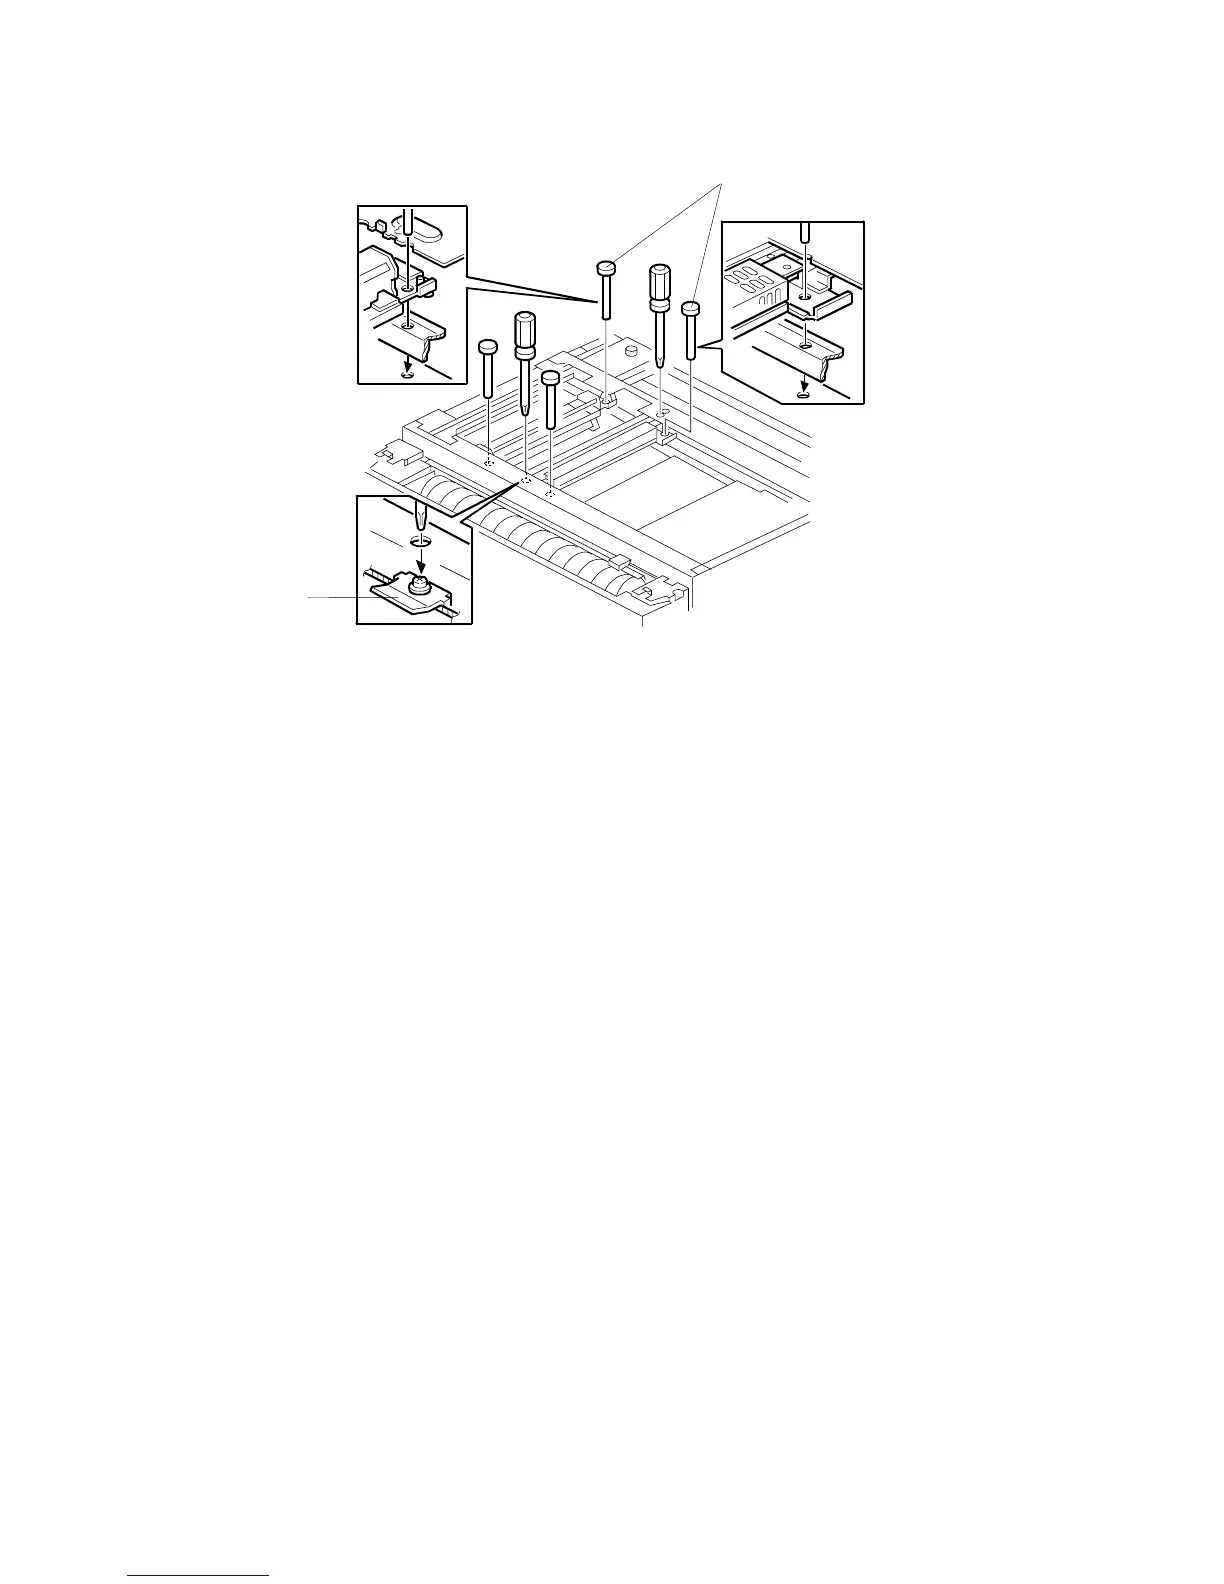
6. Attach the 1st scanner bracket [B].
7. Tighten the screw on the tension bracket ([E] previous page).
8. Remove the positioning pins. Hold the center of the 1st scanner then move it
gently left and right to make sure that the wire is seated and positioned
correctly.
9. Insert the positioning pins again, then loosen the following screws: 2nd scanner
inner screws, 1st scanner bracket screws, tension bracket screw.
10. With the pulley facing directly up, tighten the screws again to fix the pulley in
place.
11. Re-assemble the scanner, then perform the scanner and printer adjustments.
(☛ 3.14)
B246R926.WMF
[B]
[A]